Here is an easy Compressor tutorial explaining how you can take multiple video files and set them all for compression.
Video Codec Mania
Apple’s Compressor is a full service video compression and video codec program that can change, and compress, the files that you need to transfer formats. The workflow for Compressor, often coming from Final Cut Pro , is usually just to compress a specific video file for whatever use. Oftentimes, you are going to need to compress multiple video files all for the same use, such as a compilation DVD or so that you can upload them all online for streaming audiences. It does not make sense to just compress videos one by one in this situation, especially since you need to employ the same type of video compression on all of them. Apple’s Compressor makes this fairly simple as you can set multiple video files to compress with the exact same specifications. Here is an easy Compressor tutorial explaining how you can set it up to compress more than one video file with the same settings.
Multiple Video Compression
You will want to begin by opening Compressor first on its own rather than selecting a video file and choosing to open it in Compressor. You
will also not want to Send to Compressor in Final Cut Pro 7 in this situation, and instead may just want to export as a QuickTime file first.
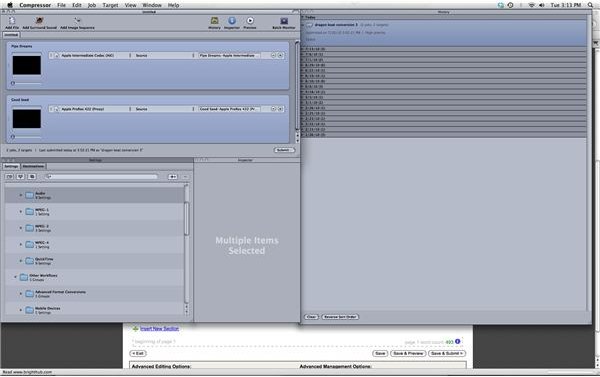
Go down to the Settings window below the project window and find the correct setting for the purpose you are compressing the video files for. For example, if you are burning a DVD in DVD Studio Pro you will be able to find a video codec that is specific to that purpose.
Drag and drop the setting folder that you select into the project window where it says Drag Settings and Destinations Here. Once you have the settings in there properly for the video compression, and possibly the audio compression as well, then go ahead and find all of the video files that you want to set to compression as well.
Begin dragging and dropping them one at a time into the same window that once said Drag Settings and Destinations Here and now just lists the proper settings. This will create a project block for each one, but now you will have to drag the selected settings onto each one as well.
Once each individual video is present in this window and each one has the selected video compression settings you will highlight all of them and then go up to Target. In the drop down menu select Destination, and then choose a place on the hard drive where you want the compressed files to go. Now you will hit the Submit button and save a name for this Compressor project.
Now in the Batch Monitor you can watch the progress of video compression for the entire Compressor project as a whole, not just a video on its own. Once Compressor is finished you will find all of your compressed videos with the proper video codec in the specifically listed location.
This post is part of the series: Special Apple Compressor Situations
Here are Apple Compressor tutorials with unique situations or very specific uses of the software.


