Do you want people to know who created the video that you are working on? Well, add the titles and credits to the video. In this tutorial I will show you how to add titles and credits to your video using Auto Movie Creator.
In this tutorial, I will show you how to add titles and credits to your video. You can add the titles to the beginning of the video and the credits to the end of the video. I will show you step by step how to add the credits and titles to the video in Auto Movie Creator. Go ahead and click the Titles and Credits button at the top of your window.
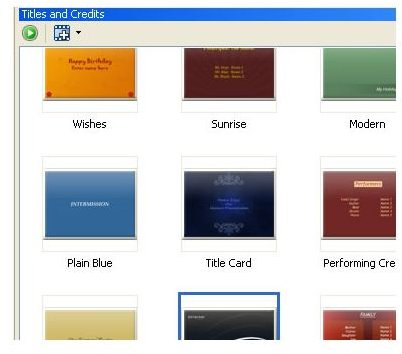
In the right panel, you will see the titles and credits designs that you can choose from. You can click through the designs to view them. A preview of the titles and credits will appear in the left panel of your Auto Movie Creator window. Once you find one that you want to use, do the following.
Click the design that you want to use. Drag it to where you want it in your storyboard. A new window will load and this is where you will edit the information. The box that opens is a text editor. Click the text and delete it. Then type what you want in the text field. You can change the color of the text, the style, size, and more in this editor. To move the text, click it with your mouse and drag it to where you want it.
You can also add credits to the end of your video. Click the credits design that you want to use. Then click the arrow beside the add button. When the menu drops down, click Credit at the End. That will place the credit screen at the end. After you add the credits, the same window will open where you can edit the credits. Edit this screen the same way that you edited the titles.
You can preview the video with the titles and credits by clicking the Play button on the video screen. You can add titles anywhere in the video. If you are adding multiple videos, you can add a title before each video starts.
Continue on to the next tutorial in this series to learn how to add music to your video that you are creating in Auto Movie Creator. The next tutorial will explain step by step how to add music to your video.
This post is part of the series: Auto Movie Creator Tutorials
This series will show you how to create videos using Auto Movie Creator.
- Auto Movie Creator Tutorial – Introduction Article
- Auto Movie Creator Tutorial – Adding Videos and Photos
- Auto Movie Creator Tutorial – Applying Effects to Videos and Photos
- Auto Movie Creator Tutorial – Applying Transition Effects to Videos and Photos
- Auto Movie Creator Tutorial – Managing the Advanced Options of Transitions
- Auto Movie Creator Tutorial – Adding Titles and Credits to your Video
- Auto Movie Creator Tutorial – Adding Music to Your Video
- Auto Movie Creator Tutorial – Adding Narration to your Video
- Auto Movie Creator Tutorial – Exporting your Video
- Auto Movie Creator Tutorial – Creating, Saving, and Opening Projects


