Want to do more with your Transition Effects? Read the tutorial below to find out how to manage the advance options of the transition effects.
In this part of the series, I will show you how to manage the advanced options of the Transition effects. When you apply a transition effect to your videos or photos, you have many more options. This tutorial will show you how to navigate through the options and change them. Assuming you are still in your transition panel, we will pick back up there.
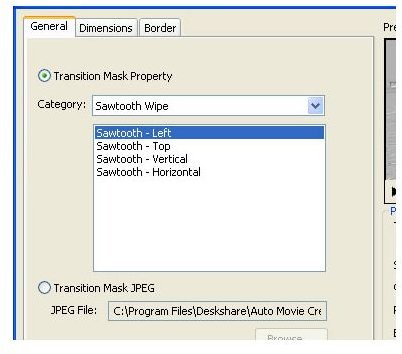
We will use the Sawtooth Wipe Transition effect for this tutorial. I will use this transition as an example and then you can go back and use the transitions of your choice. Click the Sawtooth Wipe Transition and apply it to your video. The properties box will open and that is what we will focus on.
In the properties box you will see three tabs; General, Dimensions, and Borders. We will start with the General tab. Click that tab if it is not selected. In the general section, you can select the direction of the transition. You can choose for it to come in from the top, bottom, right, or left. Select the option of your choice. You can click the play button in the little preview window to see the effect.
Click the Dimensions tab. In this section you can change the size of the transition and the center point of the transition. Adjust the numbers in the fields and keep clicking the preview button to see the changes. You can drag the red point in the box to change the center point. It’s really hard to tell you want to enter in these fields, so you will just have to play around with it and keep previewing it.
Click the Borders tab. In the borders section, you can change the color of the border, the width of the border, and the softness of the border. The first option is the border width. If you want to change the size of the border, change the number in the first field. To make the border softer, enter a higher number in the second field. To make it a hard line, enter a lower number.
Then you can change the border color in the bottom part of the box. You can change the color by clicking one of the primary colors or you can click the Custom button and select a color from the box that opens.
After you are finished with the advance options, you can click the OK button to close the box. Then you can move on to the next tutorial in this series. The next tutorial will focus on applying titles and credits to your video.
This post is part of the series: Auto Movie Creator Tutorials
This series will show you how to create videos using Auto Movie Creator.
- Auto Movie Creator Tutorial – Introduction Article
- Auto Movie Creator Tutorial – Adding Videos and Photos
- Auto Movie Creator Tutorial – Applying Effects to Videos and Photos
- Auto Movie Creator Tutorial – Applying Transition Effects to Videos and Photos
- Auto Movie Creator Tutorial – Managing the Advanced Options of Transitions
- Auto Movie Creator Tutorial – Adding Titles and Credits to your Video
- Auto Movie Creator Tutorial – Adding Music to Your Video
- Auto Movie Creator Tutorial – Adding Narration to your Video
- Auto Movie Creator Tutorial – Exporting your Video
- Auto Movie Creator Tutorial – Creating, Saving, and Opening Projects


