Want to add effects to your video? This tutorial will show you how to add the effects to your photos and videos.
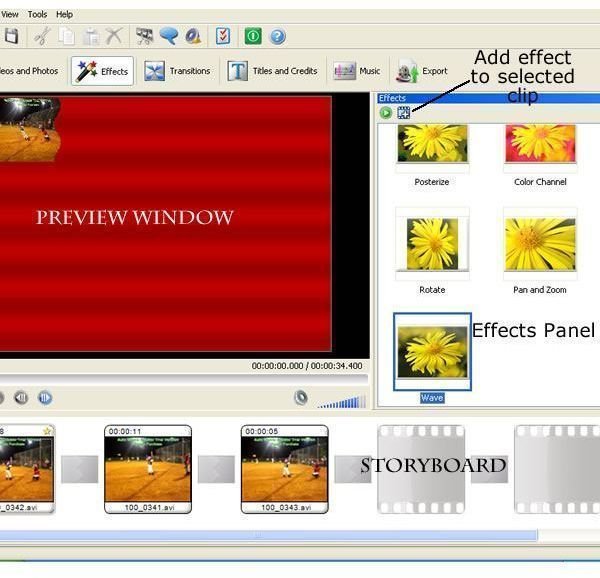
In this part of the series, I will show you how to apply effects to the photos and videos. Let’s take a look at the effects panel, so you can get an understanding of what we will be working with. You will need to click the Effects button at the top of your window to navigate to the Effects section. On the left side of the program is the preview window. This is where you will preview the videos, effects, and photos. On the right side of the program is the effect panel. All of the effects available will be in this panel. The bottom panel is your storyboard. Below is an image with the certain areas highlighted.
How to Apply Effects to your Videos and Photos using Auto Movie Creator
Select the video or photo that you want to apply an effect to. Look in the effects panel and find the effect that you want to apply. Click the effect and click the Preview icon in the Effects Panel to view the effect. If this is the effect that you want to apply to the video, click the Add button in the effects panel. The properties box will open for the effect. Click OK on the box and the effect will be applied. Then you can click the Play button to play the video or photo with the effect applied to it.
If you decide that you do not want that effect applied to the video or photo, you can quickly remove it. At the top right corner of the video clip, you will see a little yellow star. Right click on that star and a menu will drop down. Click the Remove Effects link in the drop down menu. The effect will be removed.
You can go through each video and photo and apply the effects of your choice to them. Some of the effects do not look right when applied to the videos, but I will leave the decision up to you, since it is your video. Once you have applied all of your effects, move on to the next tutorial in this series. The next tutorial will show you how to apply transition effects to your videos.
This post is part of the series: Auto Movie Creator Tutorials
This series will show you how to create videos using Auto Movie Creator.
- Auto Movie Creator Tutorial – Introduction Article
- Auto Movie Creator Tutorial – Adding Videos and Photos
- Auto Movie Creator Tutorial – Applying Effects to Videos and Photos
- Auto Movie Creator Tutorial – Applying Transition Effects to Videos and Photos
- Auto Movie Creator Tutorial – Managing the Advanced Options of Transitions
- Auto Movie Creator Tutorial – Adding Titles and Credits to your Video
- Auto Movie Creator Tutorial – Adding Music to Your Video
- Auto Movie Creator Tutorial – Adding Narration to your Video
- Auto Movie Creator Tutorial – Exporting your Video
- Auto Movie Creator Tutorial – Creating, Saving, and Opening Projects


