Scribus grid lines make working with the best open source desktop publishing program easier than ever. In this Scribus tutorial, you will see how to enable page grids and baseline grids and use grid lines to align your text and shapes in your publication.
Getting Started with Grid Lines
Scribus is a free, but powerful desktop publishing platform that gives users many of the robust advantages of Adobe InDesign without the high cost of ownership. If you do not have Scribus installed on your computer, please visit the Scribus Web site and download the latest version for your operating system.
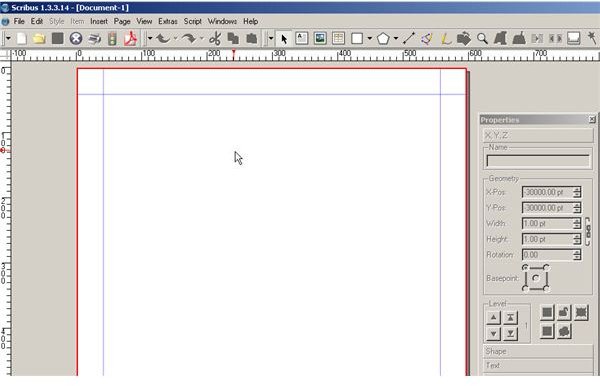
Once you have Scribus installed on your computer, open the program and then create a new document.
You are now ready to learn how to use grid lines in Scribus.
Turning on the Grid
If you need to use Scribus grid lines, you should click on “File” on the main menu and then choose “Preferences.” When the preferences window opens, you should click “Show Page Grid” and “Show Baseline Grid.”
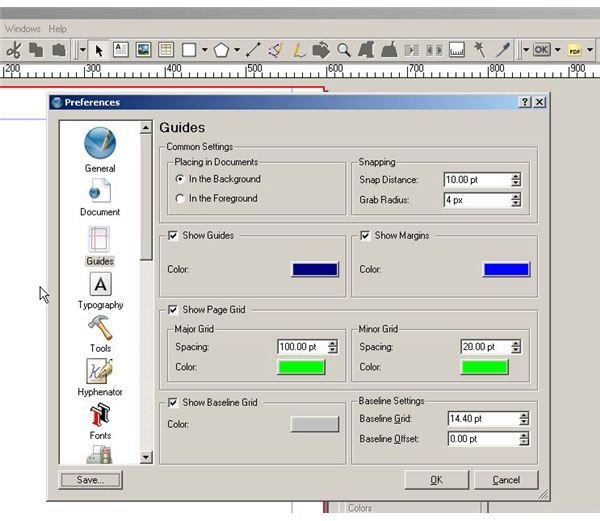
While you are on this window, you can set the spacing for both the major and minor grids. You can also set values for the baseline grid and baseline offset. You can always come back later to change these values.
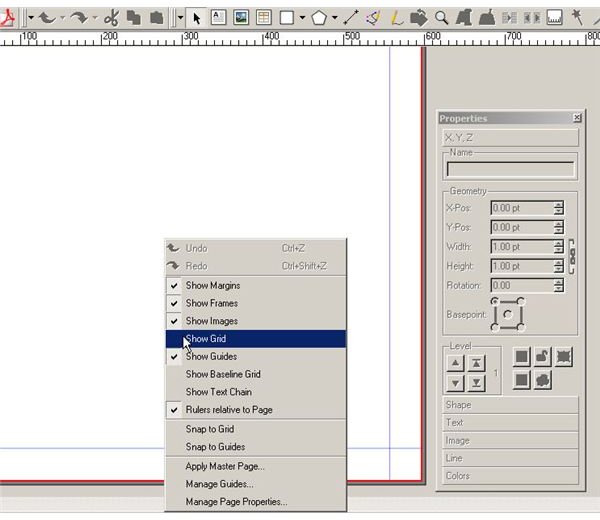
When you click the “OK” button and return to the Scribus main window, you should see the grid on your layout window. If you don’t, there is no need to worry. Right click on your layout and then choose the “Show Grid” option from the context menu. You can also toggle the display of the guides and of the baseline grid here.
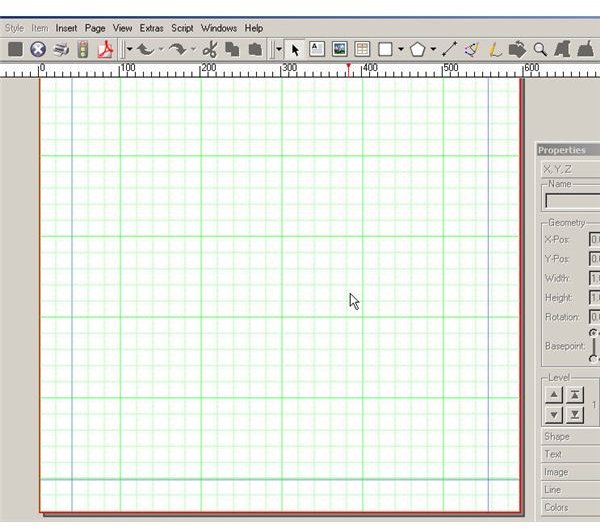
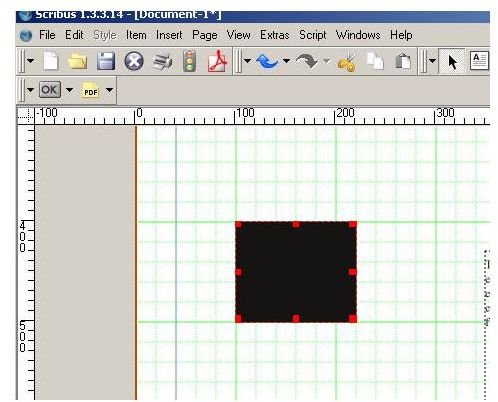
You now will see the guides displayed in blue and the grid is shown in green. You may now use the grid as is or return to the grid setting window to adjust the spacing.
Using the Grids and Guides
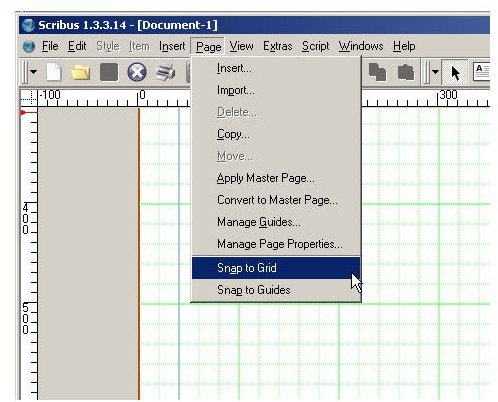
The page grid looks a lot like graphing paper in Scribus . The major lines are the thickest and easiest to see, and the minor lines are the thinner ones and less visible. You can use the grid as mere guidelines, or you can enable the “Snap to Grid” option by clicking on “Page” on the main menu and then selecting the option from the menu. This menu is also where you can manage the guides and set Scribus to snap objects to them.
With “Snap to Grid” enabled, you will notice that new objects will be attracted to horizontal and vertical grid coordinates when placed.
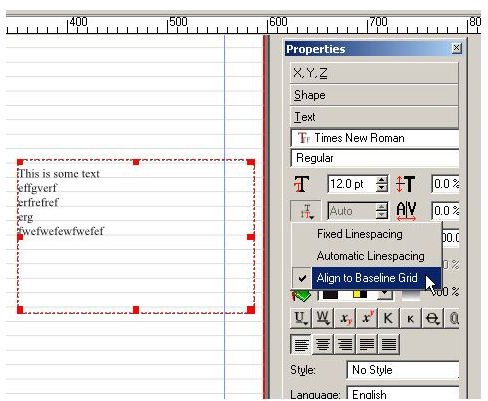
The “Baseline Grid” is used to set up alignment in a text box. You will find settings for this grid on the Scribus “Text” menu from the properties window while placing text. If you want to align your text to the grid, click and hold the line spacing button found about halfway down the properties window. Next, click the “Align to Baseline Grid” option and you will see that your text now lines up with the grid.
Guides are convenient when you want to align objects in a non-uniform manner. Guides are also good when the grid covering the page presents a distraction since you can place guides one at a time. The “Snap to Guides” option will automatically align objects to your guides.
Wrapping it Up
This Scribus tutorial has shown you how Scribus grid lines work to give users powerful alignment options to help them in their daily work.
Image Credits: Screen shots taken by Bruce Tyson


