
Every way you have to create distinctive work adds value to your personal brand and empowers you to use your imagination to the fullest. in this tutorial, you will see how to make your own brushes for Paint Shop Pro. Follow these steps on your computer to master this skill.
Getting Started
This Paint Shop Pro tutorial uses PaintShop Photo Pro X3 running on Windows 7 Ultimate (32 bit). You can download a trial version of this software to install as long as you have a computer that meets the minimum system requirements for the application. Users of other versions may be able to follow along, although some of the steps and screens may look different.
The first step in creating brushes in Paint Shop Pro is to create a new image. Here we will make one that measures 100 x 113. When doing this on your own, you can use an image of any size up to 255 x 255.
Create Your New Brush
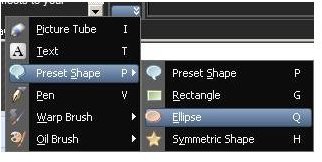
From the toolbox, choose the “Preset Shapes” tool, and then choose “Ellipse.”
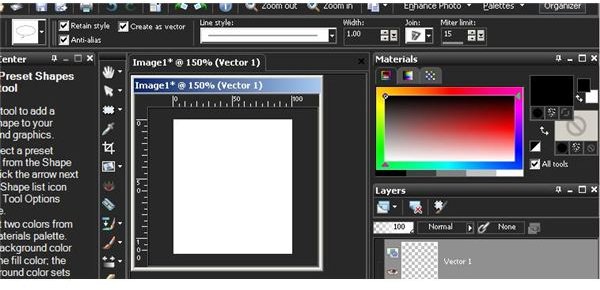
In the “Materials” palette on the right, set the top color box (Foreground) to black and the lower color box (Stroke) to “Null.” On the “Tools Options” palette, be sure to select “Anti-alias " and “Create as vector.”
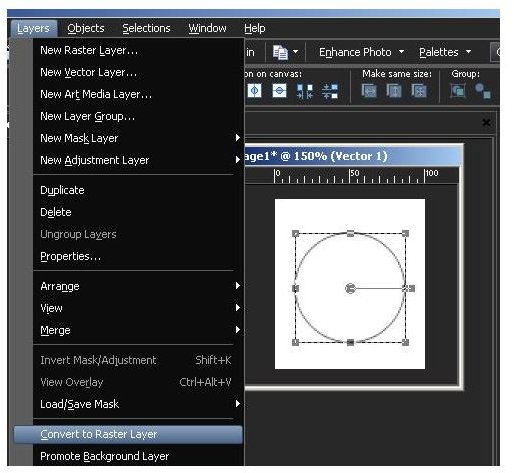
Next, draw a circle in the center of your image space. This is just a demonstration, so you don’t have to worry about getting creative right now. Once your circle is ready, click “Layers ” on the main menu and the select “Convert to Raster Layer.”
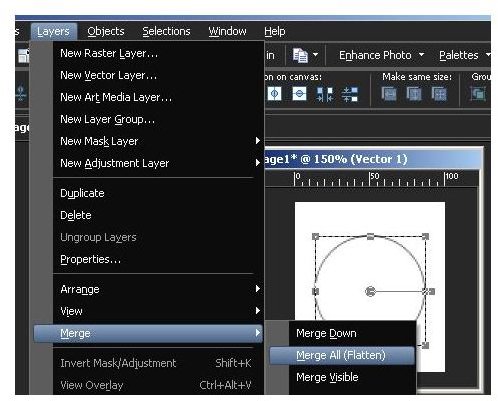
Now, click on the “Layers” option on the menu bar again. This time choose “Merge” and the “Merge all layers.”
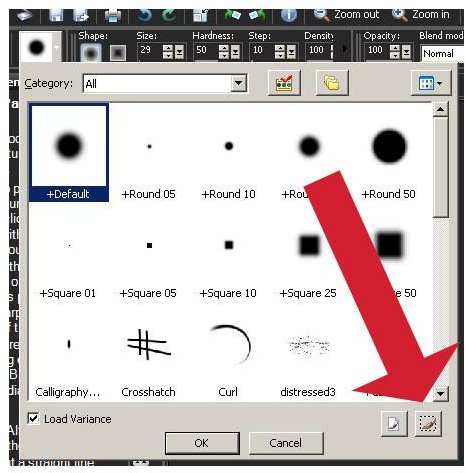
Click the “Selections” option on the main menu and then choose “Select All.” Next, click the brush type box that is in the “Tool Options” palette and then click the icon on the bottom right of the window. If you put your mouse over the button, you will see that it is called “Create brush tip from selection.”
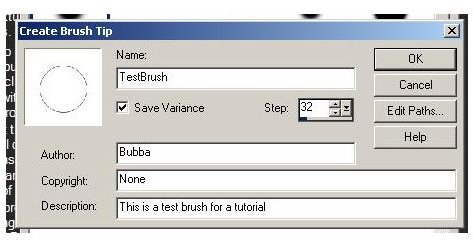
You can now name your brush and add copyright information and a description and then click the “OK” button. For this tutorial, we name the brush “TestBrush,” give a fake creator name, add copyright information, and then a simple description as shown in the image below.
Trying it Out
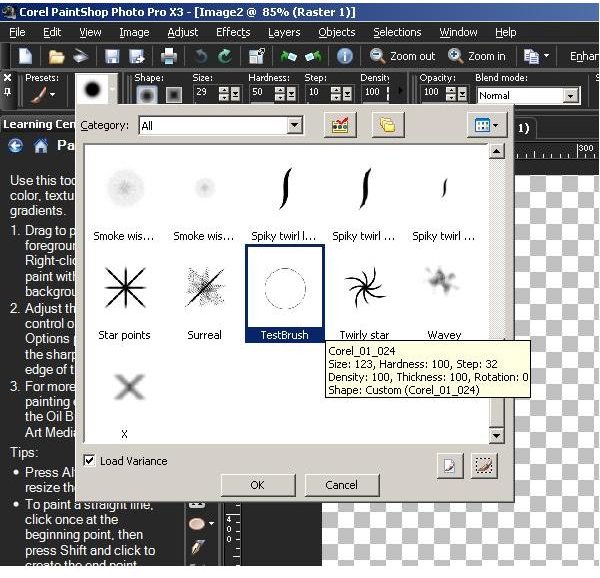
Now that you have created and saved your brush, try it out. First, create a new image. Grab the paintbrush tool from the tool box and then select your “TestBrush” from the brush selection window.
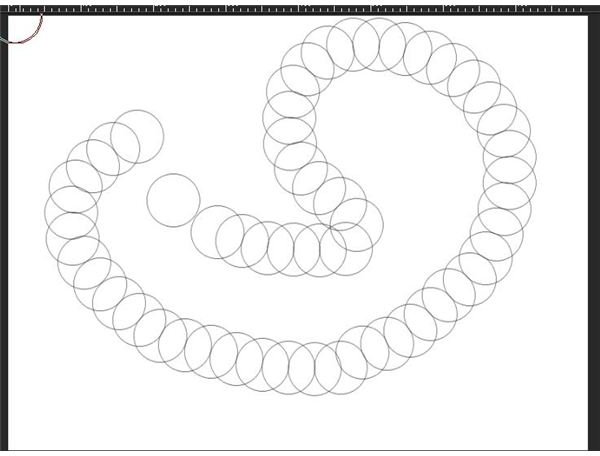
Now, draw with your newly created paintbrush. Savor the feeling of working with something you made all by yourself.
Wrap Up: Creating brushes Paint Shop Pro
In this Paint Shop Pro tutorial , you learned how to make your own brushes for Paint Shop Pro. As you have probably noticed, the potential for creativity in this process is limited only by your imagination.
Next time you are doing work for a client and wish that Paint Shop Pro had a brush that suits your needs, relax: just design the brush you need, save it, and move on with your work. Paint Shop Pro has never been easier.
Image Credits: Screenshots taken by Bruce Tyson.


