A Scribus table is the answer to presenting related data such as price lists, feature comparisons, menu items and other data in a neat, organized manner. Here you will learn step by step how to create a Scribus table and how to make it easier for representing complex relationships.
Getting Started
To follow along with this Scribus tutorial, you will need the latest version of Scribus installed on your computer. Although this article uses Scribus running on Windows 7 (32 bit), other versions of Scribus should be similar so you will be able to follow each step. To get started, open Scribus and then create a new single page document to learn these tips on creating tables in Scribus.
Creating a Scribus Table
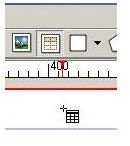
From the Scribus tool bar, click the “Insert Table” button. as an alternative, you can use the keyboard shortcut by typing “A.” You should now have the “Table” cursor.
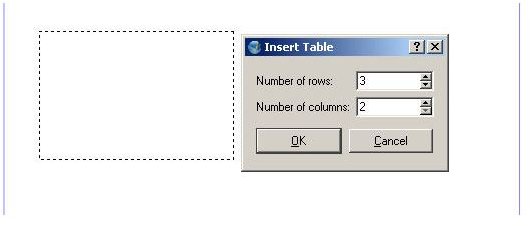
In the work area, left click and drag to define the size of your table. When you release the mouse button you will see the “Insert Table” dialog where you can define the number of rows and columns in your Scribus table. Here we will create a table with three rows and two columns.
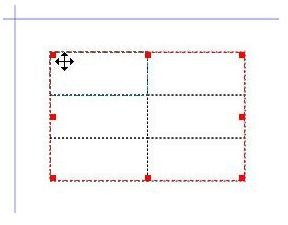
When you click the “OK” button, you will see your table appear in your work area.
You can now enter data into your Scribus table and edit it as necessary.
Tips for Using the Scribus Table
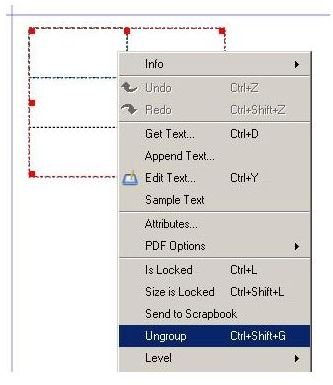
1. Entering data. You may notice that you cannot add data to the Scribus
table you just created. To add text to the cells, you will have to ungroup the table. To do this, right click on the table and choose “Ungroup” from the context menu. You can also press
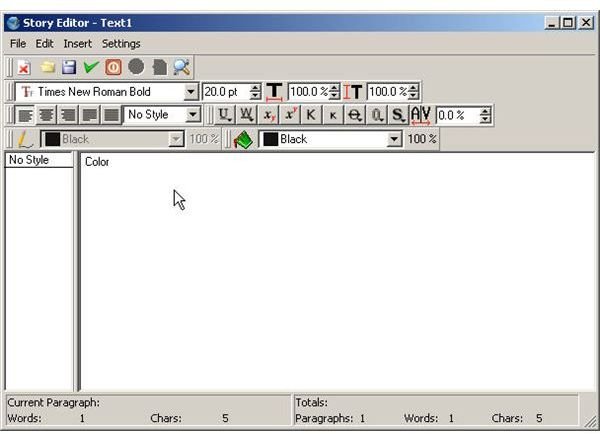
To enter text in a cell, right click on it and then choose “Edit Text.” In the “Story Editor” window, type in and format the text for the cell. When done, click the green check box.
Now you can fill in your Scribus table. Keep in mind that you will not be able to tab from one cell to the next. Instead, you will have to manually place your mouse in each field.
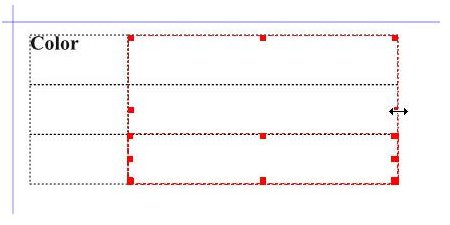
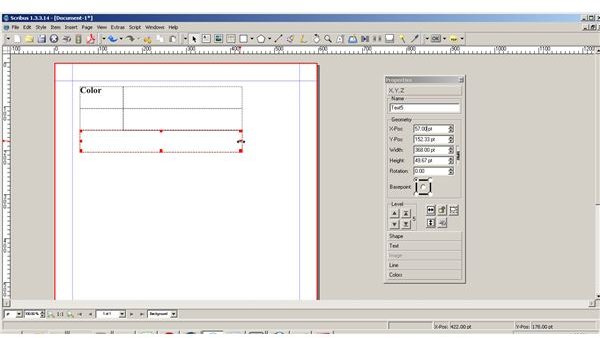
2. Resize columns and rows by selecting all the frames in one column and then resize them all together by grabbing the handles with the mouse. If you want to change formatting inside each cell, you will have to edit it individually with the Story Editor.
3. Merging cells really doesn’t work in a Scribus table. If you need to merge cells, delete cells that are in the way and then expand an existing cell to the desired size.
You probably have discovered by now that a Scribus table is nothing like an Excel spreadsheet. In fact, the table function does little more than create a series of text frames in column / row order. Unfortunately, Scribus has limited import functions. If you have a lot of formatted data in an Excel spreadsheet, you may want to convert it to an image file, convert it into an .svg and then import it into Scribus as an image.


