A Photoshop torn paper effect can add a creative touch to a variety of photographs and other images. If you have seen pictures with the torn paper effect and have wondered how to use Photoshop to create the effect, you will learn the step-by-step process right here.
Getting Started
The way to create the Photoshop torn paper effect centers around the creation of a custom brush that will create lines that will emulate the appearance of paper that has been torn or ripped. This Adobe Photoshop tutorial reveals how to create the look of torn paper through the creation of a custom brush. Although this particular lesson on how to use Photoshop uses Adobe Photoshop CS4 running on Windows 7, users of other versions of Adobe Photoshop should be able to follow along with this process
Create the Torn Paper Effect
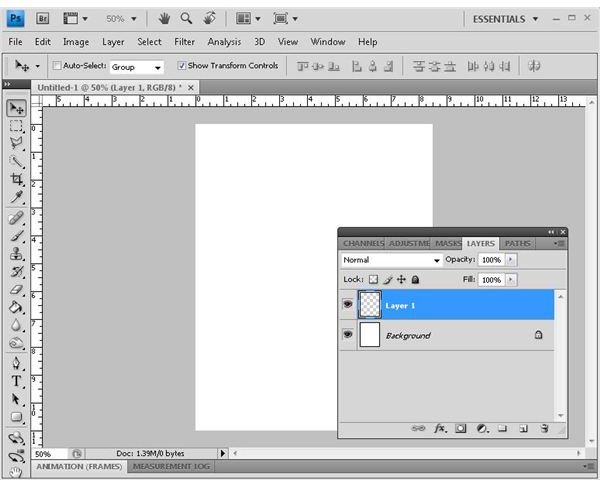
Before we can have torn paper, we’ll have to make the paper to tear. To do this, create a new Photoshop document and create a new layer. Do this using the “Layers” window that is accessible from the “Window” menu on the main menu bar.
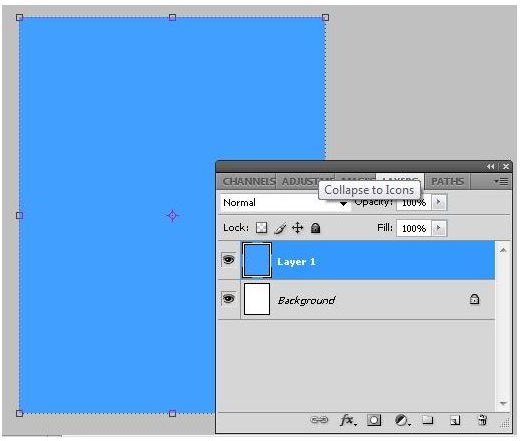
Fill the layer with your desired color. Do this by pressing
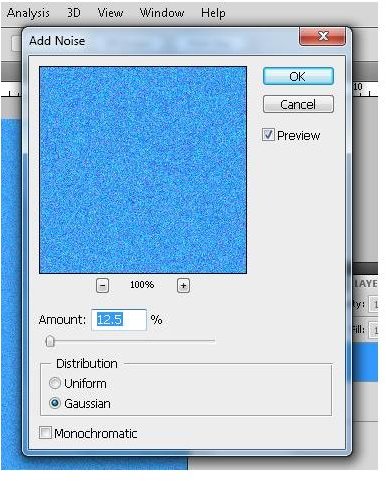
Next, click “Filter” on the main menu bar and then click “Noise” and choose “Add Noise.” Leave the “Amount” set to “12.5%.”
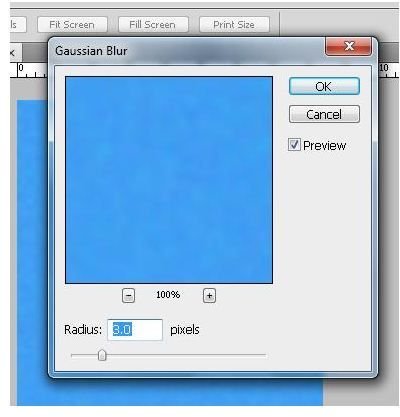
Now, return to “Filter” on the menu bar, but select “Blur” and then “Gaussian Blur.” Set the radius to 3 pixels. You can change this to accommodate your preference.
You now have a nice piece of blue cotton scroll paper.
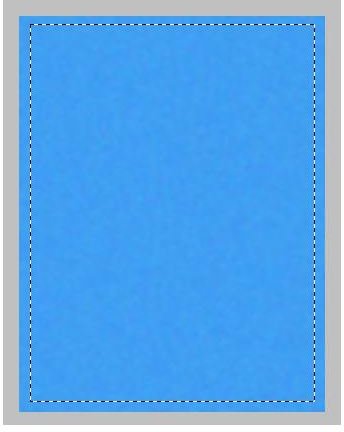
Now grab the “Rectangle Marquee ” tool to define the actual area of your paper.
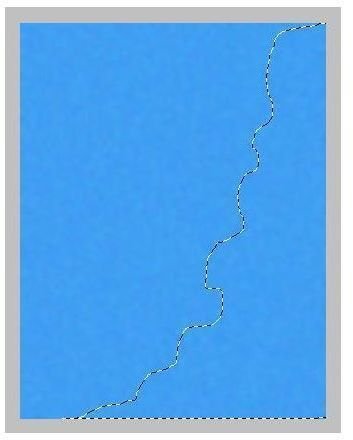
Now, use the “Lasso” tool from the toolbox to define the section that you want to tear away. Hold the
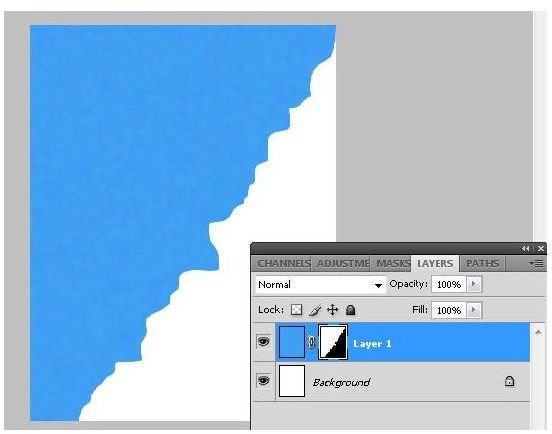
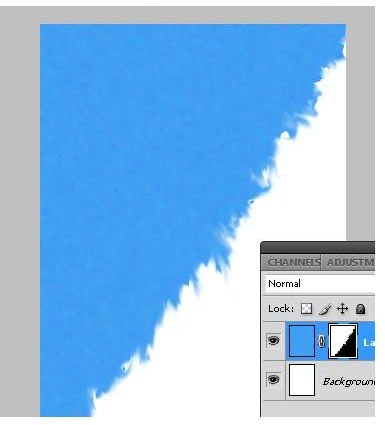
Now, click “Select” and then “Inverse” from the main menu and then create a layer mask by clicking on the “Layer Mask” icon at the bottom of the “Layers” window.
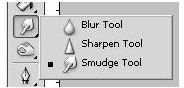
Now grab the “Smudge” tool from the toolbox. Be sure to turn the “Finger Painting” option off.
Now, rub the torn edges with the smudge tool to give the edges you have defined to give them the torn paper look.
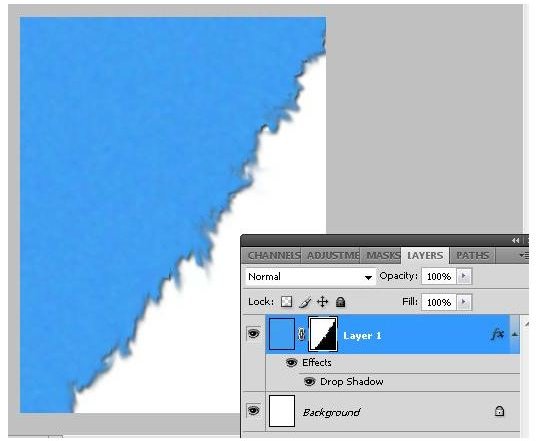
Finish up the Photoshop torn paper effect by adding a shadow effect. To do this, click the paper layer to select it. Next, click the “fx” icon on the “Layers” window to add a layer style. Choose the “Drop Shadow” option. Change the settings as necessary and then you are done.
Now that you know how to use Photoshop to create a torn paper effect, you can adapt the principles found in this Adobe Photoshop tutorial in a variety of ways to enhance your everyday work.


