Inkscape, the powerful open source vector art software, is great at drawing shapes, lines and objects, but how is it with text paths? Inkscape has the ability to flow text along paths created with the pen tool, the pencil tool, or shapes so that you can fully integrate text into your designs.
Getting Started
Inkscape is an alternative to Adobe Illustrator that shares many of its powerful text and vector graphics capabilities. Before you get started using Inkscape to create text paths, you need a computer that meets the minimum requirements for Inkscape software. Also, you need to visit the Inkscape Web site to download and install the program (if you have not already done so). This Inkscape tutorial is done using a computer running the Microsoft Windows 7 operating system and Inkscape for Windows.
Creating and Using Shapes and Text Paths in Inkscape
To begin we will create a shape and flow text using the shape as a text path.
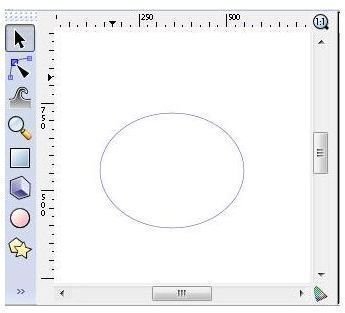
1. In Inkscape , grab the circle tool from the tool area and draw a rectangle on the canvas.
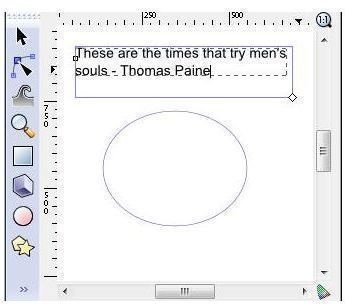
2. Next, grab the text tool from the tool box and draw a text area. Enter some text in the text box.
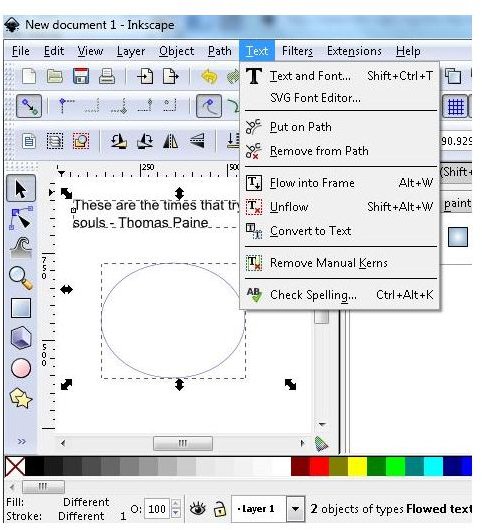
3. Select the rectangle and the text box at the same time. You can do this by grabbing the selection tool from the tool panel and then clicking the text box and then the circle while holding down

4. On the main menu bar, click “Text” and then choose “Put on Path.”
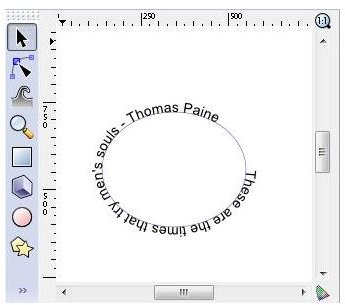
5. If you want, you can put the text inside the shape. Begin by undoing the previous “Text to Path” operation.

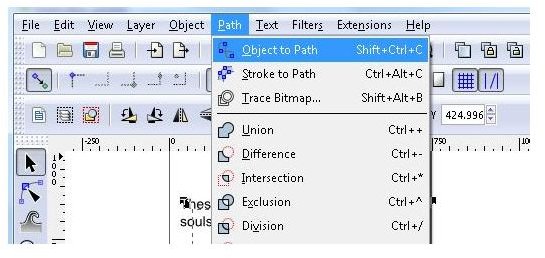
6. Select the circle. Click “Path” on the menu bar and then choose “Object to Path.”
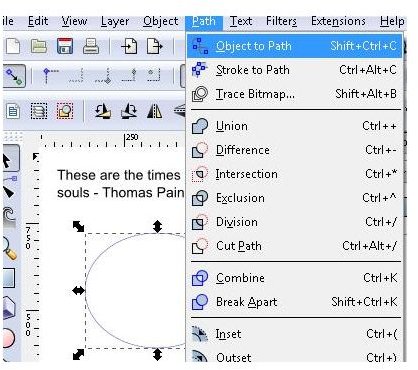
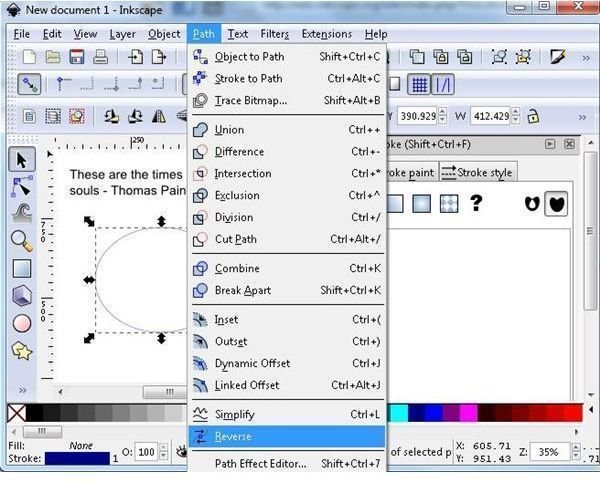
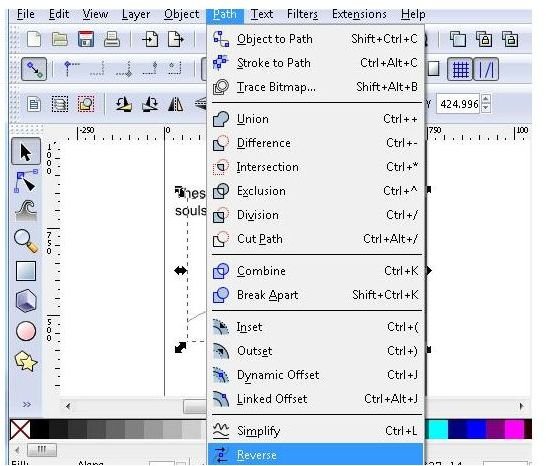
7. With the circle selected, click “Path” on the menu bar and then choose “Reverse.”
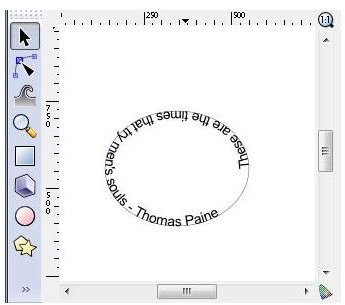
8. Select the text box and the circle and then click “Text” and then “Put on Path.”
Using a Line for a Text Path
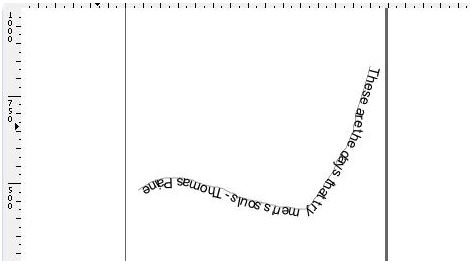
To begin we will create a line using the pencil too and flow text using the shape as a text path. You can also use the pen tool for this.
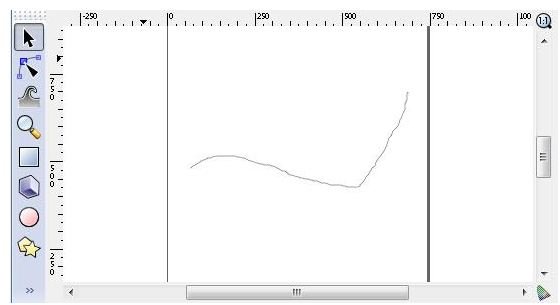
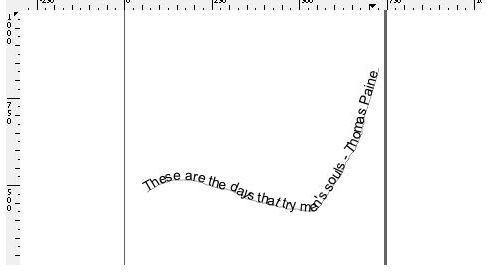
1. In Inkscape, grab the pencil tool from the tool area and draw a line on the canvas. For this example, any random line will do.
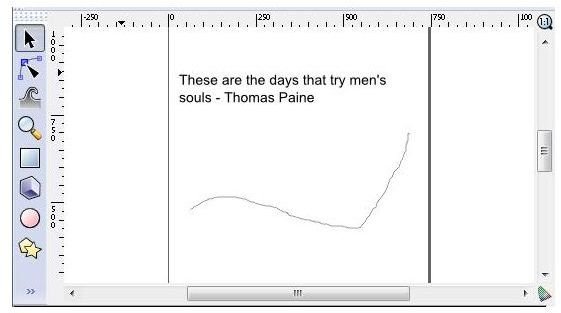
2. Next, grab the text tool from the tool box and draw a text area. Enter some text in the text box.
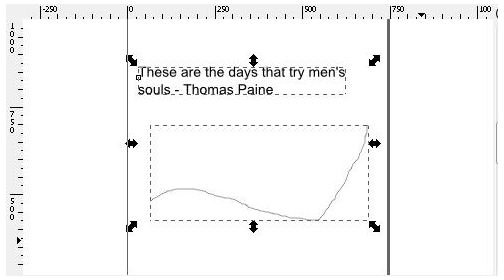
3. Select the rectangle and the text box at the same time. You can do this by grabbing the selection tool from the tool panel and then dragging a box around the line and the text box. Choose a font that suits your situation. If necessary, you can import a new font into Inkscape .
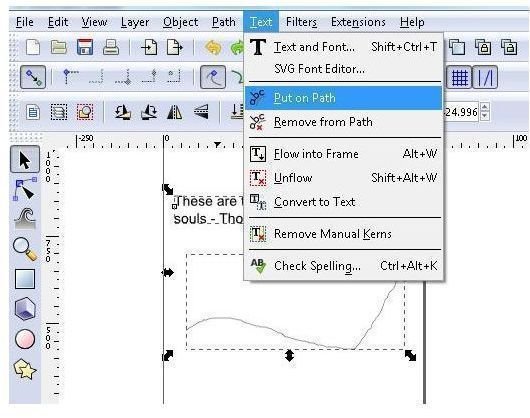
4. On the main menu bar, click “Text” and then choose “Put on Path.”
5. If you want, you can put the text under the line. Begin by undoing the previous “Text to Path” operation.
6. Select the line. Click “Path” on the menu bar and then choose “Object to Path.”
7. With the line selected, click “Path” on the menu bar and then choose “Reverse.”
8. Select the text box and the circle and then click “Text” and then “Put on Path.”