Have a raster image that you need converted to a vector? Learn how to use Adobe Illustrator’s Live Trace tool to perform this conversion.
Convert Rasters to Vectors
Raster images, also known as bitmaps, have their place. JPEGs, JPGs, BMPs, GIF, TIFF, and PSDs are all raster images and work fine when used at the original size and resolution when printing brochures and other kinds of print media. But when trying to enlarge a bitmap image, you can run into problems. Raster images are made up of a fixed number of pixels. Enlarging the image means that these pixels will be made larger but will not increase in number. If enlarged to much, the pixels become visible, creating a low-quality image.
Thankfully, there is a work-around. Rasters can be converted to vector images, and a vector image can be enlarged without quality loss because vectors use equations to make up the image, rather than a fixed number of pixels. Logos and other such artwork that will need to be rescaled to fit different media must be converted to a vector image to avoid loss of quality. Here’s an article for logo design using other software .
Illustrator CS2 and later versions have an amazing little tool called the Live Trace, which converts bitmap images to vector images. This tool is easily explained in CS3, but for those who have CS2 or CS4, you should be able to follow along without too many differences in steps.
Step 1
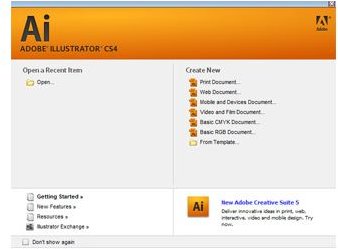
First, open a new document within Illustrator by choosing Print Document underneath the Create New options on the splash screen that appears. When the sub menu opens, simply hit OK. The workspace will now be visible. (Click any image for a larger view.)
Step 2
Import the image you want to convert by dragging the image from the folder it is in onto the Illustrator workspace.

Step 3
Next you will need to start Live Trace by clicking on the Live Trace button located in the menu bar at the top of the frame. A box may pop up with a warning that this is a high resolution image, making the Live Trace tool work much more slowly. If this happens, you can either hit cancel and resize your image before continuing, or you can trust that your computer is beefy enough to handle the large image and click OK. You should now see your image in black and white.

Step 4
Now you can configure the trace. In the Tracing toolbar located at the top of the screen, first click on the Options button in the upper left hand part of the screen in the Tracing toolbar. The icon for the Options button looks like a miniature version of a pop up dialog box in CS4.
Once you click on the Options button, the Tracing Options dialog box should appear with Default showing in the Preset drop down menu. Most designers do not recommend using the Default settings. Playing around with each of the settings in this dialog box is really the best way to learn the Live Trace tool; as you choose different settings, you will be able to see the Live Trace make changes to your image. The following is a break down of what each setting means:
- Mode—Choose between black and white, grayscale, or color.
- Threshold—If you choose black and white mode, this setting is available to change the threshold of the black and white.
- Palette—Choose from automatic colors or choose your own.
- Max Colors—Controls the maximum amount of colors used.
- Output to Swatches—Sends the colors used in the final computation to your color swatches palette.
- Blur—This controls the Gaussian blur on the image before the computer finds the edges. More blur equals a more general shape.
- Resample—You can change the resolution of the image here.
- Fills/Strokes—If fills/strokes are used in the rendering process, this toggles them.
- Max Stroke Weight—Anything larger than this value is considered a fill.
- Min Stroke Length—The smallest that a stroke is allowed; therefore, anything smaller is eliminated.
- Path Fitting—A higher number creates a looser path, and a lower number creates a tighter path.
- Minimum Area—This controls the smallest detailed area that the tool will trace.
- Corner Angle—This is the sharpest corner angle allowed in degrees.
- Ignore White—Selecting this option will leave white areas transparent.
- Preview—Make sure this is selected first thing or you will not be able to see the changes in live view!
After you have selected your options, you can click on the Save Preset button to store your selections for future use. Now click Trace to close the Options dialog box.


Step 5
Now you can expand the trace by clicking on the Expand button located in the top frame.
This will reveal all of the paths in this image and allow you to move or change the actual paths. This is done by simply clicking on the Direct Selection tool located in your tools menu. Now you can select certain shapes to change the colors and shapes individually. Simply play around with the Direct Selection tool until your image looks how you want it to look and your vector image is complete!


