Adobe InDesign is one of the top choices in graphic design software. Professionals use the power of InDesign to create everything from posters to books and everything in between. Recent versions of the InDesign program have made it easy to quickly create and publish professional jobs.
Using InDesign: an Overview
Desktop publishing and graphic design are fields that are computer intensive, making your choice of software important. Adobe InDesign is a remarkable software application that is used by professionals around the world to produce quality documents and books. In fact, it has become an industry standard, that’s why it’s so important to know how to use it.
A first look after opening it for the first time, InDesign may be somewhat intimidating for a first time user. The plethora of tools, menu options, and controls that are available can be overwhelming at first, but with patience, users ultimately find the InDesign interface to be easy to use. The following tips will guide you into how to use Adobe InDesign to produce a simple document. These tips are based on InDesign CS4.
Opening InDesign
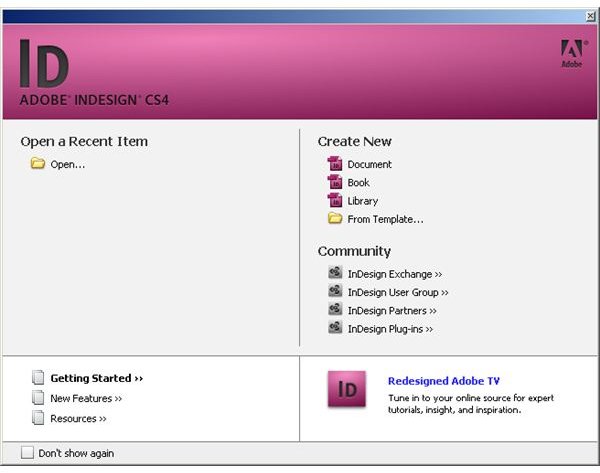
When you start the InDesign program, the first thing you see is a window that allows you to choose to open a recently used item or to create a new document, book, or library. There are also templates that you can choose from that will help you get a quick start on a predefined layout. When you choose to create a new document, you will be taken to the InDesign work area.
The InDesign Work Center
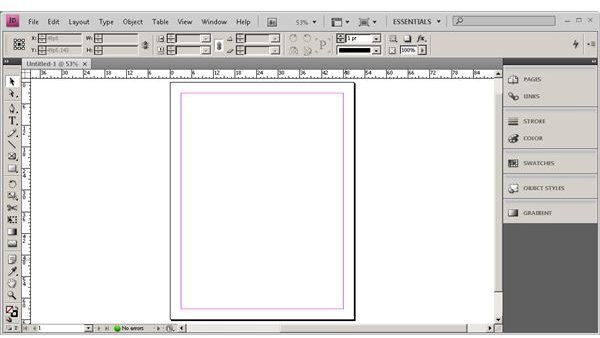
InDesign’s work area is composed of the menu bar at the top, the palette pane to the far right, the tool palette to the far left and the control palette found directly underneath the menu bar. In the center of your screen is where the work is done. Here you can place text, images, and other objects. Surrounding it are the means to access some of the most robust publishing tools available on today’s market.
The InDesign Menu Bar
Besides learning where all the actions, features and options are located, the most important thing about the InDesign menu bar is the keyboard shortcuts
. These are key combinations for commonly used functions that are faster than using the mouse (for example,


InDesign Control Palette
A special palette, the Control Palette, is usually found directly underneath the menu by default. The Control Palette is contextual, meaning that it changes depending on specific operations you do while working. The toolbar is docked to the left of the screen. When you select different tools (such as the Type tool), you will notice that the contents of the control palette will change, making the most relevant features easy to access when you need them.
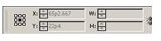
The Control Palette is key for giving you information about the objects in your document. X and Y tell you the location of the mouse. When you select an object they give you the coordinates of the object on the page. The H and W give you the height and width of selected objects. The Control Palette also has controls where you can modify the size, angle rotation and alignment of a selected object. As your mouse hovers over the various controls a label will appear that helps you identify what each control does.

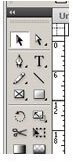
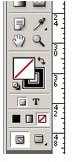
InDesign Tool Palette
What could easily be called the toolbar is really a special palette containing all the tools you need for artwork, text, color and editing. found in a vertical pane to the left of the screen by default. Like the other various palettes, the InDesign tool palette can also be undocked and repositioned to float over the main part of the work area. While the tools are still new to you, remember that by holding your mouse over each tool you can view its name. Also, by clicking and holding your mouse pointer on a tool in the tool palette, you can access flyouts that display tools that are otherwise hidden from view, yet grouped with the tool that was clicked.
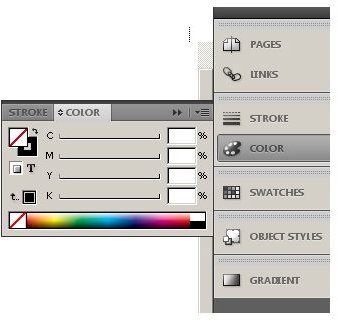
Other InDesign Palettes
As you produce your document, you will need access to other Indesign palettes that may not be open yet. Palettes with text formatting options can be accessed either from the “Type” menu option or by clicking “Window” and then “Type and Tables.” Other palettes are listed when you click the “Window” option from the menu.These palettes are: Assignments, Attributes, Automation, Color, Control, Effects, Extensions, Gradients,Info, Interactive, Layers, Links, Type & Tables, and more.
When you first open a palette, it floats above the InDesign workspace. You may at any time drag a palette to the right to dock it for further use.
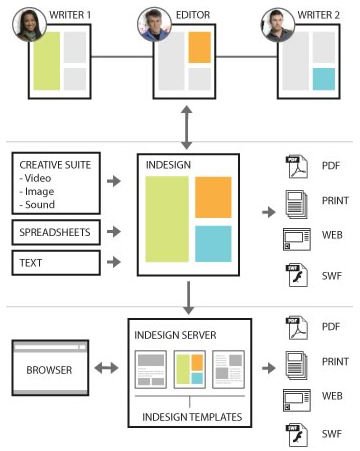
InCopy and InDesign Server
The function of Adobe InDesign can be enhanced with Adobe’s InDesign Server and InCopy products. InDesign Server works to automate InDesign workflows. It even allows writers to enter content into InDesign from a Web browser. InCopy is a powerful workflow tool that allows writers, designers, and editors to work together on a project without overwriting any data. InCopy also has conditional text features that make it easy to create multiple versions of the same document
Summary
Now that you know how to use Adobe InDesign, you can get started by trying out the various tools and formatting options. Once you get the hang of it, you might want to try making a greeting card as your first project. With a little practice, you will discover why Adobe InDesign is the favorite choice for desktop publishing.


