Welcome to part 2 of the Measurements In inDesign series. You’ll learn how to override InDesign’s measurement defaults in any dialog or palette, and how to make InDesign do the math for you!
Welcome to part 2 of the Measurements In InDesign series. Part 1 introduced the different units of measurement InDesign allows us to use , along with how to set them locally and globally in InDesign’s preferences, how to use the ruler to your advantage, and some handy keyboard shortcuts.
In part 2 we’re going to gain a bit of a deeper understanding of using measurements in InDesign, including tips on how to override the defaults you’ve set (useful when your client/boss says “move that down a pica” when your document is in inches) and how to make InDesign do math for you.
How to Override InDesign’s Default Measurement Settings
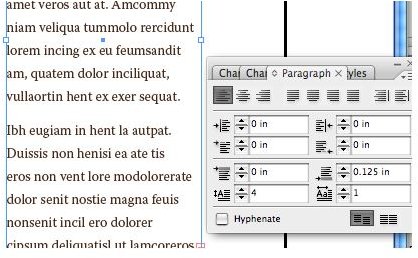
No matter what unit you’re measuring with, InDesign allows you to type in whatever unit you like. Here we see that the “space after” paragraph setting is at 0.125 inches, or 1/8". Normally you can adjust this by clicking the little arrows or by typing in a new inch value.
However, it’s often the case that a savvy client — e.g., when subcontracting from advertising or marketing firms — will specify exactly what they want changed. For instance, in this case, let’s say the client asked us to make the space between paragraphs 12 points.
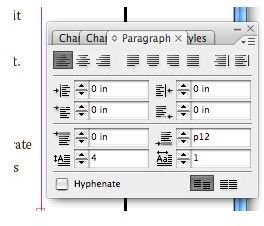
InDesign will accept points notation. Simply highlight the portion of the Paragraph palette that says 0.125 in and type in “p12” or “12pt.” It’s necessary to specify points because otherwise InDesign will think you want 12 inches.
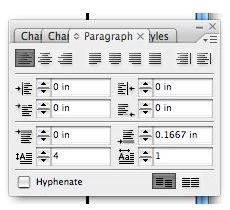
Notice that InDesign automatically converts 12 points to its inches equivalent.
Let InDesign Do the Math for You!
We’ve set one unit of measurement for the document or application, but as we’ve seen above InDesign will accept values in several measurement systems, as long as you specify which one: p12, 2cm, 30mm, and so forth.
Not only will InDesign think in whatever measurements you tell it to, it will also perform calculations in any dialog or palette that will accept numbers. You can use addition (+), subtraction (-), multiplication (x), division (/), or even percent (%).
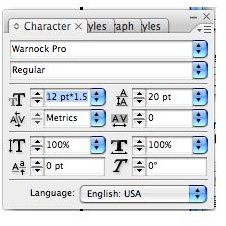
Let’s say in this example that we want the body copy to be one-and-a-half times as large as it currently is. We can grab our calculator and do the math ourselves, or, we can append “* 1.5” to the current point size of the type.
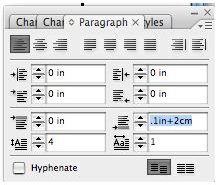
You can even change which measurement system InDesign thinks in, several times in one calculation if you wish! Need to know 0.1 inches + 2 centimeters? No problem, just type them in, no need to look up conversions. In the above example, I’ve changed the paragraph’s space after attribute to .1in+2cm, which InDesign then converted into the document’s default measurement system: 0.8874 inches.
This post is part of the series: Understanding Measurements In InDesign
Welcome to the two part series on using measurements in InDesign. You’ll learn how to set different units of measurement, how to use and move rulers on the fly to streamline your work, and some nifty tips for making InDesign do some math for you!


