If you’ve been looking for a quick, simple way to make a flyer advertising a pep rally or other school event, Microsoft Publisher may have the solution for you. In Part 1 of this tutorial, we describe step-by-step how such a flyer can be created in minutes using Publisher.
Sometimes the best part of a sporting event is not the game itself but the parties and pep rallies associated with it. If you’re looking for a way to get the word out about the pep rally planned for your team’s next big game, flyers may be the best way to go. Not only are they inexpensive to make and easy to distribute, but they can be whipped up in minutes with the help of a desktop publishing program like Microsoft Publisher.
Creating the Initial Flyer
When first creating a new flyer in Microsoft Publisher, we have the option of starting with a completely blank page or with a template that already contains several design elements. I have to admit that I sometimes “cheat” a little here. Even if I have a solid image in my mind of what I want the finished result to look like, I’ll often get a bad case of the “blank page stares” when starting a publication from scratch. To remedy this, I’ll generally try to pick a predefined template that looks somewhat like what I want and then make modifications to it as I go along.
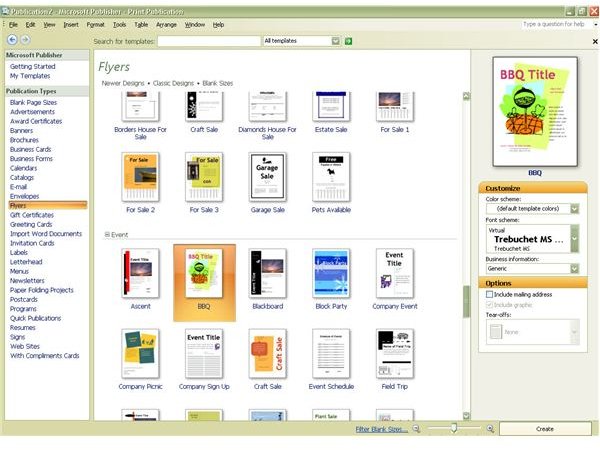
For this project, we’ll start out with the BBQ template that can be found in the Event section of Microsoft Publisher’s Flyer templates. See Figure 1 in the image gallery at the end of this article for a screenshot of this. I like this template because the shape that has been pre-drawn in the background resembles a megaphone.
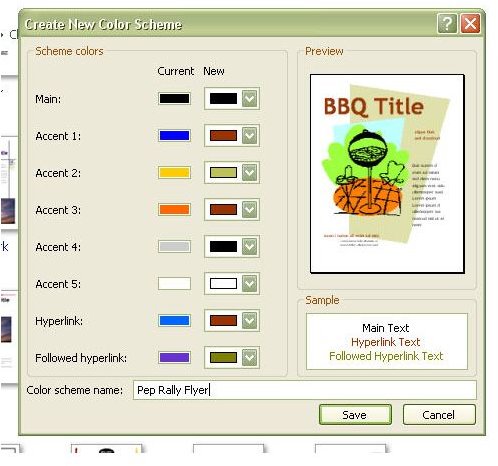
Before we leave this screen, we’ll go ahead and choose our color scheme. We can change this at any point later in the design, but it’s nice to set it up in the beginning if you already know what colors you want to use. Our school colors are red and gold so we would like to incorporate that into the design. Since there are no predefined color schemes that match what we want, we’ll create a new one.
To do this, choose Create New from the Color Scheme dropdown box as shown in Figure 2. This will cause the Create New Color Scheme dialog box to appear on your screen. Here you can make modifications and see how they will appear on the preview window. See Figure 3 for an example. We’ll go ahead and choose a sampling of red, gold, and black. Just in case we want to use this color scheme for another project at a later date, we’ll name it and save it as Pep Rally Flyer.
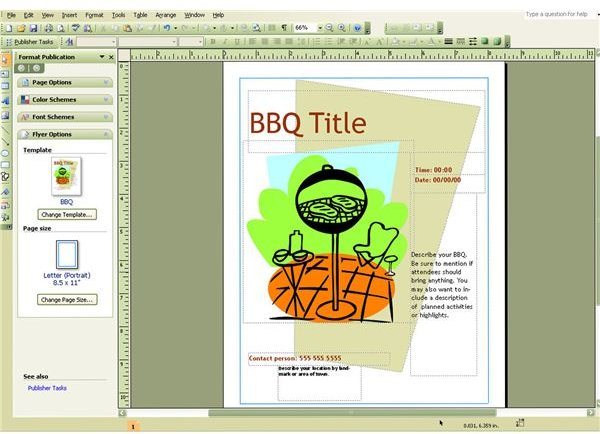
After doing this, we’ll click on the Create button to load the template with our color scheme (Figure 4). Now is the time to start modifying the template to reflect our own event. We will continue with that in the next section.
This article is Part 1 of a two-part series. To continue reading and learn more about modifying the flyer template that was just created, please see Part 2 .
Screenshots