This Photoshop tutorial walks you step-by-step through the process of creating a custom forum signature that you can use to sign off all your forum or bulletin board posts.
Creating a custom forum signature for yourself or for your business is a unique way to present your business or simply express yourself with flair. A forum signature is the little area of either text or an image that is displayed under your forum or board post. You can easily design one for your account by combining Photoshop fonts as well as images of your choice, such as your business logo, to create a unique, personalized signature. In this tutorial, we will combinetwo images with text to create our custom forum signature.
Step #1
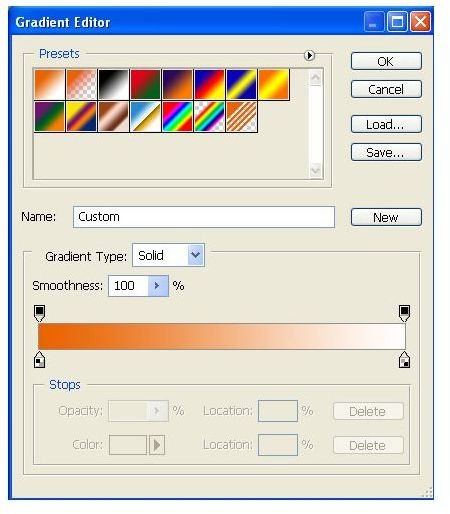
- Create a new page size measuring 250x50 px.
- Add a gradient scheme to the Background layer.
In our example below, we have an orange and white color scheme.

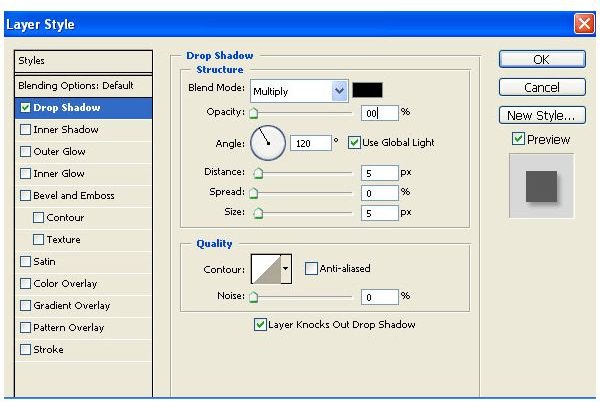
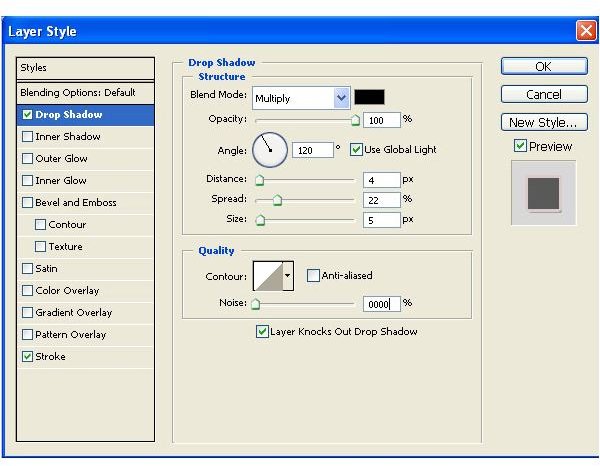
Step #2
- Select the Layer Style.
- Check the ‘Drop shadow’ option.
- Set the values as shown in the screen shot below.
Step #3
- Open your first image.
- Copy and paste the image to the working page.
- Resize it as needed using Scale Transform tool. (Edit > Transform > Scale).
- Use the Hand tool to position it as desired.
In our example, we have pasted a batman image on the left-hand side of our canvas.

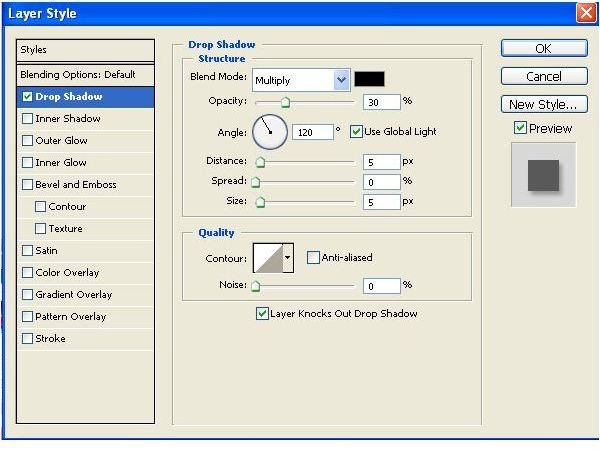
Step #4
- Open the Layer Styles.
- Check the Drop shadow option.
- Set the values as shown in the screen shot below.
Step #5
- Type your text into the page.
- Position the text in a desired position
In our example, we have positioned our text to the right of our first image

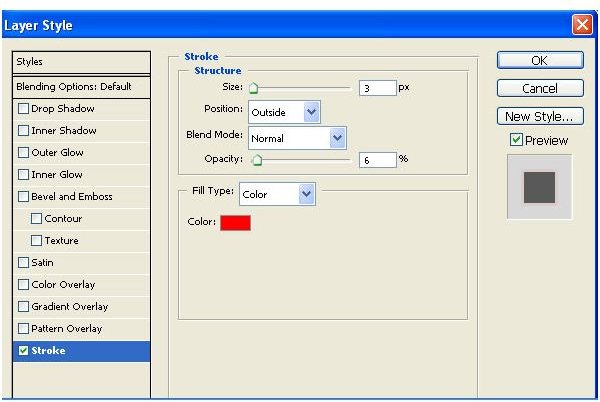
Step #6
- Open Layer Styles and check the ‘Stroke’ option.
- Set the values as shown in the screen shot below.
Step #7
- Check the Drop Shadow option.
- Set the values as shown in the screen shot below.
Step #8
- Add the second image onto the working page.
- Position it as desired relative to the first image and the text.

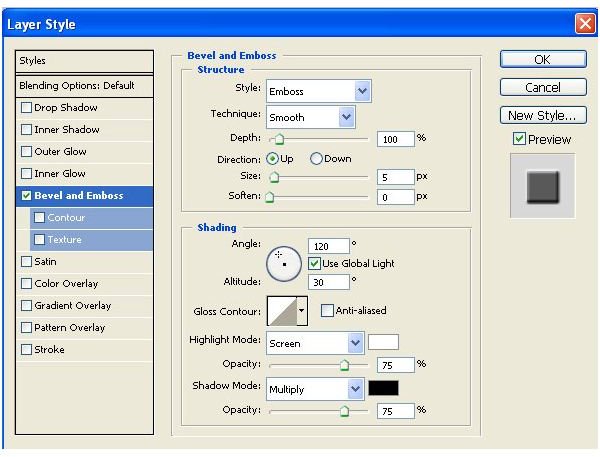
Step #9
- Select the Layer Styles.
- Check the ‘Bevel and Emboss’ option.
- Set the values as shown in the screenshot below.
Step #10
- Save the final image. And you are done!

This post is part of the series: Adobe Photoshop Tutorials: How to Create Text Effects in Photoshop
This series of Adobe Photoshop tutorials provides step-by-step instructions on how to create unique text effects.


