Need to know how to make an envelope for a half fold card for those computer generated greeting cards or irregular size cards that are a little more difficult to find than standard size envelopes? This guide shows you how easy it is to make your own!
What Kind of Paper to Use for Envelopes
Making your own half-fold computer-generated greeting cards and invitations is fun and much more personal than trying to match your sentiment with the pre-fabricated choices off the assembly line. However, after making the cards, what do you do about envelopes? Read on, because they are easy to make.
The stock for making an envelope for any size card needs to be at least one half inch, up to two and a half inches, wider than the card itself. The length of the stock for the envelope needs to be two times plus one inch, up to three times, the length of the card, depending on the look you want to achieve.
Paper for envelopes is usually made of stock that is at least 60 lb in weight, but there is no rule that says it has to be! Any paper that is the right size – wrapping paper, wallpaper, scrapbooking paper, construction paper, etc. will work. If only one layer of the wrapping paper is too thin, try doubling it up to make a custom looking lined envelope.
However, if you want your envelope and card to match, as if they came from the stationery store together, you can achieve this look by sticking with standard size paper bought from the same manufacturer. The advantage of buying letter size 8 ½” x 11” 67 lb card stock in a green from Hammermill, for example, guarantees the same green in a 60 lb 11 x 17 paperweight. You will also find the same green in 20 lb legal size or 20 - 24 lb letter size, since once a manufacturer selects a color it is the same for all the standard sizes and weights offered by that manufacturer. There are many different paper manufacturers besides Hammermill and I do not necessarily recommend one over another. It is all a matter of the color you choose, the availability and the price.
The disadvantage of going this route is that you will most likely have to buy a full ream of each size and weight you want to use. A ream of 67 lb card stock contains 250 sheets; a ream of 60 lb paperweight contains 500 sheets. If you only plan to make one card, there will be a lot of paper left over. If you have a friend or friends who also make their own greeting cards , you could go together and split the ream amongst you, or in some rare cases you will find stationery stores that are willing to let you buy by the pound or per sheet at a much higher price per sheet.
Alternatively, you can never go wrong with white cards and white envelopes and using your inkjet to add whatever color you wish for the occasion.
The best standard size paper for making an envelope for a half fold card is 60 lb 11 x 17 paper, which does come 500 sheets to the ream. The flexibility of 11 x 17 papers is that besides using it to make envelopes for half size fold over cards, you can also cut the paper in half to make letter size paper for ¼ size card envelopes.
Step One
Here’s the first step in how to make an envelope for a half fold card:
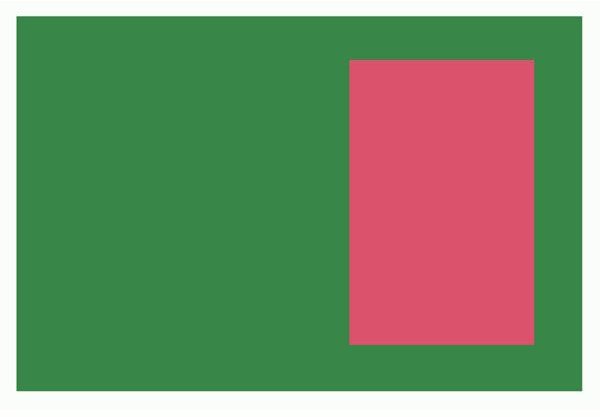
Place the fold over card (8 ½ inches wide) at the bottom of the 11 x 17 paper, leaving a margin of 1 ¼ inch on both the left, right and bottom sides. (11 inches - 8.5 inches =2.5 inches divided by 2 = 1.25 inches) Use a ruler to measure and mark the margins; the marks will not show since they will be inside the envelope.
Step Two
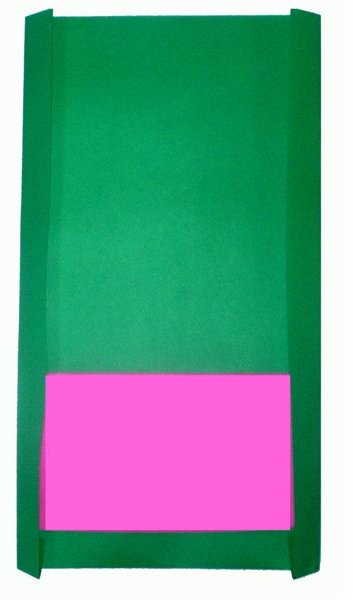
Fold and crease the surplus paper in towards the card and continue the fold on the left and right length of the paper.
With all margins folded down and creased, lift the bottom of the card and fold it over itself towards the top of your 11 x 17 paper.
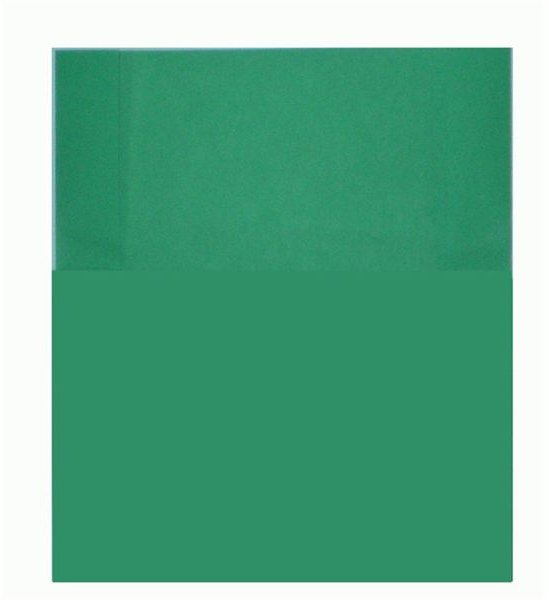
The surplus paper at the top can fold down as is, to serve as the envelope flap, or trimmed in a variety of ways to achieve the look you want. You could cut the flap into a point or cut the surplus folded paper on the sides at the crease and fold over as is, or trim the bottom of the flap to make a shorter flap. You could even use scissors with decorative cuts or make decorative punches along the flap.
Glue the creases and sides together, insert your card, glue down the envelope flap and, there you have your envelope!
Step Three - Customization
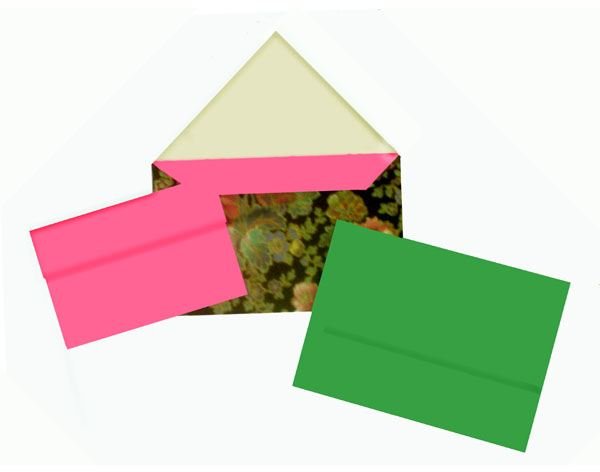
After you have made your first envelope, you will see many ways to vary this procedure and customize your envelopes. For example, by changing the beginning bottom fold to 4.5” instead of the original recommended 1.25”, the card will be visible when you open the envelope. The envelope pictured, made out of wrapping paper, shows how this fold turns out.
Now you do not have to worry about finding an envelope to fit your half fold or any other size cards again. With this guide you can have hours of fun making envelopes of all sizes shapes and colors. Have fun!
Don’t have time for all that measuring? Why not try some envelope making templates for a quick fix.
References
Instructions were compiled by author, using her own experience in envelope making.
Illustrations and envelopes by Patti Hale.


