If you’re one of the millions of authors out there looking to get their eBook noticed, one of the simplest solutions is to make your book more visually appealing. Even though your eBook will likely never see print, you can still learn how to design an attractive cover for it with Photoshop.
Yes, People Do Judge Books by Their Covers
So if you’re like many people out there today, there’s a good chance that you’re making an endeavor into creating your own eBooks. eBooks – much like their traditional counterparts – can cover pretty much any subject that you can imagine, such as art, politics, fantasy, fiction, non-fiction and even how-to. But it doesn’t even come close to stopping there! Because of this, and the fact that many websites such as Amazon are now allowing authors to self-publish their eBooks, everyone seems to be rushing to write their own.
And sure, a lot of people say that you can’t judge a book by it’s cover. And yes, I’m fully aware that that old adage might not be meant to be taken literally, but we all do it! So while content is king in the world of electronic books, don’t completely forget to design the cover of the book for website promos, online merchant websites, and advertisements. An eye-catching cover, even on a book that will never see print, might be just the thing to help get your sales or downloads started.
Free eBook Template!
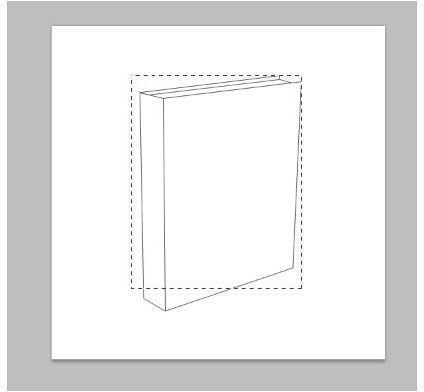
Go ahead and download the PSD files that I’ve created and uploaded here. This download includes a traditional hardcover book template which helps associate that nice, traditional book feeling. Here’s an example of the blank template I’ve created.

Customizing Your Template
First and foremost, you’ll notice that the PSD file has a rectangular box over top of them in a layer named “Cover Art - Size Template.” This is where you’ll design your cover art, to fit within the lines here. The reason being is that it is much easier to design your book cover straight on and then use Photoshop’s Free Transform tool to position it at an angle, rather than trying to design on an angle and hope everything looks good. Here’s what you’ll likely see when you first open the PSD files.
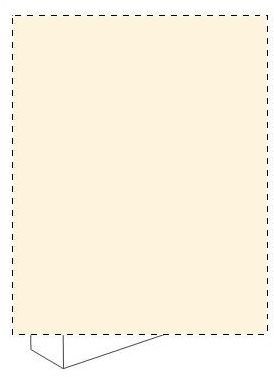
Go ahead and hide the layer with the blank book template on it if you find it too distracting. You won’t need it right here. Instead, create a new layer between the book template and the cover size. Name it “Book Cover” like I’ve done here.

Now take your rectangular marquee tool and create a selection that fits within the rectangle.
Fill your selection with whatever color you would like the main body of your cover to be. Here I’m going to pick a cream color just because it looks fairly nice and professional.
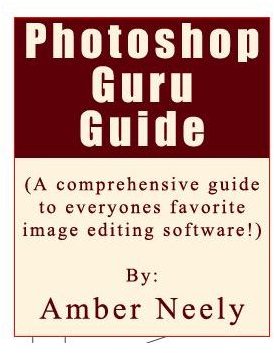
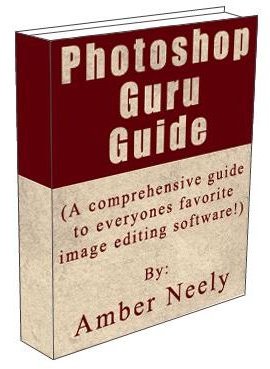
Now is really the time that you can branch out and create whatever you want, but I’ll walk you through creating a simple effective cover. For the top part of the book where the title will be, I’ve created a very deep crimson color to contrast nicely against the cream.

Now to add the text with the text tool, I’m going to assume you know how to do this. However, if you just need a refresher course, you can check out this Photoshop Text Tool Tutorial ! Simply type in the title of your book. I’m going to use the same cream color that I used for the bottom half of the book.

Now add your name and any additional information you might want to include in the spot under the rectangle in crimson. This inverted look has proven time and time again to be a very effective way to catch someones attention.
Now I’ll grab a quick texture from the internet and lay it atop the cream color parts of the book cover. I’m using the same method I demonstrated in this Photoshop Texture Tutorial .

Now that you’ve got a snazzy cover designed, merge the cover layers together. Turn back on the original book layer if you turned it off – this is important.
Press CTRL+T which opens up the free transform bounding box. Now all you have to do is right click and select distort:
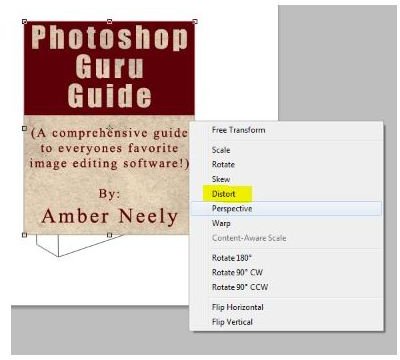
Grab the corners of your cover and pull them to the corners of your book so they fit onto the book cover. Your end result should look like this.

Now simply repeat the process for the spine of the book, just to make sure that you have the spine match the rest of the book.
Now, make sure not to forget to fill in the inside of the back cover or the pages if you’re planning on saving this as a PNG or GIF file. And there you have it, an eBook worthy of a shelf!
Looking for more tips and advice? Check out the other articles in Bright Hub’s guide, What You Need to Know About Self Publishing .
References
Book template, images, and information are all provided by Amber Neely.


