Creating illustrations such as logos that can be scaled up or down infinitely is simple with vector-based programs. Raster to vector conversion and creation can be achieved by using the right tools and following the appropriate steps. Determine which tools you will need to achieve the best results.
Vector Art
Vector art is a modern form of digital illustration used in many designs. It is commonly seen in many printed designs, as well as on television and online. Illustrators often use vector-based software to create images such as logos and to create text. Although many
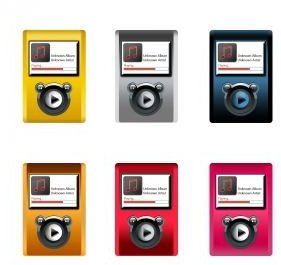
users believe that vector artwork is limited to logos, many realistic images are created with vector-based programs. Electronic software placed on packaging such as iPods and other electronics are often drawn in vector form for a precise and non-pixelated look.
One of the main advantages of vector artwork is that is infinitely scalable. This is why logos and text are created mostly in vector-based software. You can choose to scale up or down without having to worry about the image becoming unclear or pixelated. Logos can then be used in small sizes on business cards or in very large sizes on posters, depending on what the logo is going to be used for. Another advantage is file size. Unlike raster artwork which can make for a very large file, vector artwork generally keeps a light file. The size of the artwork can be scaled up immensely and not have much affect on the file size.
The creation of vector artwork generally begins with a raster image. This image must go through a variety of steps to result in a crisp and sharp vector illustration. Multiple tools and software must be used for raster to vector conversion and creation.
Scanner
The first step to raster and vector creation and conversion is to scan the image desired. Often, an illustrator will draw the logo or desired illustration on a sheet of paper to begin the design. If you are tracing a raster image that has been taken from the Internet, then there is no need to scan the image.
There are a few things to keep in mind when you are scanning a drawn image to trace in order to convert to vector.
- Before scanning the image, trace over the basic outline or the lines you will want to trace in a vector-based program with a felt-tipped pen or fine-tipped permanent marker. This will help make the lines more visible when tracing.
- Save the image as a JPEG file when you are choosing the settings for the scanned image.
- Choose a higher resolution such as 300 pixels per inch or higher. This will help make the image clear. When you are tracing, you will have to zoom immensely to ensure precise lines. Having a high resolution will stop the image from getting unclear when you are zoomed in.
Photo-editing Software
While you will not be using photo-editing software to trace the image, software such as Photoshop can be used to clear undesired lines in the image to make the image cleaner for tracing. Spots and smudges on the image such as eraser smudges can be removed in photo-editing software. Although this step is optional, erasing the unwanted lines, as well as spots and smudges can help make the image easier to trace because only the wanted lines will be visible.
If you have not set the appropriate resolution when you were scanning the image, you can also use the software to change the resolution of the image to something higher. Save the image as a JPEG file in the desired location once you are satisfied with the cleanliness of the image.
Tip: Make a folder on your desktop titled as desired to keep all your tools and images, instead of scattering them in different locations on your computer. This will help with organization.
Please continue to page 2 for more tools for raster to vector conversion and creation.
Vector-Based Software
The core of raster to vector conversion and creation is the user of vector-based software. One of the most commonly used software programs for vector conversion and creation is Adobe Illustrator, but there are various other programs as well.
There are a few steps to follow when you are setting up your document for tracing the image to ensure a good work-flow.
- Once you have cleared up the image with photo-editing software, you can open up the desired vector-based software to begin tracing your image. Ensure that the document you open is in CMYK color mode, as well as large enough to accommodate the entire JPEG image. Place the image in the document on the first layer.
- Usually, there is a layer palette or option to have multiple layers. It is always useful to have the JPEG image on one layer and start tracing the artwork on a second layer. Lock the first layer so the image cannot move, and create a second layer for the tracing.
The software generally has a tool known as the “pen tool”, which is used to trace the image by hand. Points can be added as desired on the lines being traced. Each point has a set of handles, and changing the handles’ angles will alter the curvature in the line by

increasing or decreasing curves. All paths must be closed so they can be colored later in the tracing process.
Once you have traced the image as desired, there are various options for coloring the image. Programs such as Adobe Illustrator offer gradients that can be applied to the objects, as well as color fills that are one color. A blending tool can be used to blend multiple objects and colors together, while a mesh tool can be used to create highlights and shadows in the objects. Generally, a combination of the coloring tools is used to achieve the best looking image.
Tip: Trace the outline of the image before tracing the details inside the image. It is always useful to have a full outline of the image. You should also trace with a different color than the color of the image, such as red.
Vector Conversion Online Tools
Various online tools are available for raster to vector conversion and creation to trace basic designs like simple images and logos, such as Vector Magic. They are not as precise as tracing the design by hand, but can produce a well traced simple logo. Although they are found online, some of these online tools also have a desktop version that can be downloaded onto the computer desktop. Some can only be downloaded with a price, while others are free to download.
Online tools such as Vector Magic are fairly simple to use. You must begin by uploading any desired image. The program will spend anywhere between a few seconds to a couple of minutes tracing the image. You then have a choice to adjust the software settings to the desired tracing settings, or the program can figure out what settings to use when tracing automatically.
Once the program has traced the raster image, the converted vector image can be tweaked and edited to improve the image. You can edit the colors, as well as remove the background, and make adjustments using a pencil tool to the vector paths. Once you are satisfied with the image, the software gives multiple download options. The converted image can be saved as a bitmap image, often in PNG format, or as a vector in EPS, SVG or PDF format. Generally, the best option is to save as en EPS, as the EPS can be opened in other vector-based programs in order to further edit the image.
One of the main advantages of online tools, is that it can take away the time spent tracing on simple images. The converted EPS file can be re-opened in a vector based program such as Illustrator, to have more editing options, but the basic outline of the image has already been traced. If you want more precision, it may be better to trace the image by hand, but tracing it online can help save a lot of time.
Tip: Avoid tracing fonts in online software or in any vector-based program. The font can end up looking distorted or warped. It is always better to find a font that is similar looking, or find the exact font and convert the font to a vector object for precision.
References
Source: Author’s own experience
Vector Magic, https://vectormagic.com/home[](https://www.vectormagic.com)
Image Credits:


