When downloadable brush sets fail to meet the specific needs of your project, creating your own brushes from a drawing can be the quicker, much easier way to get exactly what you are looking for. This article will quickly explain the quite simple process of making your own photoshop brushes.
About This Tutorial
Whether you’re after a certain texture or looking for a quick and easy way to copy a pattern without having to redraw it, knowing how to make Photoshop brushes from a drawing is an invaluable tool for a plethora of projects. Searching online for and installing downloadable brushes that only partially adhere to your vision is time consuming and simply inefficient. With just a little bit of brief instruction, anyone can create their own brushes from their own drawings that fit their needs perfectly without wasting the time and energy in search of someone else’s brush that was likely created the same way.
Using Adobe Photoshop, custom brushes from drawings can be created in but a couple of minutes and can be used to fulfill virtually any purpose. This tutorial is simple enough for any skill level, whether you’re familiar with Photoshop and have missed out on a useful tool or a beginner on day one. This tutorial was written for Photoshop CS2, but may still prove useful for older Photoshop versions all the way down to 6.0.
Also, click any image in this tutorial for a larger view.
Custom Brushes From Drawings
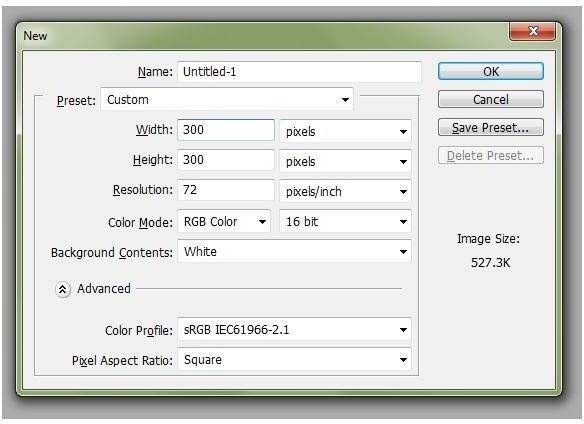
Open Photoshop and create a new document. When setting your canvas size, keep in mind that the higher resolution it is, the better! Brushes that are drawn too small will look pixelated and just plain bad when blown up to larger sizes, but a large brush scaled down will still look clean and sharp. If you are not planning to use a brush any larger than 250 pixels, your canvas should be somewhere around 300 x 300 or more to give you plenty of room to draw. Adjust as necessary! Additionally, make sure your canvas is set to a white background. Photoshop captures brushes as black on white, so any other color will not work.
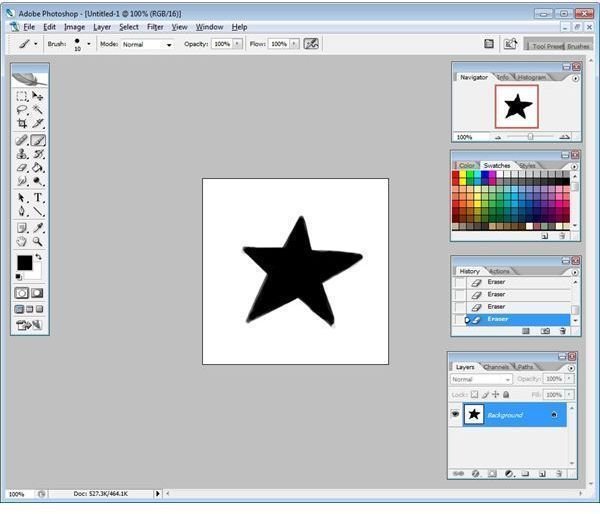
Once your canvas is made, pick any brush as you normally would, set the brush color to black, and draw whatever you need for your custom brush. Remember that Photoshop defines brushes as black and grey space with a white background for transparency, so do not use any other color! The brush can still be set to any color you please once the brush is made and ready for use. For demonstrative purposes, I have drawn a simple star shape.
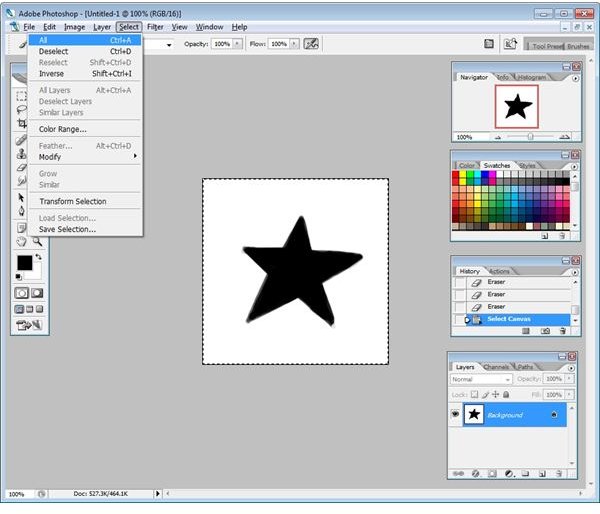
When your drawing is complete, click the “Select” button from the menu and then click “All.” This will select the entire canvas, including your drawing. You could also select the drawing manually using the lasso tool or the rectangular marquee tool, but selecting the entire canvas is quicker and removes the possibility of accidentally cutting out part of your drawing.
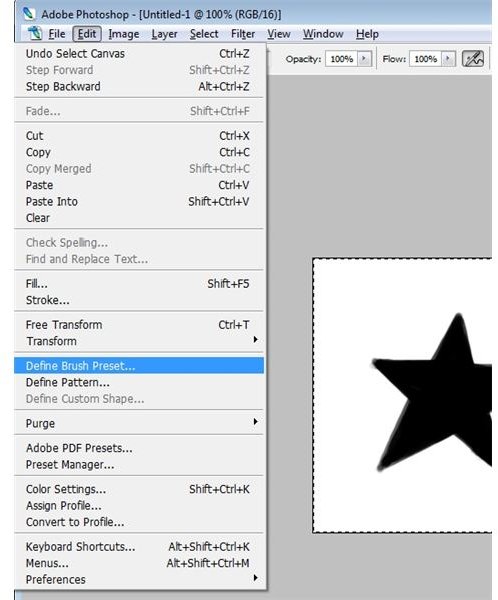
To capture your drawing as a custom brush, simply click “Edit” and then “Define Brush Preset.” A small window will pop up for your to name your custom brush. Do so and click “OK.” Your brush has now been saved and can be selected from Photoshop’s brush presets at any time.
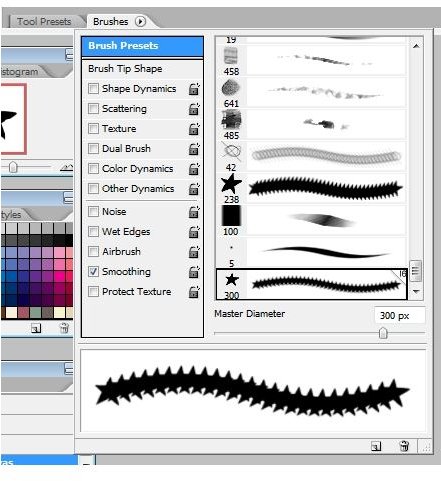
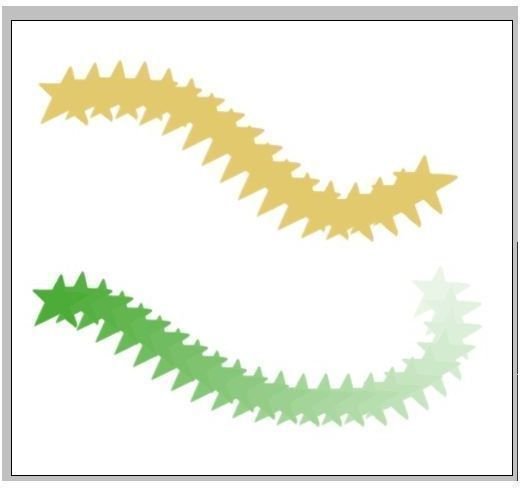
There is still much you can do to customize your brush, however! With your brush selected, click on the “Brushes” tab on the docked palette wall to configure various brush settings such as shape dynamics and scattering.
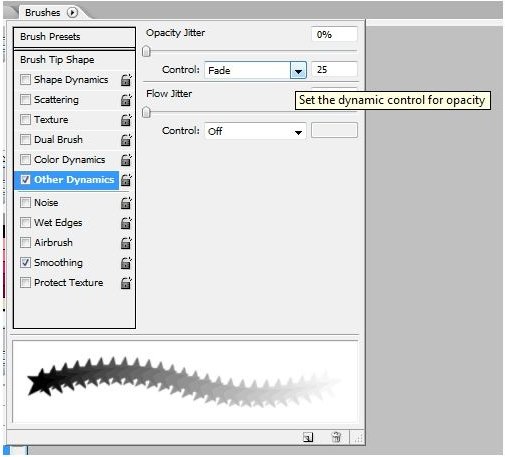
A commonly used setting is Other Dynamics which controls brush opacity. Note that many of these options work best when used with a drawing tablet that has pressure sensitivity. If you don’t have a tablet, you can change how the dynamics are applied by selecting a different option from the control dropdowns such as “Fade.” Play with these settings to create a number of different brush effects!
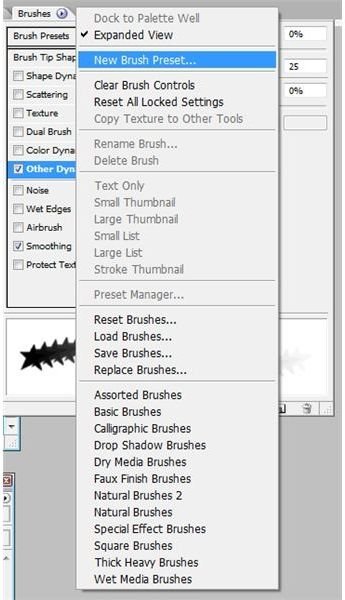
Once you have something you like, right click the small arrow button on the “Brushes” tab on the palette wall and select “New Brush Preset.” You will be prompted to save your brush once more. Give it a new name, as this is a new brush. The original brush you saved without the settings will still be there in case you want to make another brush from the same drawing with different settings, so don’t be afraid to experiment!