Drawing a dog in Photoshop is not very different from drawing a dog on paper. While this may seem like an intimidating process at first, with practice it becomes second nature. This tutorial will walk you through the process of how to draw a dog in Photoshop, including document and tool settings.
Getting Ready
I highly suggest you look up a reference of a dog if you’re not used to doing this from memory. As an animal lover who spends a lot of time with dogs, I’m confident in my ability to wing it, but if you’re looking for some great ideas, you can always check out Flickr, Wikipedia, or even the animal photography section of deviantART.
Preparation
A wacom tablet isn’t required for this by any means, but I can promise that it will make the process a lot easier. If you’re planning on getting into a lot of digital drawing, I suggest getting a good tablet. While I do recommend Wacom, don’t feel like you have to go for the high end tablets right off the bat. A simple beginner, lower-end model will do just fine! Using a mouse is also an option, but might end up taking a bit longer and be a bit more difficult at first.
Canvas & Brush Settings
The number one thing that I can’t seem to emphasize enough is that you need to use a relatively large canvas. I’m using a 1000x1000 pixel canvas, for example, and I could easily be comfortable going bigger. As for the brush settings , I’m using a 4px, hard-edged brush with a medium flow and medium opacity. This mimics the feeling of a pencil pretty well, which is great for sketching!
Blocking in the Shapes
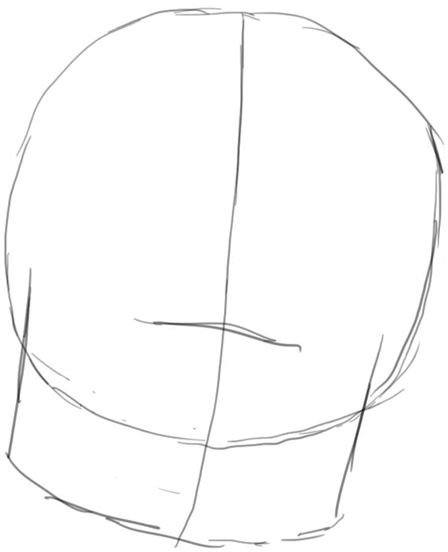
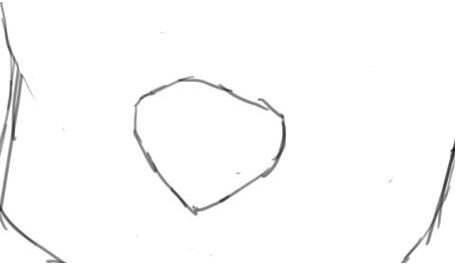
The number one thing to remember when drawing anything, be it a dog, a person, a building, or any number of objects, is that everything can basically be laid out with a very few set of geometric shapes. for instance, a dogs head is basically a circle like so:

And a rectangular prism sits on the front where their muzzle (nose) protrudes. Obviously the way your prism sits on your circle will be a bit different depending on which way the dog’s face is pointing.
Roughing (Ruffing?) It In
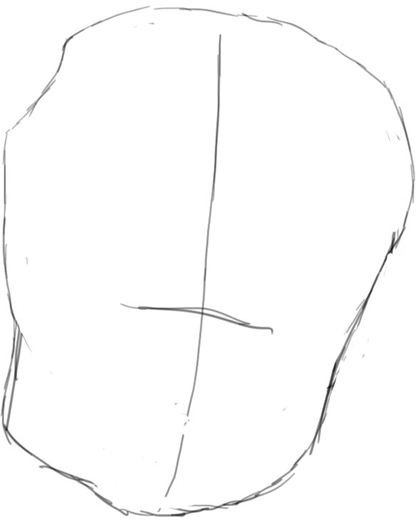
Now is the time for very basic details. Start to define the shape of the head, as it is not actually perfect circle. Sketch out the shape of the muzzle as well. Feel free to clean up any lines that may be getting in your way!
Here’s where you make note of where the eyes will be,
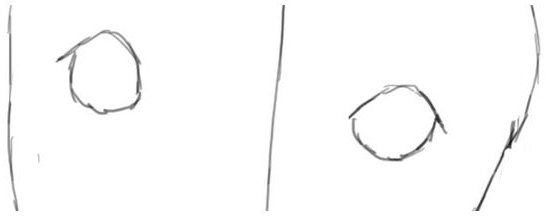
the nose,
the jowls and the separation of the upper and lower jaw.
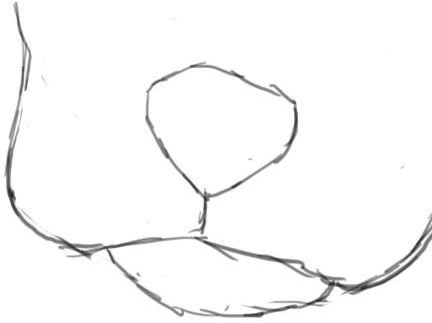
You can also go ahead and block in your ears if you’d like, too!
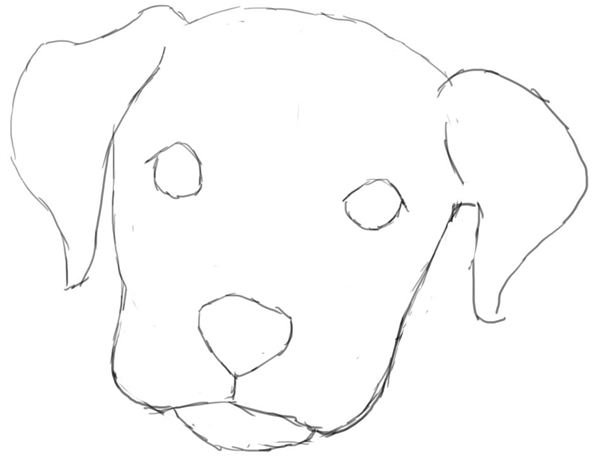
Keep in mind that I’ve picked a smooth, short-haired dog. If you’re new to drawing dogs, I don’t suggest you try a scruffy Jack Russel terrier, a shaggy Pomeranian, or a wiry Airedale terrier until you become more accustom to learning the shapes of smoother pooches! Boxers, Labradors, and even bull terriers are great to start with!
Attention to Detail
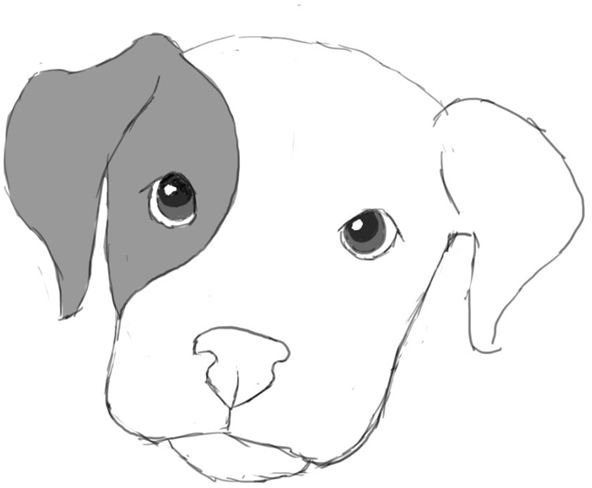
Now, this is where you zoom in your image and begin to add some more detailed bits of work. The iris and pupil can be added to the eye - and remember not to forget the highlight. Add nostrils, whiskers, and any other recognizable traits that you may want. And that’s all there is.
Tips
-
Drawing on a very large canvas allows you to zoom in and add detail very easily. Drawing on a canvas too small not only forces you to use a very tiny brush that may still feel too big, but makes adding detail such a pain later on!
-
If you’re having a hard time controlling the line-width of your brush, try going into your brush settings panel and adjusting the minimum flow. This is a great tip if you’re new at using a graphics tablet.
Advertisement -
Draw on the layer ABOVE your background, and feel free to keep separate stages (blocking in shapes, roughing it in, and detail adding) on separate layers. It’s an especially good idea to keep your rough sketch on the bottom if you don’t want to end up spending all your time carefully erasing.
-
When first starting out, don’t be afraid to be messy. Getting used to using a mouse, tablet, Photoshop, or just drawing in general is a bit tough at the beginning. Just try your hardest to have fun with it!
Advertisement


