British wildlife photography involves more than simply shooting a picture. You need to consider composition, camera settings and lighting. Learn more about British wildlife photography in this photography tutorial.
Introduction
If you’ve ever wanted to enter the British Wildlife Photography Awards, then your first step is to take some British wildlife photography. While you can just walk out your front door and snap a photograph of a bird, you need to know some techniques to really capture the essence and beauty of that bird. To help you, here is a British wildlife photography tutorial to help you improve your skills.
Stay Home
First, always start with your own backyard. If you live nowhere near the Loch Lomond and the Trossachs National Park, don’t waste your money flying all the way out there. Instead, go for a hike someplace close. Wildlife is everywhere; you just need to take the time to look.
When you are on the trail, however, keep yourself hidden. Animals will not come out of their hiding place if they hear movement. So, be quiet, set up your tripod and wait.
Equipment
A telephoto lens is a must for taking wildlife photography . Even if you are hidden, very few animals are going to come up close enough for you to shoot a portrait picture. But, zoom lenses bring their own challenges - the more you zoom in on your subject, the more likely it is that your pictures are going to be fuzzy. So, use a tripod or monopod to help eliminate camera shake .
Camera Techniques
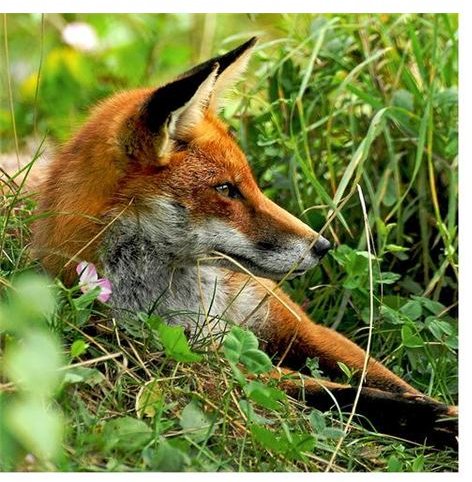
As far as techniques go, think of animal photography as portrait photography . The goal is to focus on the face. This is where you’ll see the most expression, and it makes for a more interesting photograph than simply focusing on the body. Fill the frame with the animal’s face by zooming in until it’s the only thing that you see.
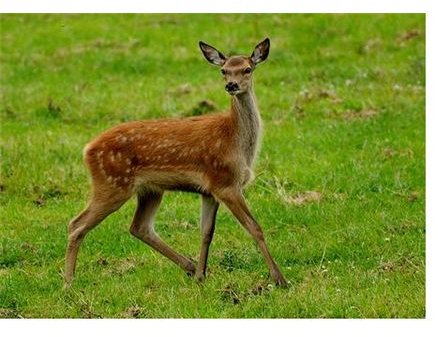
Avoid busy backgrounds if at all possible. A nice meadow with a mountain behind the animal is beautiful. A picture with an animal and 30 other people is not.
Get down on the animal’s level unless you specifically want to change the perspective. For example, if you like the look of the bird looking up at you from the ground, capture it. But, if it’s your goal to maintain a natural perspective, get on your hands and knees before photographing the bird.
Lighting
Lighting can be tricky for any type of photography, and British wildlife photography is no exception. You don’t know where your subject is going to end up so it’s not like you can set up studio lighting. And, it is very likely that flash will either wash out your subject or not even reach them to be useful. So, try to get pictures during the optimum lighting times. Mid-morning and early afternoon are perfect for taking pictures since you have just enough light.
Another option is to adjust the white balance on your camera. While you can do this manually, there are presets on your camera that do this for you. For example, use the sunshine setting if you have to take photos during the middle of the day. And, use the cloudy setting for other times of the day or when it’s actually overcast.
You can also experiment with filters, which enhance the scene and reduce glare. A simple polarizing filter is great for this.
Camera Settings
If you are experienced enough, use the manual focus. If you are a beginner photographer , just don’t take pictures through the LCD screen. What you see on the screen is not always what you get. Use the viewfinder at all times.
Also, use the Action mode on your camera. Animals are not going to wait for you to take a picture so you need to increase your shutter speed , which is how fast your camera snaps a picture. You can manually set the shutter speed, but you need to adjust other settings in the process.
If you have no luck capturing animals in the field, then head to your local zoo. Here, you will also have time to set up some fill lighting to reduce harsh shadows, and you can spend a lot of time waiting for the animal to do something.


