
A camera, tripod and moving water are all you need to make compelling images if you add just one more element – long exposures. Turn that water into spun glass for a very different look.
The beauty of moving water and long exposures
Rivers, creeks, streams and waterfalls all provide the opportunity for compelling photographs in all sorts of ways. One method of photographing any kind of moving water is to use slow shutter speeds to create a kind of “spun glass” effect that is very beautiful. Creating such images isn’t hard in theory, but can be a bit tricky in practice. Using proper photographic techniques combined with good composition and location choice is the secret to success in this type of photography . This article looks at how to take photographs of moving water with a DSLR camera.
Let’s look at the following considerations:
- Composition
- Location
- Equipment
- Technique
If you always wanted to created such images, but have never been able to get the hang of it, read further, this article will show you the way.
Composition
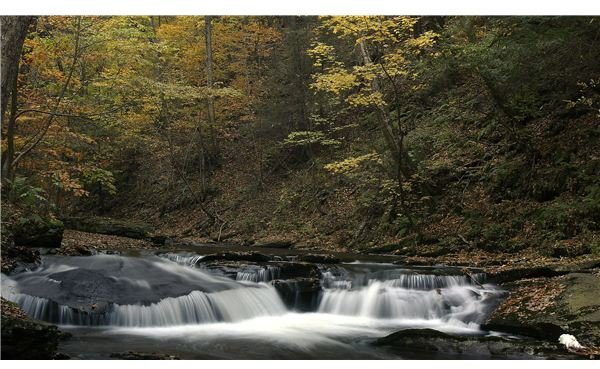
You have numerous options when using slow shutter speeds to photograph moving water . You can work a scene from every compositional distance, from close-up to a wide shot and horizontal and vertical and everything in between. Close-ups can create striking abstract images that concentrate on the forms and shapes the water blur can create. Wide shots on the other hand can take advantage of the contrast between the softness of the spun glass effect and the sharp detail of the surrounding landscape.
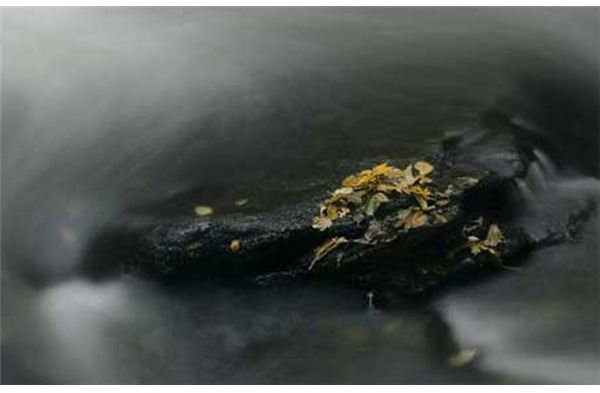
Playing on the hard versus soft contrast is an important theme in this kind of photography. Even a close-up, such as the photo of the leaf on a rock in the middle of a stream benefits greatly from the pairing. It also helps provide a sense of scale to the image (something that isn’t always necessary).
Look for curves in the stream to provide a graceful sweep to the scene. Keep in mind that while any time of year is good for this kind of photography, autumn can provide special opportunities because you can often find a carpet of colorful leaves on the river bank to add color to the image. Also, working in the great outdoors offers many opportunities, you don’t have to leave your home to work with slow shutter moving water techniques. Even your kitchen faucet can make for some interesting opportunities .
Location
While any moving water source can make for a good subject , you can maximize your opportunities by selecting small creeks and streams with noticeable elevation changes. While this can mean for some steep hiking trails, it also means faster moving water, waterfalls and a variety of angles and spots to shoot from. One of my favorite locations for this kind of work is the Falls Trail at Ricketts Glen State Park in Pennsylvania. This five-mile loop trail boasts nearly two-dozen named waterfalls and many smaller ones as well, providing a wealth of photographic possibilities.
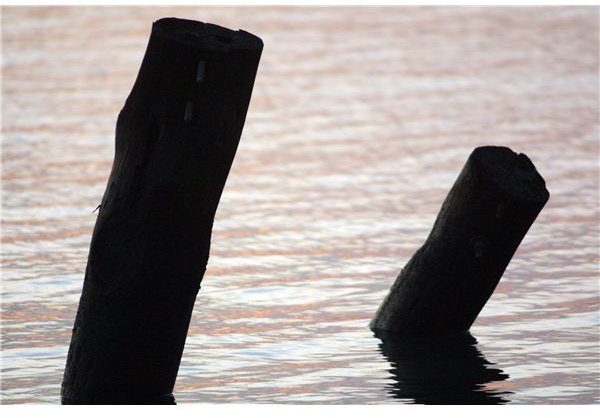
If North Eastern Pennsylvania’s too far away, don’t worry, there are lots of locations around the world that work well. After all, any moving water will provide interesting images. Look for water breaking over something that interrupts its flow, whether it be rocks or branches or a structure of some sort, since this will make the spun glass effect more dramatic.
Equipment considerations
Since learning how to take photographs of moving water with a DSLR camera and mastering this technique calls for very long exposures, you’ll need tools beyond just your basic camera. A zoom lens is a good idea to help with composing the photograph and a good, solid tripod or support is vital. Even the slightest vibration during the exposure will be magnified when you consider the shutter will be open 10 seconds at a time or longer. This is not the time to use a flimsy support system, although I will discuss some things that can improve the performance of almost any tripod.
In addition to a solid tripod, you should use some form of triggering system (a remote cable release or wireless trigger is ideal), if not, then use your camera’s self-timer to minimize camera shake from tripping the shutter (if using the self-timer, be sure to press the shutter button as gently as possible). Another useful tool is a weight bag draped over the tripod legs to help increase stability.
Filters can also be helpful. Neutral Density and Graduated Neutral Density filters can help you get the very long exposure times you need and a polarizing filter can improve image quality by reducing reflections in the water. Even color intensifying filters can play a role in punching up a key color or two.
Finally, careful use of a flash unit can add light to areas of deep shadow during the exposure.
Technique
Your biggest concern when making a long exposure is using the best possible technique to expose the shot while minimizing vibration from camera shake. In addition to needing a good, sturdy tripod, you also want to do everything possible to prevent vibration. Some things to do: keep the tripod center column to its lowest height, drape a camera bag or sand bag over the tripod legs to make it steadier, use a remote release to prevent vibration from the shutter press and shield the camera/tripod rig from the wind.


