Your subject looks great, but the background is just not what you want. What can you do? Remove it! Learn how to remove the background of a photo in some of the major photo editing software programs.
What to Do with a Bad Background
You’ve captured an amazing picture of your favorite subject. But, you want to use it for something else minus the current background. What do you do? Well, the major photo editing software programs, including Photoshop and Corel Paint Shop Pro , allow you to remove the background of your subject. Learn some step-by-step instructions on how to remove the background of a photo.
Removing Your Background in Photoshop
First up is industry-favorite, Photoshop. Follow the below steps to remove your background:
- Open your version of Photoshop.
- Open up your photo.
- Find the Layers toolbox, which is generally located on the right-hand side. Double-click on the Backgrounds name. You will now have a layer named Background.
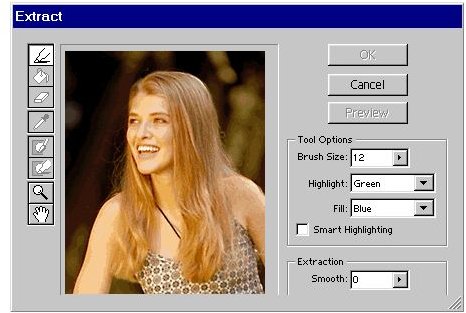
- Next, go to Image>Extract.
- Now, using the market tool, draw a light around the subject of your photo. Draw the line roughly with a little bit of the background still included. If not, you may cut out part of your subject.
- Next, select the brush tool, and completely fill in your subject.
- Select OK.
Cleaning Up Your Photoshop Image
Your background will now be gone. If you have deleted too much of your subject, you can adjust your image by following the below steps:
- Go to the History toolbar.
- Click on the Extract State image (a brush with an arrow going towards the left). Now, hit the History brush.
- Using a small brush, paint back in the missing parts of the image.
Now, your subject is ready to be used on another background. If you have too much of your background left, you can use the Erase tool, and remove additional parts of the background. Just zoom in real close so you don’t remove parts of your subject.
Tip: For subjects that have a definitive edge, use the smaller brush size. If the edges are softer, use the larger brush tool. Brush tools can be adjusted using the [ or ] keys.
Removing Your Background in Paint Shop Pro
To remove the backgrounds of your photos in Corel Paint Shop Pro, follow the below steps:
-
Open the program, and then open your photo using the Organizer.
-
Go to the Learning Center palette. Select Collage>Remove Backgrounds. The Background Eraser tools will become available.
Advertisement -
Go to the Tool Options toolbox, and adjust the following settings: A. Size: 110 B. Limits: Discontiguous
-
Using the Eraser tool, start erasing the background. The cursor’s edge should touch the subject of your photo. As you erase the background, it will become transparent. If you accidentally erase part of your subject, hit CNTL + Z. The erased parts will be added back in.
Advertisement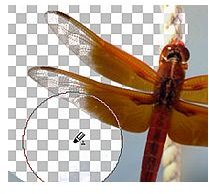
Adding Your Photo to a New Background in Corel
Now, it’s time to add your photo to your new background.
- Go to Edit>Copy.
- In the Organizer menu, click on the image that you will be using as your background to make it active.
- Go to Edit>Paste As New Layer.


