Learn how to get vibrant color in photography by following some of these tips, and using specific equipment and techniques. This article uncovers some secrets from professionals on creating vibrant color in their photos using Photoshop and other editing tricks.
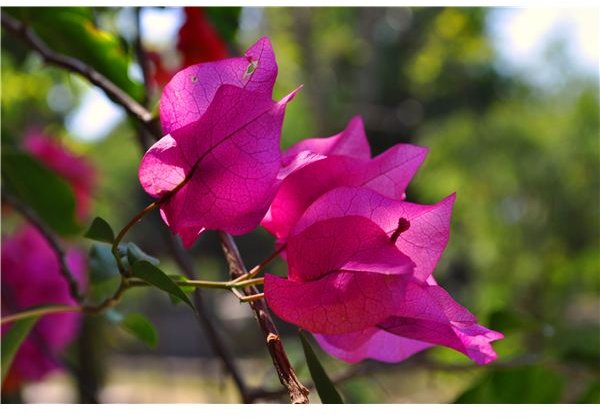
Photographs which have strong, saturated colors often have a very appealing appearance and many beginner/amateur photographers often ask the question “How do professional photographers get such vibrant colors in their photos?”
There are multiple ways to obtain this. One such method is to use the “Vivid” mode present in most digital cameras these days which tends to increase color saturation. Some other methods are explained below followed by a Photoshop tutorial on the next page.
Various Methods used by Photographers to Obtain Vibrant Colors in Photographs
Use of Filters
Circular Polarizer: A simple method of making colors vibrant in a photograph is to use a circular polarizer while shooting. This helps reduce glare, and increase color saturation thereby bringing out the rich colors in a scene.
Graduated Neutral Density Filter**:** Proper exposure is very important to obtain good colors in landscape images . Many landscapes have uneven lighting over large areas and such photographs tend to end up with the sky looking dull and flat or overexposed. A graduated neutral density filter can be used to avoid this and bring out the rich colors in the sky.
Bracketing and HDR Photography
Sometimes, the difference between a photograph with dull colors and another with vibrant colors is whether the exposure is correct or not. When in doubt, the best course of action is to bracket the photos . This also gives us the option of combining these bracketed shots into HDR photos. HDR stands for High Dynamic Range and is especially suitable to bring out the various colors in landscape, sunsets, etc.
Read this tutorial to learn HDR photography and how to take HDR photos .
Using Reflected Images
Another technique to bring out vibrant colors in a photograph is to use reflections off water bodies, glass buildings, etc. to fill the frame with rich colors. However, this technique cannot be used in the absence of a suitable reflecting medium.
Importance of Contrast in Photography
**
Another method to do this is to understand the importance of contrast in photography and how it plays an important role in composing an image.
However, if one has not made use of the above techniques or by choice wants to increase the color saturation manually in Photoshop, then the following Photoshop tutorial can be used to obtain vibrant colors in photographs.
Adobe Photoshop Tutorial: Obtaining Vibrant Colors in Photographs
If you’re new to Adobe Photoshop, you can learn the basics of Adobe Photoshop by viewing the Introduction to Adobe Photoshop tutorial before you go ahead with the following steps.
- Open the image to be edited in Adobe Photoshop
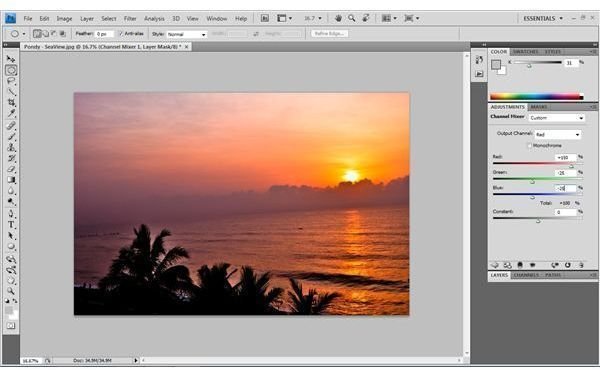
- Add an adjustment layer for Channel Mixer
- Select ‘Red’ from the drop-down box for Output Channel. Move the Red slider to 150% and decrease both Green and Blue sliders by 25%. (The trick is to keep the overall total at 100 percent)
- Similarly, select ‘Green’ from the drop-down box for Output Channel. Move the Green slider to 150% and decrease both Red and Blue sliders by 25%.
- Currently, the Layers dialog box will indicate a White mask. If you want to hide the saturation, then use “Ctrl+I” to Invert the layer mask and make it Black.
- The advantage of doing this is that it provides us the ability to selectively make colors vibrant in specific areas of the photograph. In order to do this, select White as the foreground color and use a soft brush to paint over the areas required. The opacity of the brush can be varied to suit your requirements.
- A recommended opacity level is about 25% to begin with. If you want to make the colors more vivid, then you can gradually try increasing the opacity or else, re-paint over the areas as required.
The final figures should read as follows
Red Output Channel
- Red Slider +150%
- Green Slider -25%
- Blue Slider -25%
Green Output Channel
- Green Slider +150%
- Red Slider -25%
- Blue Slider -25%
Blue Output Channel

- Blue Slider +150%
- Red Slider -25%
- Green Slider -25%
Note:
- While the example here uses +50% and -25%, these are only indicative figures. Play around with these numbers to arrive at a saturation level which you like.
- Always remember that the total should add up to 100%.
- All images may not be suitable for such editing and some may end up looking unnatural. Ensure that you choose photographs wisely for increasing color saturation.
- Wherever possible, edit a RAW file rather than editing a JPEG . This will ensure that the final image is of better quality.


