Getting a professional-looking photo of clothing can be extremely tricky. Harsh lighting and wrinkly clothes are the first things to avoid. Read on for more tips.
Prepping The Clothes
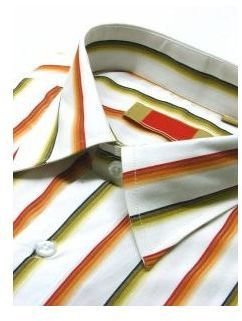
When you are photographing clothes for the web or for a print ad , make sure you start off by getting the clothes in top shape. This means the clothes should be free from any spots or stains and any loose threads or buttons. Secondly, the clothing should be freshly ironed, especially for shirts and trousers. Some items, such as blue jeans, may look more natural with a few slight wrinkles.
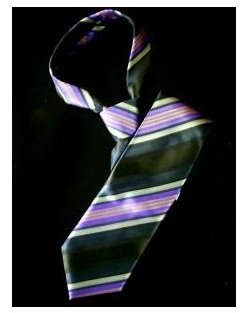
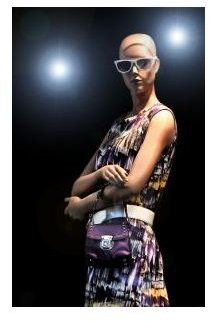
Once the clothes are looking sharp, it’s time to place them either on a flat surface or on a model. For flat surfaces, lay out the clothes so that the full design can be seen. Folding a shirt, for example, won’t allow viewers to see the sleeve length. If you’re using a fashion model or a mannequin, make sure the clothes are hanging naturally. You can choose to include the model’s face in the picture or just focus in on the clothing, depending on what type of photo you’d like to create. Keep pins on hand in case you need to adjust the way the clothing lays for the photograph.
For any photo, you should start with a neutral background that won’t take away from the clothing. A white, grey or black background are good for photographing clothes on a flat surface. When using a model , you can place them in front of a wall or background as long as there aren’t too many distracting items in the photo to take the focus away from the clothing.
Lighting
Creating a soft lighting effect will have the best result when photographing clothes. You can do this by placing lights on either side of the item of clothing or model; this removes harsh shadows from one side of the piece. Softboxes should be used on the lights to ensure that the clothing looks as it would in natural light; this produces colors that are closer to the actual appearance of the item than if you used brighter lighting. If you’re using a model, you may also want to place a softbox behind the model to light the background area. You’ll find that with models and mannequins, your clothing will have a fuller shape and produce more shadows. This is okay as long as you can still see all of the forward-facing parts of the item.
Taking the Photo
When it’s time to photograph your clothes, your camera should be placed directly above any clothing laid out flat. Models can be photographed from different angles depending on which part of the clothing item you want to show. If you’re shooting small items up close, a zoom lens may work best. However, in order to fit larger pieces or photos of models into the frame properly, you should use a wide angle lens, such as an 18-55mm lens. A tripod is typically used for almost any clothing photography.
Snap several pictures and take close-ups of any interesting detailing. While clothes laid flat are easy to capture, it may take several tries to find the right angle with your model. In most cases, it’s better to zoom in to highlight the clothes rather than trying to capture the model’s entire body and the surrounding background.
Editing
During the editing process, keep the lighting soft and make sure there are no imperfections showing in your background. In most cases, clothing photography requires little editing other than cropping and some minor adjustments with contrast and brightness. If you lit your items correctly when photographing clothes, it should be a snap to edit them. Photos with models may take a little more time in the editing process since you may need to fix something on the model’s body.
Overall, photographing clothes for the web, print ads or other purposes is quite easy if you have the correct lighting equipment . Remember that the keys to a professional-looking clothing photo, other than the item being ironed and clean, are a neutral background and soft lighting.


