Light painting is a neat way to draw pictures or write messages at night. What kind of camera do you need for light graffiti? Find out here!
Light painting is a cool way to capture the movement of light and color to create a unique piece of art and messages. You get to experiment and play around with lights and your environment around you becomes your canvas. Whether you are writing a message, drawing a picture, or painting the world around you, you are sure to wow your viewers. Often times they will be so puzzled how you were able to draw without the use of Photoshop. The good thing about light painting is that it is really easy to do and you do not need too special of a camera.
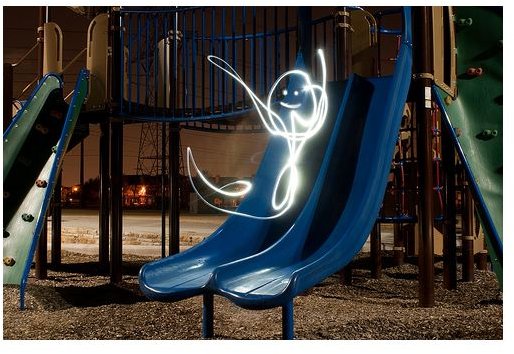
Photo by .dr4gon
What Kind of Camera is Required?
As I said in the introduction, you do not need any sort of special camera or even a digital SLR. A digital SLR will for sure work, but it is not a must. The only thing your camera needs to be able to do is the ability to manually set your exposure (shutter speed, aperture, and ISO). Even my five year old Sony’s point-and-shoot has these functions. This camera feature is found under the Manual mode demoted usually by an M on the camera’s dial. Manual means that we will be deciding how the picture is taken instead of letting the camera use auto exposure .
Camera Settings
The exposure settings are some things you will obviously have to play around with and will depend on your scene.
Aperture
A good starting point is a small aperture like F/8 or F/11 (or smaller). Note that the larger the F/ stop number, the smaller the camera aperture’s opening.
Shutter Speed
You will want a shutter speed slow enough to allow you enough time to paint your scene and long enough to properly expose your surroundings to your liking. A good starting place is anywhere from 8 to 30 seconds. Most cameras with a manual setting have an upper limit of 30 seconds for an exposure.
ISO
Use the lowest possible ISO to get the most detailed and digital noise free image.
Camera Accessories
Lenses
As previously stated, you don’t need fancy equipment for this project. Any lens will work since they can all be stopped down to F/8 or smaller. If there is one lens that would be fun to experiment with, it would be an ultra-wide-angle lens that is in the focal range of 10-20mm for “crop” APS-C digital SLRs or 14-36mm on “full-frame” digital SLRs.
Tripod – A tripod or a firm resting place is a must for these pictures. Any movement of the camera will result in a blurry scene (background, paint, and all).
Shutter Release – A shutter release is optional, but highly recommended. A wireless one works best as it allows you to be in the scene and ready to start painting as soon as you click the shutter. Having a buddy to press the shutter button can substitute for a shutter release but having a buddy while shooting at night is a good idea anyway.
Lens Hood – A lens hood will block out stray lights from entering your lens. These will show up as flares and other artifacts and can be quite distracting.
Remember to have fun with it and try different lights, colors, movements, and locations! Share your work, thoughts, and questions in the comments below! Also, be sure to check out A Beginners’ Guide to Light Graffiti for additional tips and tricks.


