What is an Adobe Lightroom Snapshot? Learn the answer to this question and how to create Lightroom Snapshots (along with a suitable example) by reading this photo editing software tutorial.
What are Lightroom Snapshots?
Lightroom Snapshots is one the most useful features present in Adobe Lightroom. It provides you with the ability to save a sequence of edits as a “Lightroom Snapshot” which can be reapplied onto a photo as and when required.
Lightroom Snapshots are ideal for performing a sequence of edits on a photograph, save it in its “current state” and then reset the photograph in order to experiment with a different set of edits. By doing this, the work which has been performed thus far is still retained while you have the freedom to experiment with further creative editing.
Lightroom Snapshots are somewhat similar to Photoshop Actions , but are far easier to create and use.
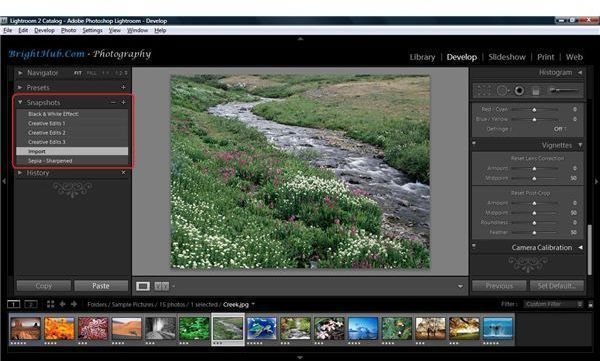
Lightroom Snapshots are available in the Develop Module of Adobe Lightroom on the left panel, next to the History tab.
Applications of Lightroom Snapshots
Adobe Lightroom has a wide variety of features for organization photos and editing photos. Many professional photographers manage their entire digital photography workflow using Adobe Lightroom .
Besides organizing photos, Lightroom can be used to edit photos using a wide variety of available Lightroom Presets .
While using presets for photo editing, or after performing a complicated sequence of edits in the develop module, one can preserve a photo at a particular moment in time by taking a “snapshot” of the image i.e. by using Lightroom Snapshots.
How to Create Lightroom Snapshots in Adobe Lightroom?
The following steps describe how to create a Lightroom Snapshot within Adobe Lightroom
- Perform the required edits on the photograph
- Click on the + icon in the Lightroom Snapshots Panel (available on the left)
- Type a suitable name and save the Snapshot
Tips for working with Lightroom Snapshots
-
Now to perform a new set of edits from scratch, click on the “Import” snapshot and use it to edit the image from its original state. “Import” is a default snapshot which gets created when you import images to Lightroom.
Advertisement -
Edit the images as required and save them as snapshots with suitable names as indicated above.
-
Click on a Snapshot to open the image at that point in time. If further edits have been performed and you would like to update the snapshot, then right click the snapshot name and choose “Update with Current Settings”
Advertisement -
The right click menu can be used to rename and delete snapshots.
-
Snapshots can also be deleted by selecting a snapshot and clicking the - icon.
Advertisement
Lightroom Snapshots are stored as metadata along with the files metadata. So if the same file is opened within Lightroom at a later point in time, the snapshots will be available.
Snapshots are also available in Adobe Camera Raw and function similar to how they do within Lightroom. The Snapshots panel can be accessed by clicking on the rightmost icon in the menu. The add new snapshots and delete snapshot buttons are present in the bottom of the panel. Snapshots in Adobe Camera Raw can be used as a partial workaround for the absence of a History feature.


