Once you’ve created an image with a transparent background in Paint Shop Pro, you’ll need to save it in a certain manner in order to preserve that transparency. In this tutorial, we’ll explain the steps you need to take in order to do just that.
Transparency and Image Formats
There are lots of ways to make the background of a digital photograph transparent in Paint Shop Pro . If you’re using the X2 Ultimate version of the software, you can invoke the background remover plug-in to make the process fairly simple. Those who have upgraded to PaintShop Photo Pro X3 can use the new Object Extractor tool. Even if you have an older version of the software, you can use the Eraser tool or one of many specialty plug-ins to make the background (or any other part of the image) transparent.
However, if you want to preserve this transparency when saving, you’ll need to save the image in a special way. Most photographs use the JPEG format, and this format does not support transparency. So, if you just try to save your final image as a new JPEG, the transparent areas will be converted to a solid color. This may be okay for certain projects, but it’s definitely not the ideal solution.
Using the PSPIMAGE Format
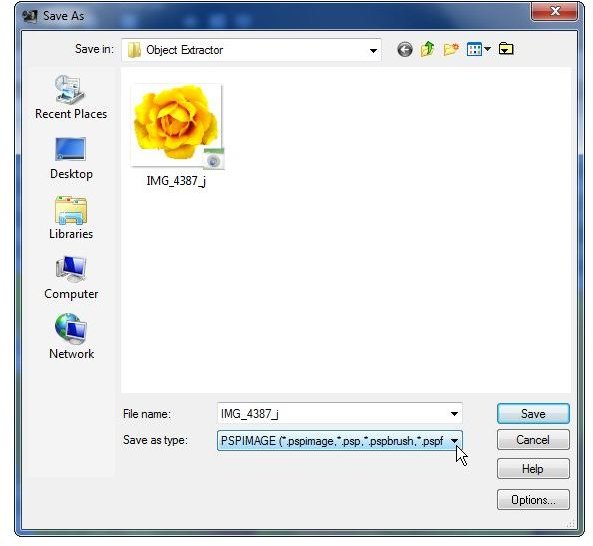
If your plans are to use the image with a transparent background in other photo editing projects in Paint Shop Pro, you can take the easy route and just save the image in PSPIMAGE format. To do this, choose Save As from the File menu on Paint Shop Pro’s main toolbar. Then, when the Save As window appears on your screen, choose PSPIMAGE from the drop down menu next to Save as type as shown in the screenshot to the right. (Click any image for a larger view.)
This format preserves transparency, layers, and several other attributes in Paint Shop Pro. Whenever you’re ready to use the image in other photo editing work, you can just open the PSPIMAGE file and work from there.
The problem is that this file format is not recognized by many other applications or web browsers. So, if you want to preserve the transparency in the image and use that picture in other software programs or insert it into a web page, you’ll have to save it as a transparent GIF instead.
Exporting as a Transparent GIF
Unlike the JPEG format, the GIF format does support transparency. However, to make sure that the transparency in your image is preserved, you have to do a little bit more than just save the picture in GIF format. Instead, you need to export as a GIF using the following steps. The screenshots accompanying these steps are from PaintShop Photo Pro X3, but the process is basically the same as in older versions of Paint Shop Pro.
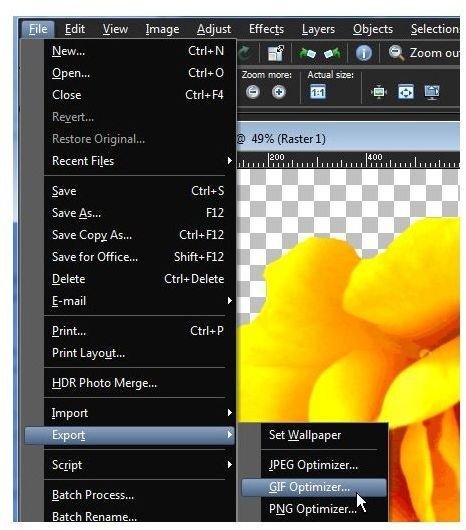
Step 1: From the File menu, select Export and then choose GIF Optimizer.
Step 2: When the GIF Optimizer appears on your screen, you’ll need to go through each of the tabs shown and select the proper options.
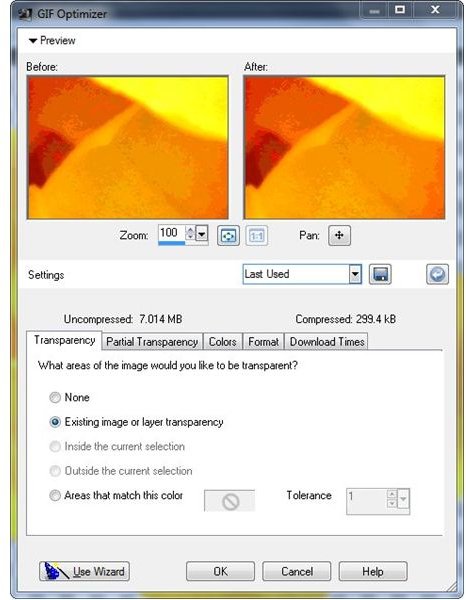
Here are the things you need to check on each tab.
Transparency – Make sure that the radio button next to Existing image or layer transparency is selected.
Partial Transparency – On this tab, you may want to make several changes or none at all. Use the preview window to see how the default options appear on the After image. If they look fine to you (and in most cases, they probably will), go on to the next tab. If not, experiment with some of the settings until you’re happy with the look of the After image in the preview window.
Colors – You can usually accept the default settings on this tab as well, but you may want to try selecting each of the different methods of color selection to see how the preview image looks with those settings. For instance, if you choose the web-safe color selection method, it may cause your photo to have a slight cartoonish look.
Format – On this tab, make sure that Version 89a is selected.
Download Times – This tab is for information purposes only. It gives estimates on how long it will take the final GIF image to load on a web page, depending on the connection of the person who is accessing the page.
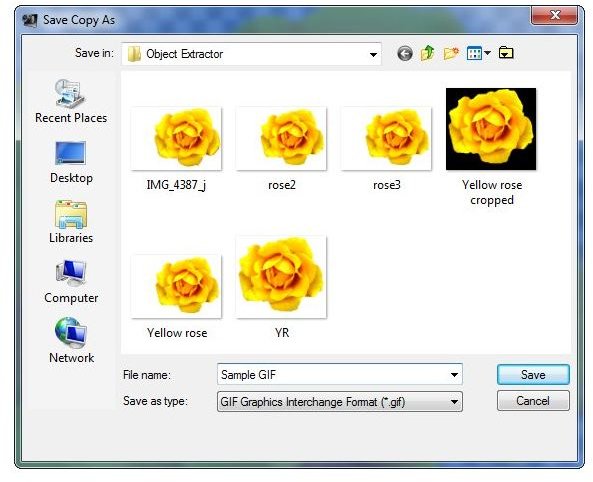
Step 3: When done, click OK. This will close the GIF Optimizer and open a Save Copy As window with the GIF format pre-chosen as the Save as type. Type in the name that you want to save the file under, and click the Save button. You’ll then be returned to you original image in the Paint Shop Pro workspace.
Note that if you reopen this saved image in Paint Shop Pro, the background may show up as a solid color instead of transparent when viewing the file. Don’t worry too much about this. You’ll still be able to insert the GIF image into other applications or into a web page with the transparency intact.
For more tips and tricks, be sure to take a look at the other Paint Shop Pro tutorials and user guides available at Bright Hub.


