How to Use the Smart Carver in PaintShop Photo Pro X3 to Edit Images - Corel Paint Shop Pro Tutorial
Uses of the Smart Carver
Of all the new features found in PaintShop Photo Pro X3, the Smart Carver is one of the most versatile. The tool can be used to get rid of objects in digital photos without leaving a gaping hole where the object used to be and to change the dimensions of an image without distorting the important part of that same picture. Easy brushes let you mark the parts of the photo that you want to keep (as well as those that you want to remove), and then the software takes care of the rest.
In this tutorial, we’ll walk through the steps needed to perform each of these tasks and give some tips that will help you get the most out of the Smart Carver’s capabilities.
Removing Unwanted Objects
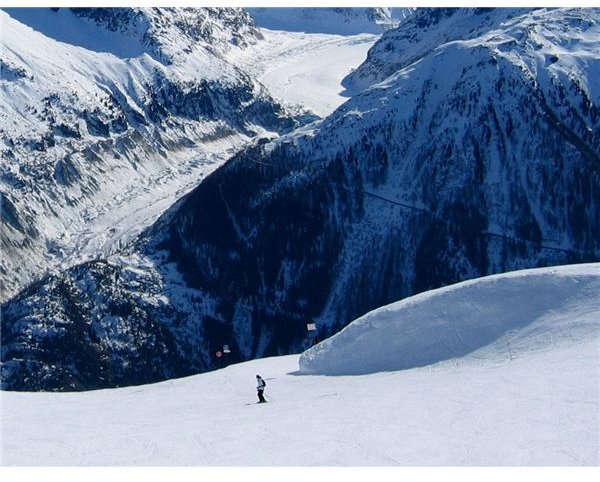
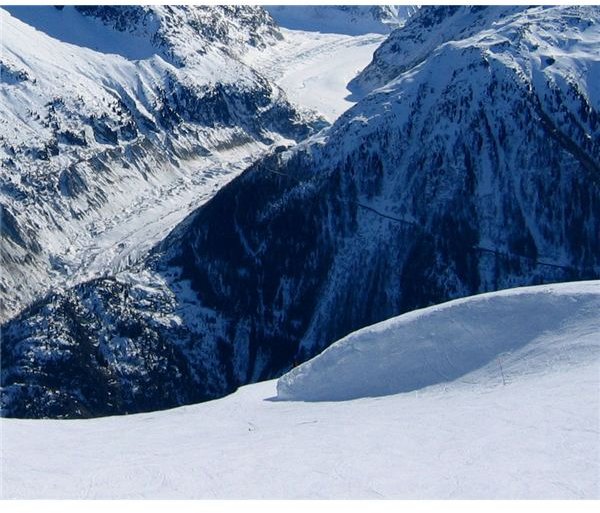
We’ll start out with an example of how to use the Smart Carver to remove unwanted objects in a digital photograph. The photo below (click any image for a larger view) shows a great mountain snow scene. However, in the middle of the photo, you can clearly see a skier and several signs if you look close enough.
We’d like to get rid of these distractions and end up with a final image that only includes the snow and mountains.
Step 1: From the Image menu on Paint Shop Pro’s main toolbar, select Smart Carver.
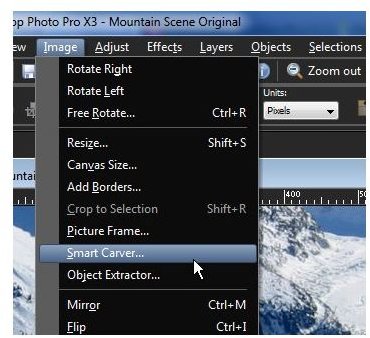
This will open up the Smart Carver window, which you can resize to your desired specifications.
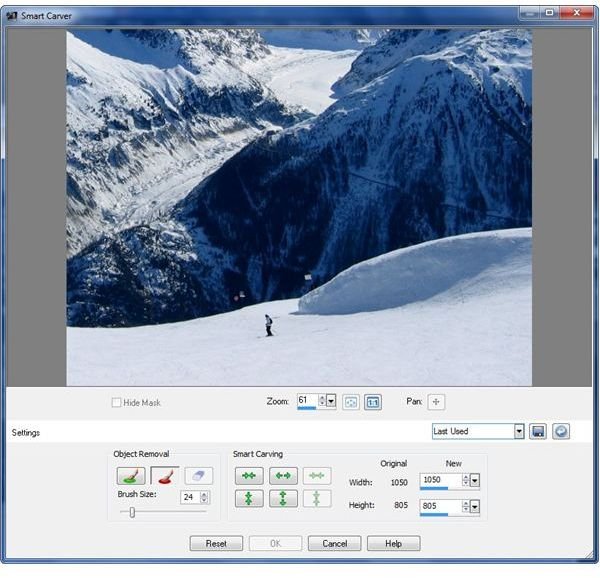
Step 2: Select the Remove brush (the one represented by a paintbrush dipping into red paint). Adjust the Brush size to a diameter that is suitable for the size of the objects you want to remove. Paint over the areas of the photograph that you want to get rid of.
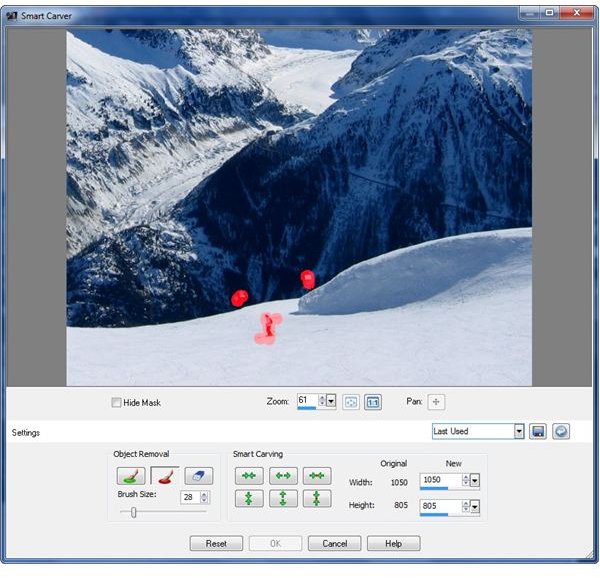
Step 3: Click on either the Auto-contract horizontally or Auto-contract vertically tool to get rid of the red-painted areas. In this example, we’ll use Auto-contract horizontally.
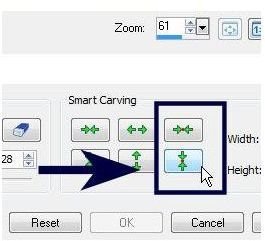
Wait for the tool to finish processing. At this point, if you’re happy with the result, you can click OK to return to the main interface of Paint Shop Pro and apply the results to your image. If not, you can click the Reset button and try a different option. The image below shows how the photograph appears with the skier and signs removed.
Rescaling a Photo
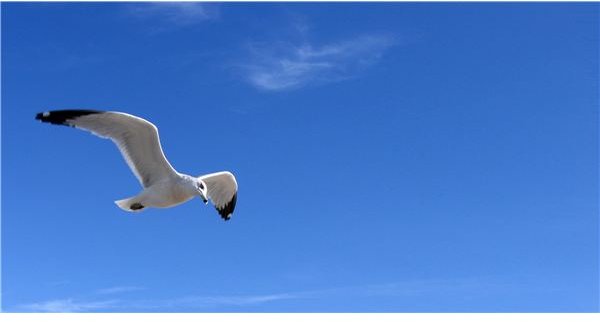
There are a number of times when you may need to rescale a photo and keep all of the details found in that original image without any distortions. The Smart Carver can also be used for this type of task. As an example, we’d like to make the image below wider (while keeping the photo’s original height) without distorting any of the bird’s features.
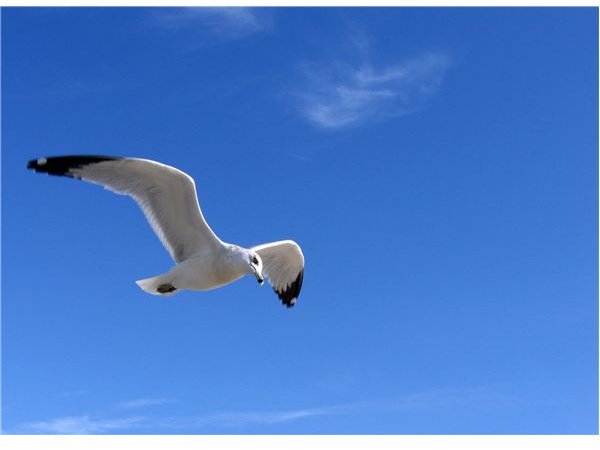
Image Credits: morguefile.com/rosevita
Step 1: Select Smart Carver from the Image menu.
Step 2: Using the green Preserve brush, mark the areas in the photograph that you want to keep as-is – that is, the areas that you don’t want to be distorted. If, in addition, you have areas in the photo that you’d like to get rid of, go ahead and mark those with the red Remove brush as well.
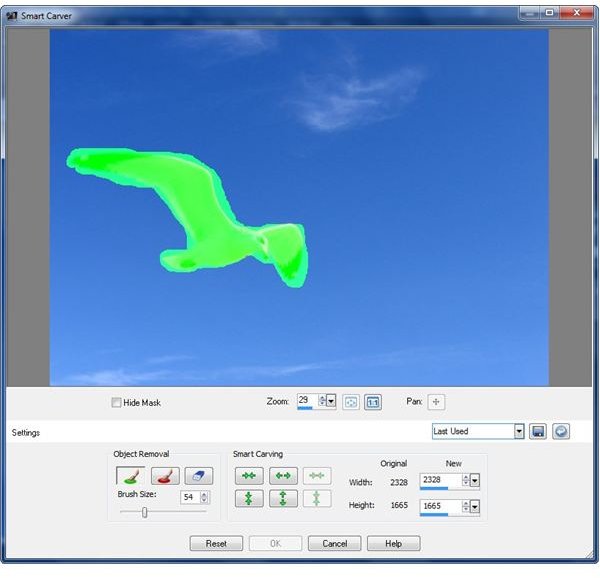
In this example, we wanted to leave the bird unchanged so it was marked with the Preserve brush. There weren’t any objects that we wanted to remove, so no red areas are marked.
Step 3: Enter the new dimensions for width and height, either by manually inputting the values or using the up and down arrows to select a new value. For our example, the original photo had a width of 2328 pixels and a height of 1665 pixels. We want to leave the height alone and change the width to 3200 pixels.
Step 4: Wait for the tool to finish processing, and then preview the result. If you’re happy with the result, click OK to exit the Smart Carver and apply the changes to the image in Paint Shop Pro. If not, click Reset and try again.
The screenshot below shows the result of these modifications. Note that the details of the bird remain clear and proportioned while the rest of the photo has been widened.
Be sure to take a look at the collection of other Paint Shop Pro tutorials and user guides found here at Bright Hub.
