
Do your group photos end up looking stiff and lifeless? Get in the holiday spirit with these 10 amazing tricks to taking great group shots.
Staff parties, family dinners, an evening of drinks with friends … it all happens this time of year. And with these occasions comes great photo opportunities - that is, if you know what you’re doing. Taking group photos during the holiday is common, especially if it’s the only time of year when everyone comes together. Taking great group photos during the holiday is rare, there is always at least one person (and how come it seems to be the same person year after year?) who has their eyes closed, tongue sticking out or is looking away. Besides people not cooperating, there are many other obstacles that can get in the way of taking a great group photo such as low-light conditions or cluttered backgrounds . Here are ten tips and techniques to help you take the best group photos.
1 - Plan Ahead
If you’re familiar with the area where everyone will be together, it’s a good idea to think ahead to come up with the best locations to take the photos and how you want everyone to position themselves (more on this in a moment).
It’s also a good idea to plan your group photos for the beginning of the event when everyone is looking their best, isn’t hungry or too tipsy. Alternatively, if you prefer the glassy look in people eyes and goofy grins resulting from a few hours of social drinking, plan to take your group photos after the event’s meal, when people aren’t anxious to get the photo shoot over because their bellies are rumbling and the kids are cranky from lack of food.
Planning ahead also means you should be sure your digital camera’s batteries are fully charged . Nothing is worse than getting everyone prepared for a group photo session and then finding that your camera won’t turn on or dies part way through.
2 - Think of Positions & Poses that Make Sense
Don’t line your group up in a long row, squaring them shoulder to shoulder. For starters, it’s an unnatural way to stand and will make people feel silly.
Second, the results will be that your group photo looks like a criminal line-up.
Try to cluster everyone together nicely. Tall people should stand behind those who are more vertically challenged. Likewise, those who carry a little extra insulation will probably appreciate being placed behind other people (plan these arrangements in your own head, failure to do so may result in a broken camera or busted nose).
If you’d like to emphasize certain people, perhaps the hosts of the party or guest of honor, place them in the middle of the group. This will make them the focal point of the photo.
3 – Shed Light on the Situation

Lighting is an important factor and if it isn’t used correctly, it can destroy an otherwise great group photo. If your group photos will be shot outside, try to avoid direct sunlight as it will result in squinting faces and harsh shadows.
For indoor photos, try using as much natural light as you can. Pulling the shades back from windows and having your group stand near the light source is a good idea, but be sure not to position them directly in front of the light, or your photo will result in a bunch of silhouettes. If your group photos are going to be taken when it’s night time, turn on extra lamps to provide more light. If possible, experiment with your camera’s flash system before hand in similar conditions so you can decide what you like the most.
4 – Keep it in Focus
Try not to have people in the front be too far away from the people in the back. Aim to have everyone near to the same distance away from the camera; otherwise some people in the photo will be out of focus. If you absolutely can’t avoid having a distance between everyone, try using a smaller aperture .
If you’re shooting in lowlight conditions, consider increasing your camera’s ISO settings . Keep in mind that when the ISO is increased, your photos may result in more noise (grainier photos). Also, because higher ISO means quicker shutter speeds, it’s imperative that you avoid any camera shake or you’ll be looking at blurry, out of focus group photos.
5 – Consider Different Composition Techniques
There are several techniques you can follow when composing a photograph. However, when composing a group photo, here are three that you should definitely consider:
- Fill Your Frame : If you’re taking a photo of a large group, chances are that your frame will already be filled. If your group consists of fewer people, get as close to them as you can. You’re likely to capture the moment more effectively this way. Getting close will show peoples expressions better and give the overall picture a more intimate feeling.
- Avoid Unnecessary Clutter and Distractions : When composing your group photo, try to avoid background clutter, this will draw the viewers’ eyes away from your subject. Additionally, make sure that anything that is in the background isn’t going to appear as though it’s protruding from somebody’s head.
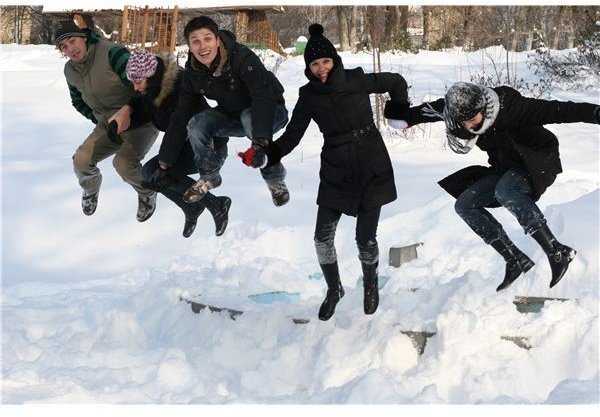
- Try Different Angles : Try thinking outside the box. Let’s face it, a lot of group photos are dull, boring and so unoriginal. Try standing on a table or ladder to take your shot from above, or get on the floor and have everyone circle around you as you look up at them. It isn’t just the angle of your camera that should be thought of; also consider positioning people at different angles. For example, if you are positioning the dinner hosts in the middle of the frame, have all the other guests turn slightly to face them, or if the group photo consists of Grandma and Grandpa with all the grandchildren, have them sit on the couch with all the kiddos surrounding them. Oh, and don’t forget to ask everyone to raise their head’s slightly to avoid the horrid double-chin!
6 - Use a Tripod
Using a tripod is helpful for two reasons. One, it eliminates all camera shake. If your group photos are taken in lowlight conditions or you’ve increased the ISO settings , this is especially important. And two, using a tripod along with a self-timer will allow the photographer to be included in the photo. This will make it so nobody is missing from the picture.
7 - Make it Snappy & Snap A Lot!

Taking several pictures in a row or using your digital camera’s burst mode will increase the chances of getting a great group photo. Another obvious thing to do - but not everyone does - is to take many, many photos. The days of digital mean we don’t have to worry about film and the cost of developing photos, so take advantage of it! The more lottery tickets you buy the better chances you have of winning. The same rule applies when taking photos; the more you take the better your chances are of getting the best group photos!
8 - Have Fun with the Self Timer
To capture fun group photos, follow these steps:
- Have everyone gather around behind the camera
- Set the camera’s self-timer for a few seconds (the longer you set it for, the less fun it will be)
- Have everyone dash into the camera’s field of view and pose before the camera takes the photo
9 - Don’t Wait Until One
Another trick is to count down from three, but snap the photo when you get to two. If you leave it until you get to one, people have had the time to perfectly pose their fakest smile, get distracted by somebody else in the group causing them to look away, or by the time you get to one somebody is sure to blink.
10 - Bribe the Kids
If your group photo consists of children – or immature adults for that matter - that just aren’t listening or are trying to goof off (are rabbit ears even funny anymore?), tell them that if they cooperate and help by posing nicely, you’ll take some goofy photos afterwards where they can pull whatever faces they want, without their parents snapping at them for doing so!


