Blurry photographs are the bane of photographers. This article provides you with tips and techniques on how to minimize blur in your pictures.
Introduction
Blurry photographs are the bane of photographers. Surveys of commercial one-hour photo processors have consistently shown that most images returned by consumers are rejected because they are “out of focus.” Ironically, many of those shots were properly focused, it’s just that they ended up being blurry from camera movement during the exposure rather than from being focused poorly. A blurry photo looks like an out of focus photo to most people.
Getting the shutter speed right
One of the first things to do to prevent blurry images is to make sure you’re shooting with a fast enough shutter speed . Most shooters learn the “reciprocal of the focal length” rule, which says to choose a shutter speed that is at least your lens’s focal length as a fraction of one second (300 mm telephoto would call for a 1/500th of a second shutter speed). DSLRs make the math a little more complicated because of the “multiplier” or “crop” effect. Since most DSLRs have less than full frame sensors, lenses designed for film cameras effectively produce an image that has been “multiplied” or “cropped” as a result. (The issue of whether the image is multiplied or cropped is the subject of much heated debate amongst photographers. I’m trying to stay out that debate myself.) Either way, because the focal length of the lens is magnified, the potential blur from camera shake is too. If you’re using a 300 mm lens on a camera with a 1.5 multiplier effect, you’re effectively shooting with a 450 mm telephoto, so setting that 1/500 of a second shutter speed is even more important. The need for an appropriate shutter speed/focal length combination is true whether you’re using a big, heavy, pro DSLR or a credit card sized point and shoot camera that’s light as a feather.
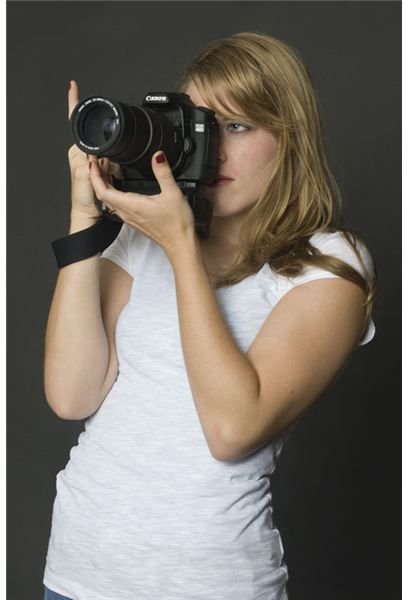
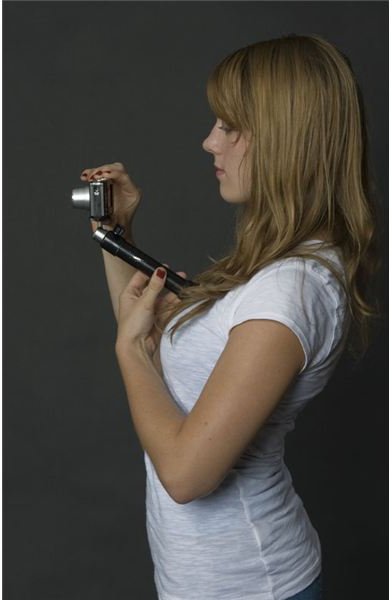
In fact, getting the shutter speed right is even more important when you’re shooting with the point and shoot than it is with the DSLR. That’s because of another important consideration in avoiding, namely the need to exercise proper camera holding technique when making an exposure. The steadier the camera is when the image is made, the less problematic blur from camera shake will be. For DSLR use, proper technique includes bracing the camera properly with the arms and hands and adopting the proper foot positions. It’s also important to bring the bracing elbow in tight to the body to improve camera steadiness. (See illustrations for examples.) This technique can be used with any camera that has a viewfinder that the photographer opts to use, even point and shoot cameras.
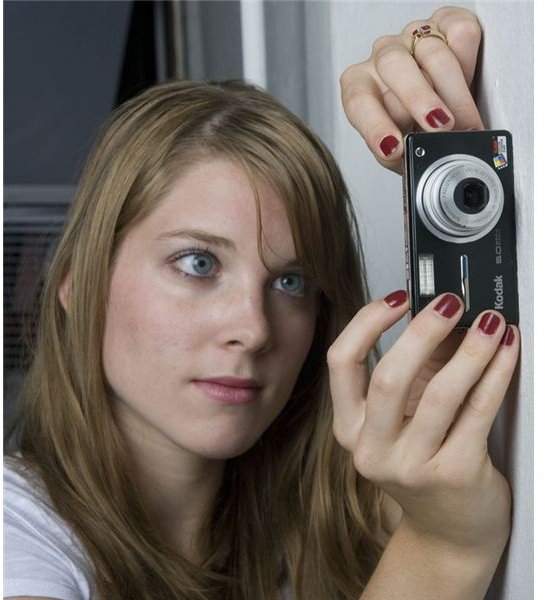
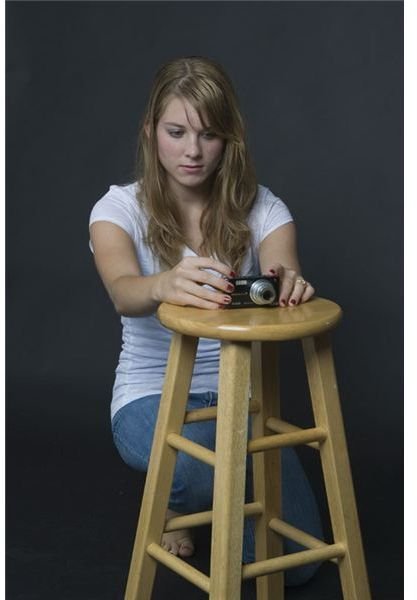
It’s a different story when it comes to using an LCD viewer to operate the camera. Shooting with the camera with outstretched arms and trying to trigger the shutter is a recipe for blurry photos since keeping the camera steady during the exposure is very difficult. Pushing the shutter button will usually cause the camera to move during the exposure, so making an effort to hold the camera as steady as possible is extremely important. Photographers often try to brace themselves and their cameras against a solid surface to help improve camera steadiness. Bracing the camera on a tabletop or desk can also keep the camera steadier. It’s also important to trigger the shutter properly. Proper technique calls for gently squeezing the shutter rather than a quick sharp jerky movement.
Other approaches
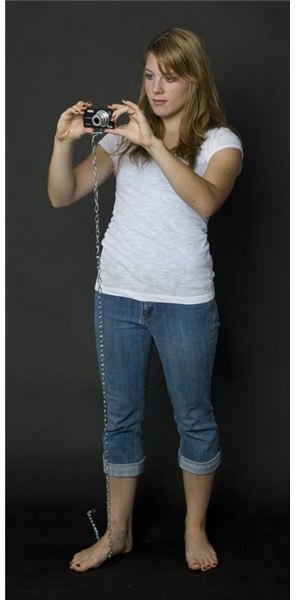
Of course, the pro approach is to bring out tools to help improve camera steadiness. While in camera or in lens solutions such as Image Stabilization and Vibration Reduction are popular, tripods and monopods are also tried and true approaches. A good tripod can make a world of difference in image sharpness and is invaluable for eliminating blur, providing your subject is not moving. While not quite as effective, a monopod can help, particularly with LCD only point and shoot cameras. Another trick is to buy a length of quarter inch chain, thread a nut and bolt through it and then screw the bolt into the tripod socket of the camera. Drop the chain to the ground and gently step on it with your foot. Then pull the camera up until the chain is taught. The tension will add a reasonable amount of steadiness, buying you about an f-stop worth of improvement.
If none of these options is available, using flash will also help. Since the flash provides almost all the light for an exposure (unless you’re combining flash with a long exposure), it effectively turns the camera’s shutter speed into the flash’s duration. Most shoe mount flash units fire a burst of light that can last for less than a thousandth of a second.
Even more solutions
Image Stabilization, Vibration Reduction and other stabilizing features are popular technology based solutions designed to help avoid blur from camera shake . If your lens budget allows for such purchases, these systems work well and provide some extra stabilization. When it comes to point and shoot camera image stabilizing options the benefits are less clear. Many point and shoots when set to image stabilizing mode merely boost ISO settings to get to faster shutter speeds. The good news is that many of the newest models on the market do have legitimate image stabilization capabilities. Do you really need this technology? Well, if you can afford it, it’s a great addition to your camera bag, but if money’s tight, you can live without it. I’ve never shot with an IS or VR lens and I’ve produced plenty of sharp photos without it.
One reason I’ve been fine without image stabilization is because I’ve used a poor man’s version that’s been around as long as photography. It’s simply a matter of bracing the camera against a solid surface like a wall or tabletop. Using such a surface works beautifully to help prevent blur. A variation of this is to take a small table top tripod and use it to brace the camera against your chest adding a little more stability. Another useful product is one of the Pods line of products. These beanbag like devices can also give your camera some support and help keep it properly positioned on the ground or against a wall.
Avoiding blur is all about keeping the camera steady enough, whether by supporting it with a tripod or bracing it against something stable, using tripods or monopods, or resorting to faster shutter speeds (including via flash). Keep the camera steady and you solve the blurry photos problem!


