In this tutorial, we’ll take a look at several tools and brushes that can be used to help restore older scanned photographs in Corel Paint Shop Pro Photo X2. We’ll also give some tips you can use to make the restoration process quicker and easier.
Retouching Old Photos
There are a number of tools that you can use to retouch and restore scanned photos in Paint Shop Pro . Here, we’ll look at how some of these tools in action. You may also want to check out these tips for scanning photos to find out how to get the best digital images possible out of your hard copy photographs.
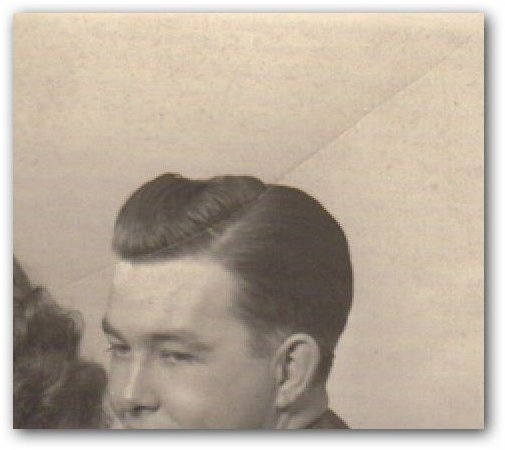
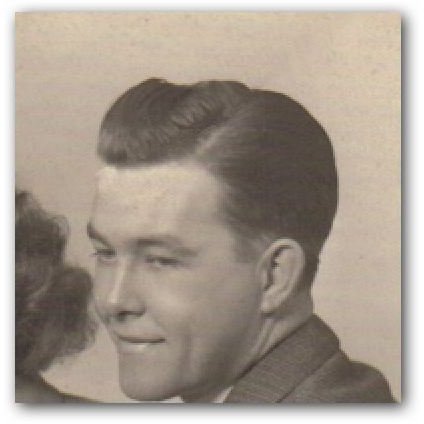
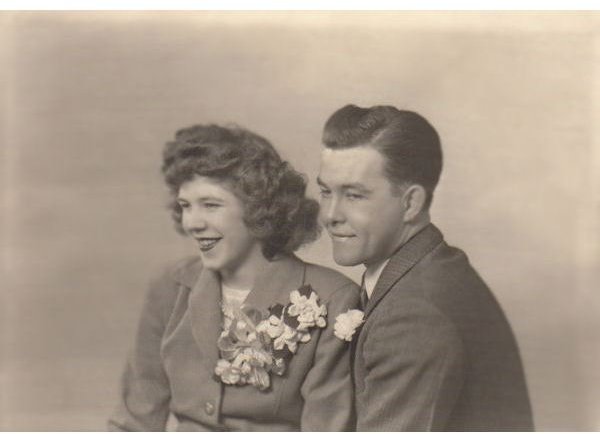
For this project, we’ll use a photo of my grandparents (shown below) that my aunt scanned and sent to me. (Click any image for a larger view.)
Considering its age, this photo is actually in pretty good condition, but there are still a few creases and small stains that we could get rid of using Paint Shop Pro.
Removing Creases, Folds, and Scratches
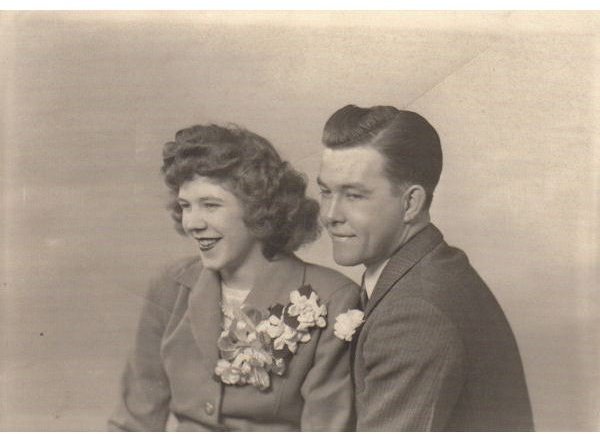
Let’s start by looking at the crease that’s passing through my grandfather’s head.
One easy way to get rid of folds and creases like this is to use the Scratch Remover Tool that’s located about mid way down the side tool panel of Paint Shop Pro.

This tool works best when the background of the crease, or “scratch”, that you are trying to remove has a fairly basic texture like the wall in this photo. To use the Scratch Remover Tool, just click on the photo at the beginning of the crease and drag it to the end.
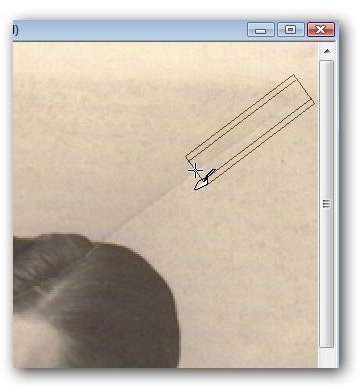
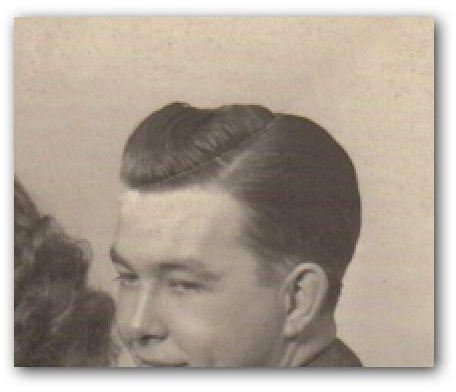
In this particular photo, I’m only going to use the Scratch Remover Tool to remove the portions of the crease that have the wall as background. The part of the scratch that runs through the hair has a more complicated background so we’ll use a different tool for that. Here’s what the photo looks like after removing this part of the crease.
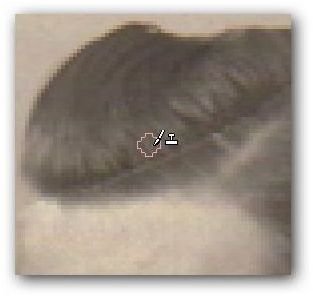
To get rid of the scratch that is passing through the hair, I’m going to use the Clone Brush. This tool is located in the same place as the Scratch Remover Tool on Paint Shop Pro’s side tool panel.
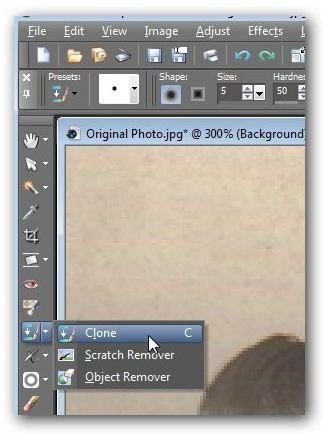
If you’ve never used the Clone Brush before, you may have to practice a little bit to get the hang of it. Basically, the Clone Brush copies one part of a digital photo and pastes it onto another. For this project, I’ll be using the brush to copy part of the hair that doesn’t have the scratch running through it and applying that snippet to the portion that does.
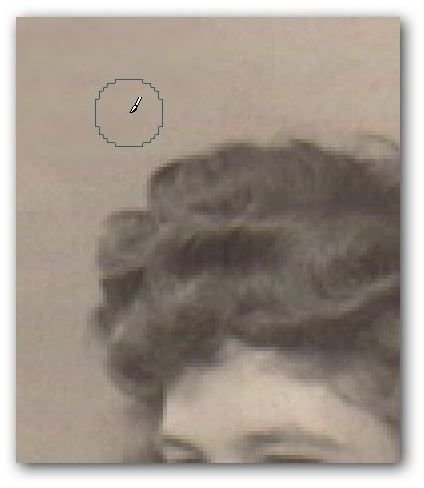
First, adjust the size of the Clone Brush until it’s fairly small. Then, right-click on an area of the hair very close to the area of the photo that is scratched.
Next, left-click on the area that you want to cover up with this cloned section of the photo.

One of the nice features of the Clone Brush is that it saves these relative distance settings until you select another tool in Paint Shop Pro. That is, you don’t have to keep reselecting new source areas for the brush. Whenever you choose a new target area for the tool, it will automatically select a relative source area based on your first selection unless you manually choose another. This way, you can quickly move the Clone Brush up and down the scratch to get rid of the entire problem area.
Below is our photo after applying the Clone Brush to get rid of the scratch running through the hair.
You can use this same technique to remove other scratches and creases in the photograph.
Continue on to the next page where we talk about more Paint Shop Pro tools that can be used to restore scanned photos.
Removing Dust, Stains, and Smudges
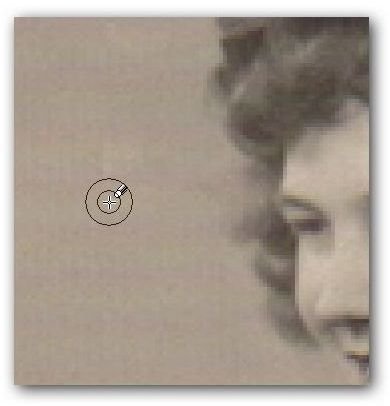
No matter how good the quality of the original photo is, there’s likely to be small smudges or dust marks in the scanned version. If the smudged or stained area is large, it’s usually best to try to remove it using the Clone Brush in the same way described in the last section. However, if there’s just a scattering of several small smudges and stains (try saying that three times fast!) on the photo, there’s a much faster and easier way to get rid of them with the Blemish Fixer. (For more details on how to use this tool, see this tutorial on Paint Shop Pro’s Blemish Fixer .)
All you have to do here is select the Blemish Fixer, zoom in on the areas of the photo that have dust marks or stains, adjust the size of the brush for that particular flaw, and click.
Here’s what the photo looks like at this point with all the major smudges and marks removed.

Grainy Backgrounds
Another problem that you run into a lot with scanned copies of older photos is grainy, noisy backgrounds. While you can try to use a noise reduction tool to get rid of this, that choice may yield some mixed results and may even take away details from the subjects in the photograph.
One thing that you can try instead is Paint Shop Pro’s Soften Brush. This tool will smooth edges and reduce contrast in the areas to which it is applied. You can access this brush from the side panel tool bar.
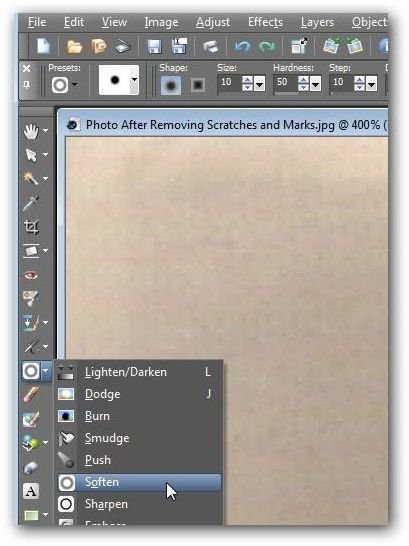
Once you select the tool, make any desired changes, such as size and shape, to the brush and then use it to paint across the background of the photo.
Depending on the photo you’re restoring, you may want to pass over certain areas several times with the Soften Brush to achieve better blending. Below is the photo after applying this effect.
From here, you can make any other desired changes to the image, but since the goal for this editing project was to retain as much of the original photograph as possible, I’ll stop here. Both the original and the final photo are shown below so you can take a quick glance to see the results of these modifications.
Additional Resources: For more tips and tricks, be sure to check out the other Paint Shop Pro tutorials found here on Bright Hub’s Digital Photography Channel. Also, if you have several digital photographs that you’d like to restore, you may want to look into specific plugins like AKVIS Retoucher that have been developed to help speed up and simplify the restoration process.


