If you’re tired of repeating the same actions over and over again when editing digital photographs in Paint Shop Pro, you can create a script that will do the work for you. In this tutorial, we’ll give detailed instructions for creating and running scripts in Paint Shop Pro.
Paint Shop Pro Scripts
A Paint Shop Pro script is a prerecorded (or preprogrammed) set of actions that can be executed as a single command. In other applications, scripts are often called macros or macro scripts. Whatever the name, the function is the same. That is, if you find that you are performing the same group of editing tasks over and over, you can record a script so that you don’t have to walk through all the gory details of every single step each time you want to edit a photo.
There are lots of variations of script creation in Paint Shop Pro, but this tutorial is going to look at one of the most basic methods – recording a simple script. We’ll also show how you can run scripts, either ones you create or ones you obtain from other sources, in Paint Shop Pro.
How to Record a Script in Paint Shop Pro
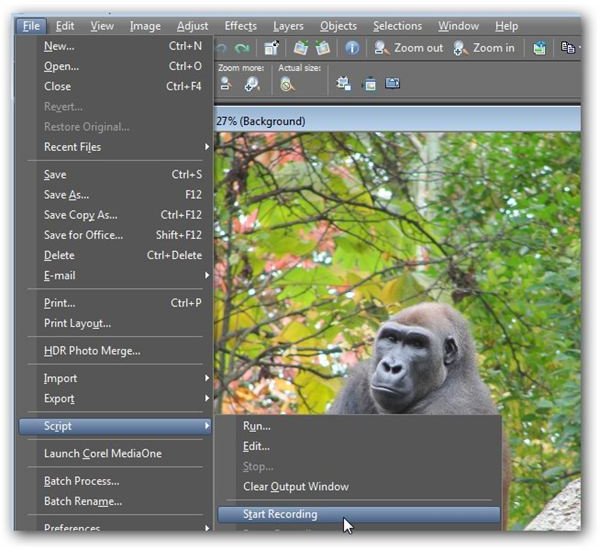
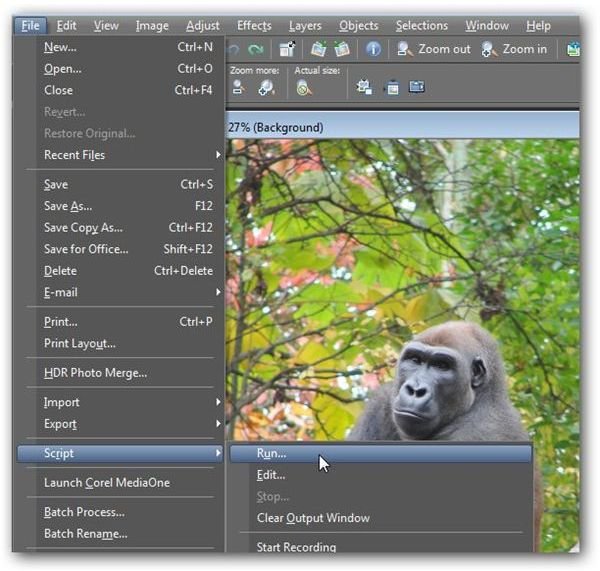
Step 1: From the File menu on the main Paint Shop Pro toolbar, select Script and then choose Start Recording. (Click any image for a larger view.)
Step 2: Perform all of the actions that you want the script to include. For instance, if you want a script that will remove purple fringing and then resize the photo to have a width of 800 pixels, perform each of these functions as you normally would in the proper sequence.
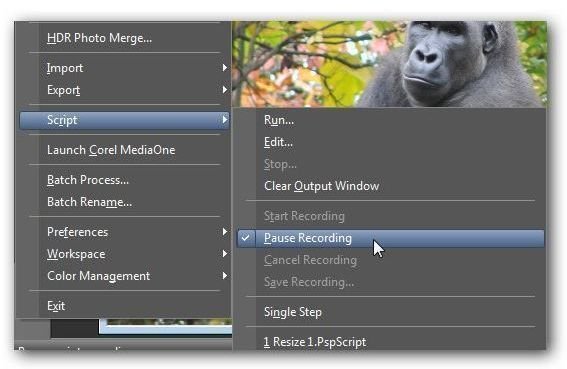
Make sure that you don’t execute any of commands that you don’t want included in the script. If you do have to perform an editing action that you don’t want saved as part of the script you can pause the script recording from the Script submenu of the File menu.
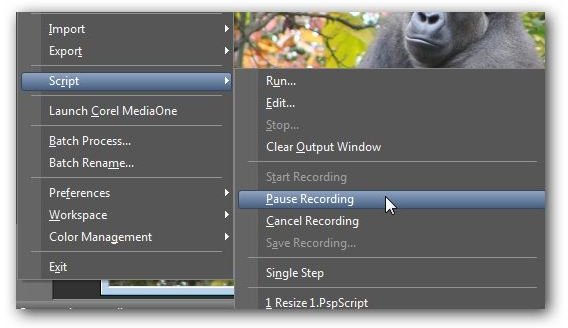
Then, when you’re ready to continue recording the script again, you can select this same option to remove the check mark in front of the Pause Recording command.
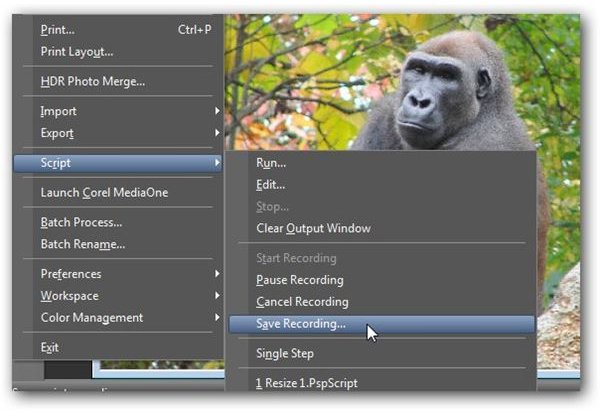
Step 3: After you’ve completed all of the actions for the script, select Save Recording from the Script submenu of the File menu.
A Save As dialog box will appear prompting you to enter a name for the script to be saved. Make sure you’re in the directory where you want the script to be saved, and enter the name you wish to use here.
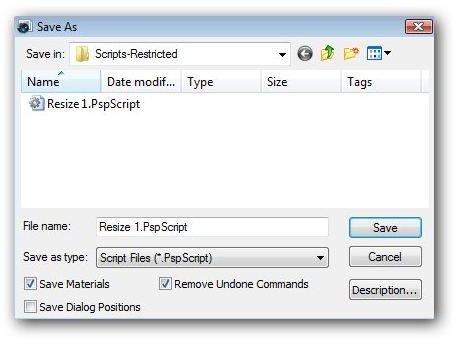
If you want to enter more detailed information about the script, click the Description button. Another dialog box will pop up where you can enter notes for Author, Copyright, and Description. You don’t need to worry about this so much if you only plan to use the script for your own personal projects. However, if you plan to share the script with others, it’s a good idea to fill this information out as completely as possible.
Additionally, there are three options that you can choose for the script you are saving at the bottom of the Save As dialog box:
Save Materials – Check this box if you want to use the same Materials Palette settings for future edits as you did for editing this particular photograph. If your script doesn’t contain any actions by a tool used in conjunction with a material, it doesn’t matter if you select this option or not.
Remove Undone Commands – During the script recording, if you made a mistake and used the Undo command to delete an action, you can select this command to remove those actions from the script. This is helpful to make sure that the script is as efficient as possible. However, if part of your script intentionally included an Undo command, make sure this box is unchecked.
Save Dialog Positions – If you select this option, interactive dialog boxes associated with script commands will be displayed in their recorded position during the script’s execution.
Step 4: Once you’ve made all of your choices from Step 3, click the Save button to save the script.
How to Run a Script in Paint Shop Pro
Once you’ve created a script or acquired one from another source, you can run that script using these steps.
Step 1: Open the digital photo to which you want to apply the script in Paint Shop Pro.
Step 2: From the File menu on the main toolbar, select Script and then choose Run.
Step 3: Locate the directory containing the script and select it. Click the Open button.
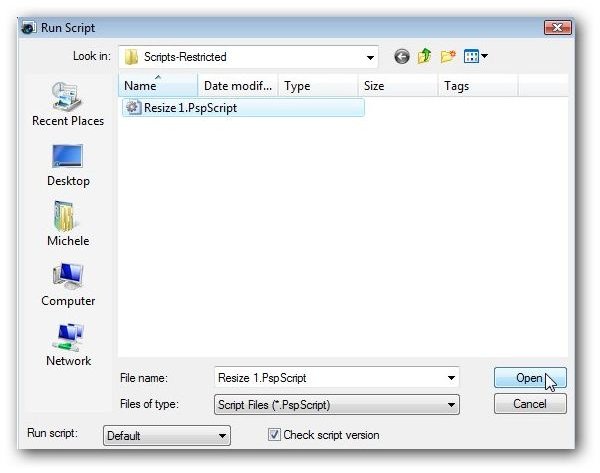
Sit back and let the script run. Note that, depending on the actions included in the script, you may have to click a few buttons as the script executes. For example, if part of your script includes resizing a photo, the Resize dialog box will appear on your screen with prefilled settings and you will have to click the OK button to continue.
Additional Resources: For more tips and tricks, be sure to check out the other Paint Shop Pro tutorials available here on Bright Hub’s Digital Photography Channel.


