
Corel Paint Shop Pro Photo X2 has a built-in tool that lets you easily fix purple fringing problems in digital photographs. In this tutorial, we’ll show how to use the purple fringe removal tool and talk a little about its limitations.
Purple Fringing and Digital Photos
One problem that pops up fairly often in digital photographs is the presence of purple halos or fringes around the edges of certain objects in the photo. Although there is some debate over what causes purple fringing , the problem isn’t that hard to fix in most photo editing applications. In particular, Paint Shop Pro has a special tool devoted solely to removing purple fringing effects. In this tutorial, we’ll explain how to access and use this tool.
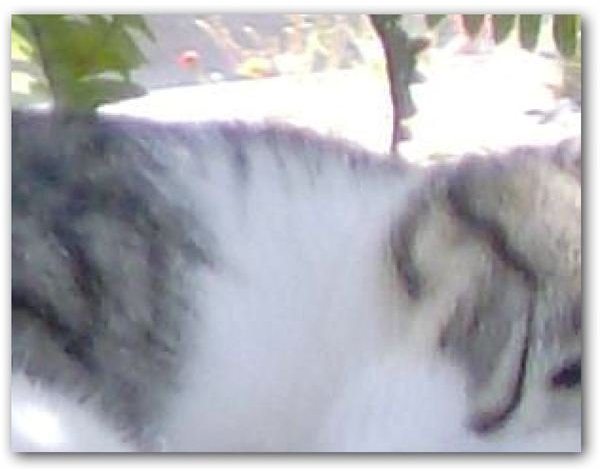
First, let’s take a look at an example of a digital photo with purple fringing. My mother sent me the photograph shown below of one of her cats sleeping on the brick dividing wall on her front porch. (Click any image for a larger view.)
You may not be able to see the purple fringing at first, but if you zoom in a little closer, you’ll notice the purple halo on the edges of the cat’s neck and back.
We want to be able to get rid of these purple tones without affecting the rest of the photo.
Removing the Purple Fringe
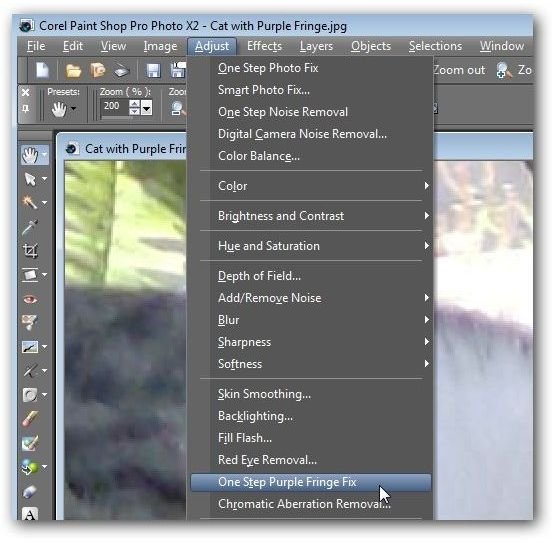
As we mentioned earlier, Paint Shop Pro has a special tool for removing purple fringe from digital photos. Aptly, it’s called the One Step Purple Fringe Fix tool since it literally removes the problem areas with just a single mouse click.
To access this tool, open the Adjust menu on the Paint Shop Pro main toolbar and select One Step Purple Fringe Fix.
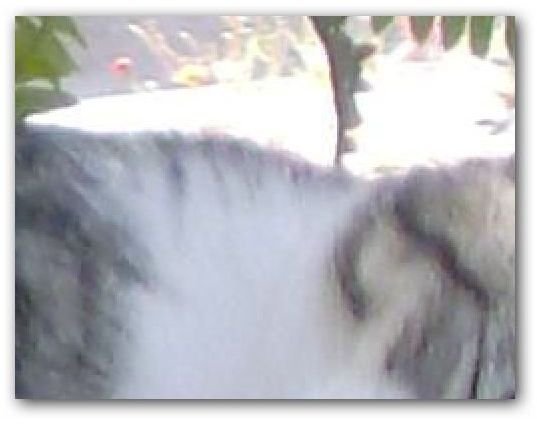
It may take a few moments for this action to process, depending on the size and complexity of your photo. While processing, you won’t see any changes taking place. But, when the action is complete, most (if not all) of the purple halo should be gone without any other changes being made to the photo. The image below shows our original photograph after using this tool.
Tips for Best Results: The purple fringe removal tool in Paint Shop Pro works much better when applied directly to the original photograph. So, if you plan on cropping , resizing, or editing the photo in other ways, wait to do so until after you’ve applied the purple fringe fix.
For more tips and tricks, be sure to check out the other Paint Shop Pro tutorials found here on Bright Hub’s Digital Photography Channel.


