The Emboss brush in Paint Shop Pro allows you to give texture to selective areas in a digital photograph. In this tutorial, we’ll explain how to use this tool and give a few tips for working with it.
What Does the Emboss Brush Do?
Technically, the Emboss brush in Paint Shop Pro removes the color from a selected area in a digital photograph and emphasizes the edges in that same selection by outlining them in black. In terms of visual appearance, this tool gives a raised (or embossed) look to the area in which it is applied. This makes it a great tool to use when creating your own textures for other photo editing projects or for emphasizing an area in a single image.
Although the Emboss brush can be used to create a variety of effects, this tutorial will focus on one particular application. We’ll use this tool to create a special texture based on one object in a digital photograph and then blend it in with the original photo to make the final image look more natural.
Using the Emboss Brush to Give Texture
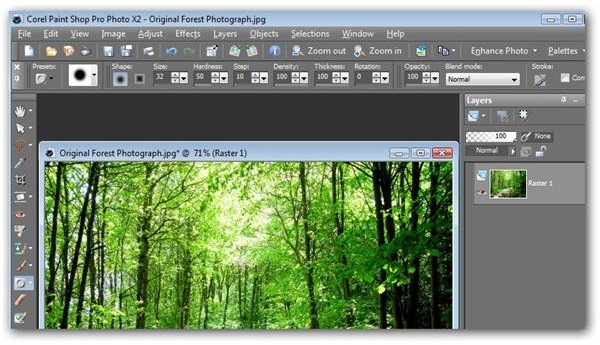
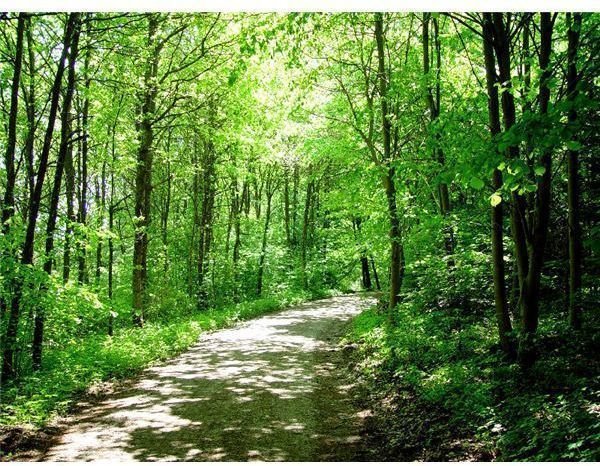
We’ll start out with the photo of a forest path shown below. Our goal is to isolate the path and modify it so that it appears to be made of stone instead of dirt. (Click any image in this article for a larger view.)
The first thing we want to do is make sure that the layers palette is visible. If you haven’t done much work with layers or if you need a quick refresher, take a look at this series on using layers in Paint Shop Pro .
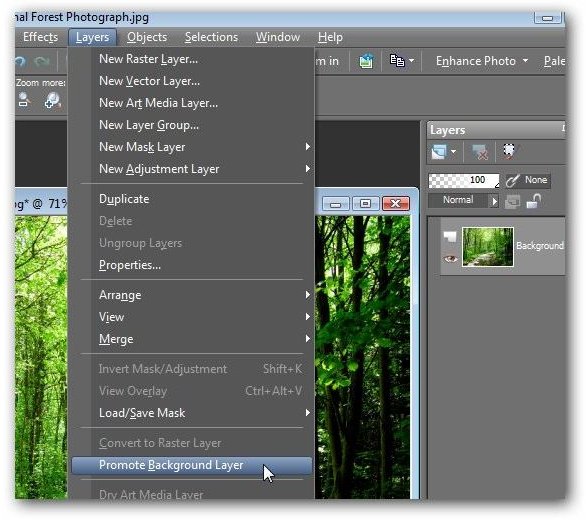
Next, if you haven’t already done so, promote the background layer to a full raster layer. Later in the tutorial, we’ll be moving layers around, and a background layer cannot be moved unless it is first converted to a full layer.
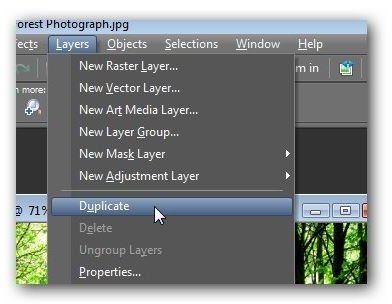
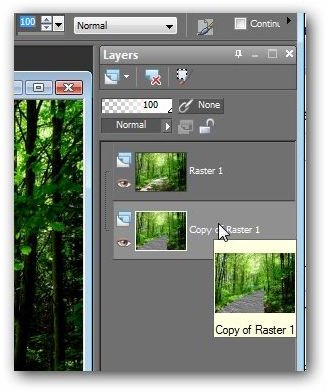
Now, we want to create a copy of this original layer to work on. To do this, select Duplicate from the Layers menu on Paint Shop Pro’s main tool bar.
Finally, we can start working with the Emboss brush. This tool is located in the brush section that is about in the middle of Paint Shop Pro’s side tool bar (the same area as the Dodge and Burn brushes ).

Once you’ve selected this brush, a new tool bar will appear underneath the main one at the top of the Paint Shop Pro interface. Here, you can modify the settings for the Emboss brush. If you haven’t spent much time working with brushes before, these various options can seem overwhelming at first. However, the default settings work just fine most of the time. You may want to change the Size of the brush depending on the photo that you’re editing, but keep the other values as they are for now.
Now, with the Emboss brush selected, we want to paint over the path in the layer marked as a copy of the original photo. This is basically like “decoloring” that area of the photo while introducing the texture. If the first pass of the Emboss brush doesn’t give you as much texture as you’d like, you can always color over it a second time.
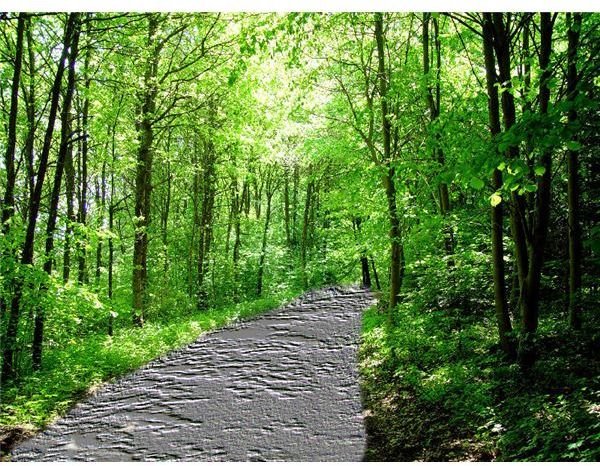
Here is what our photo looks like after applying the Emboss brush to the path.
Continue on to the next page of this tutorial to find out how to blend the results of the Emboss brush with the original image to obtain a more natural looking photo.
Blending the Layers
The path definitely has some texture now and is starting to look more like stone than dirt. The big problem, though, is that the photo doesn’t look blended or natural at all. In fact, it looks just like someone roughly colored over the path in a random manner (which is basically what we did). To make this all look more natural, we’re going to blend it with the original photo.
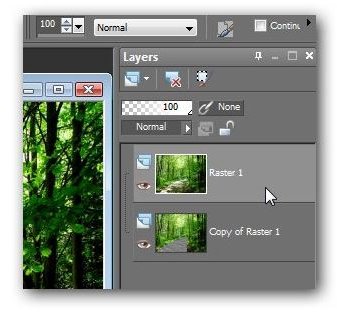
The first thing we need to do to achieve this blending is to switch the layers around. In the Layers palette, click on the Copy layer that we just modified and drag it below the layer containing the original photo.
With the original image acting as the current top layer, we no longer see the changes we made to the copy. Now, make sure that this new top layer is selected in the Layers palette.
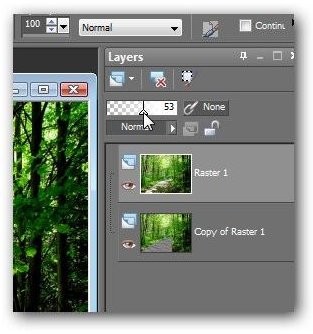
We’re now going to adjust the Opacity of this layer, making it semi-transparent. Since the path is the only part of the digital photo that is different in each layer, the rest of the photo will remain unchanged as we modify the Opacity. However, the areas that represent the path in both layers will start to blend together.
The Opacity can be adjusted by moving the slider located in the Layers palette. You can continue making adjustments until you get the blending that is right for your photo. In this particular case, an Opacity of about 53% seemed to do the trick.
Now we can merge the two layers back together and end up with the photo shown below.
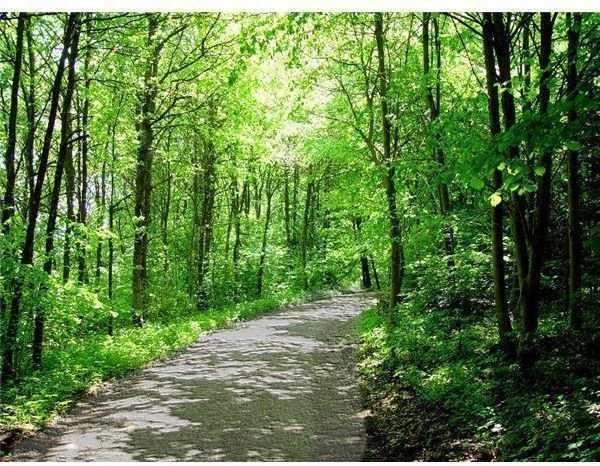
Even though this was just a very minor change to the photo, there’s quite a difference when you compare the two images side by side. The final image is a little less rustic looking and seems more like a photo of a section of a city park whereas the original photo has a more “nature trail” appearance. This is yet one more example of the power of digital photo editors.
Additional Resources: For more tips and tricks, be sure to check out the other helpful articles in Bright Hub’s collection of Paint Shop Pro tutorials here in the Digital Photography Channel.


