The chrome effect in Paint Shop Pro can be used to turn digital photographs into artistic images with metallic overtones. In this tutorial, we’ll explain how to use this effect and show some examples of its application.
What Does the Chrome Effect Do?
The chrome effect found in Corel Paint Shop Pro Photo X2 is just one of the software’s many tools that allow you to create artistic renderings from digital photographs. This particular effect can be used to achieve a metallic look in the image as if it were painted on a chrome surface.
Although the chrome effect is one of the simpler features to use in Paint Shop Pro, a wide variety of results can be achieved with this tool. Once you’ve practiced with it a bit, you can even combine it with some of the other artistic effects in the software to achieve some truly unique images.
Applying the Chrome Effect
First, open the digital photograph that you want to use as a basis for your project in Paint Shop Pro. If you plan on cropping or resizing the photo, now’s the time. Applying effects to an image file can be a slow process even if you have a powerful PC. So, if you plan to make the final image smaller anyway, it will save some waiting time to do that first.
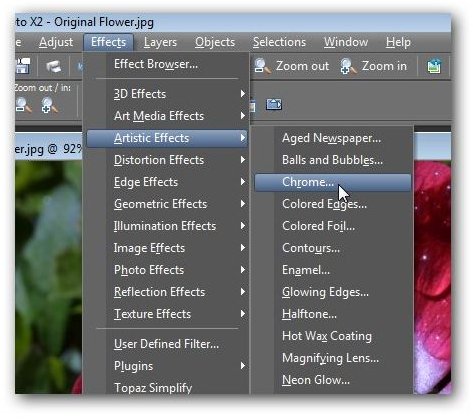
Next, from the Effects menu on Paint Shop Pro’s main toolbar, select Artistic Effects and then Chrome. (Click any image in this article for a larger view.)
This will bring up the Chrome effect window as shown in the screenshot below.
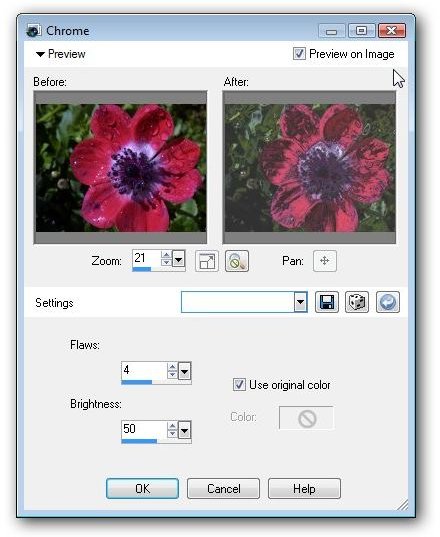
Although there are Before and After images in the Preview area of this window, they’re fairly small and may not give you as much information as you’d like about the changes you are making. If so, you can put a check in the box next to Preview on Image to see how the modifications are progressing on the actual photograph in the main Paint Shop Pro interface.
If you want to keep the original color scheme of the digital photo, put a check in the box next to Use original color. Otherwise, you can leave the box unchecked and select a single color to be used on the image.
The other two options you can modify here are Flaws and Brightness. Higher Brightness values will lighten the image and, conversely, lower ones will make it darker. The Flaws option will determine how many “folds” will appear in the final image. A fold is basically a transition from a light area to a dark area. So, increasing the number of Flaws generally makes for a more complex image with lots of color shifts. To see exactly how this affects a particular photo, experiment a little and try out some different settings.
When you’ve finally decided on a combination of settings that you like, click the OK button and the changes will be made to your photo. If you’re modifying a large image or using an older PC, it may take a few moments for the effect to be applied.
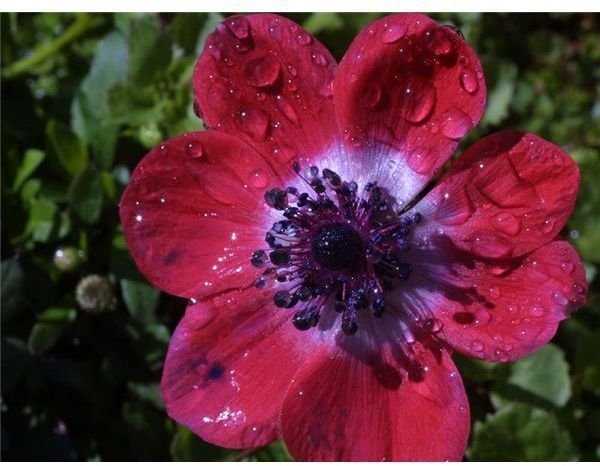
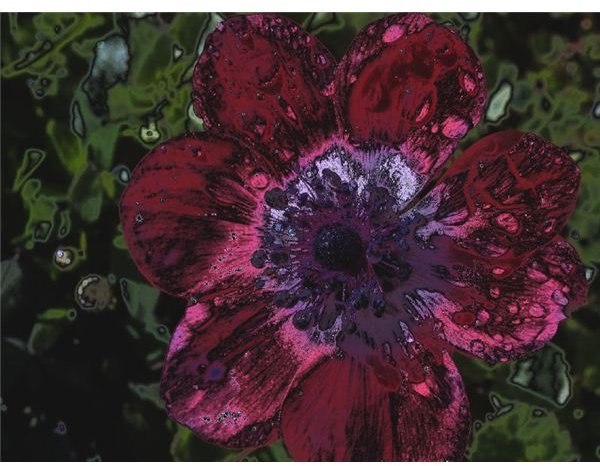
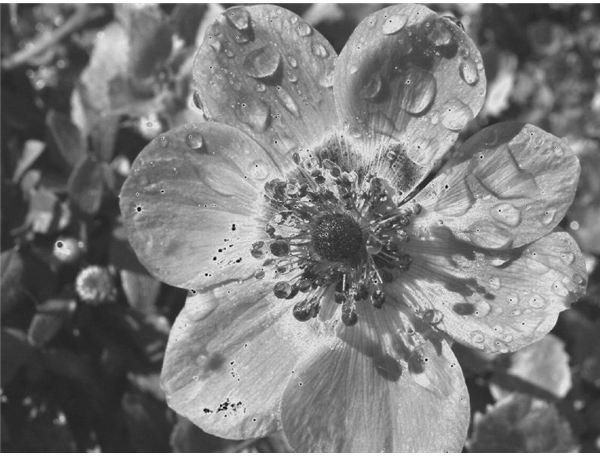
Below, you can see the original photo as well as a couple of possibilities resulting from applications of the chrome effect.
Additional Resources: For more tips and tricks, be sure to check out the other articles in Bright Hub’s collection of Paint Shop Pro tutorials here in the Digital Photography Channel.


