One quick and easy way to give a special effect to a digital photograph in Paint Shop Pro is to apply a mask layer to the image. Read on to find out the steps required for this process.
Working with Masks
Masks are a special type of layer in Paint Shop Pro that can be used to create a number of stunning effects when applied to a digital photograph. (For a more detailed description, see Layer Types in Paint Shop Pro .) While it is possible to create your own masks, there are a number of standard masks that come bundled with the Corel Paint Shop Pro Photo X2 package ready to use in your photo editing projects.
How to Apply a Mask in Paint Shop Pro
Step 1: Open the photograph that you want to edit in Paint Shop Pro. Perform any other editing techniques, such as cropping or resizing, needed to prepare the image before applying the mask.
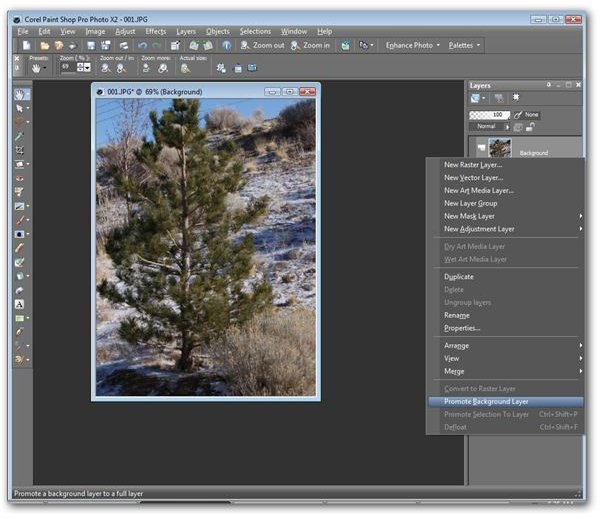
Step 2: Make sure that the Layers palette is visible and promote the background to a full raster layer. For more detailed information on how to perform this step, see the article Editing a Digital Photo Using Layers in Paint Shop Pro .
(Click any image for a larger view.)
Step 3: From the Layers menu on Paint Shop Pro’s main toolbar, select Load/Save Mask and then Load Mask from Disk.

Step 4: In the Load Mask from Disk window that appears on your screen, click on the image in the Mask section of the window. This will open up a new window containing all possible mask selections.

Click on the mask you wish to use.
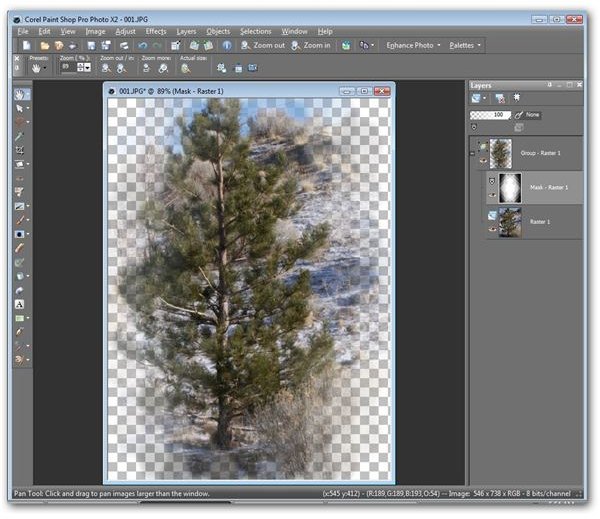
Step 5: Change any of the other items in this window to suit your preferences. All changes made can be seen in the Preview area of this window before you apply them. When previewing the mask, note that the darker parts of the mask will be hiding those areas of your photograph. Similarly, the lighter parts of the mask represent the areas of the photograph that will be visible after the mask’s application.
When you’ve finished making changes here, click the Load button to apply the mask.
Unfortunately, there isn’t an option here that will allow you to preview the mask directly on the image. However, there’s always the Undo button! Feel free to experiment, and if you don’t like the results, just click the Undo button and start again.
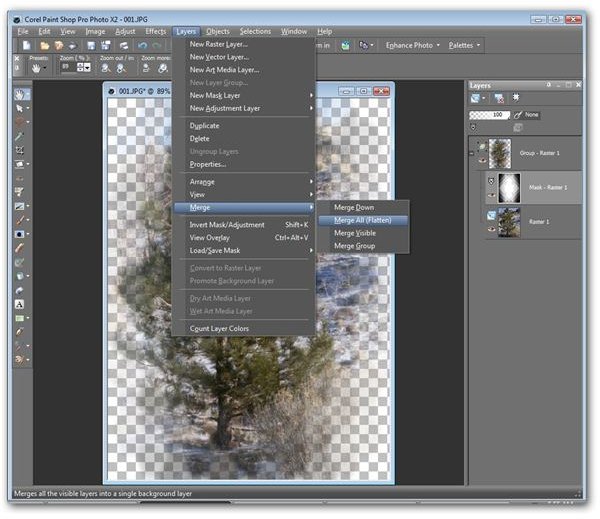
Step 6: From the Layers menu on the main toolbar, select Merge and then Merge All (Flatten) to convert your photograph back to a single background layer which can then be saved to a JPEG file.
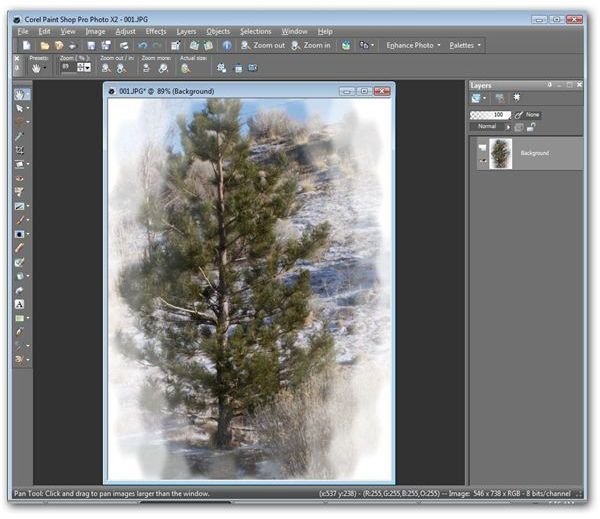
The screenshot below shows how the final image would appear in Paint Shop Pro.
To find out more about the other tools and features in Paint Shop Pro, be sure to browse through the Digital Photography Channel’s collection of user guides and tutorials .


