
In this photo editing tutorial, you’ll learn how to apply very realistic looking tattoos to your subject.
Ever wonder what you’d look like with a tattoo? Thinking about getting a tattoo but can’t decide where it would look the best? Perhaps you are the tattoo artist and a potential customer would like to see their own design on their own body. Whatever the case may be, with Corel Paint Shop Pro Photo you can very easily – not to mention, painlessly – add a tattoo to your body.
Give Yourself a Tattoo
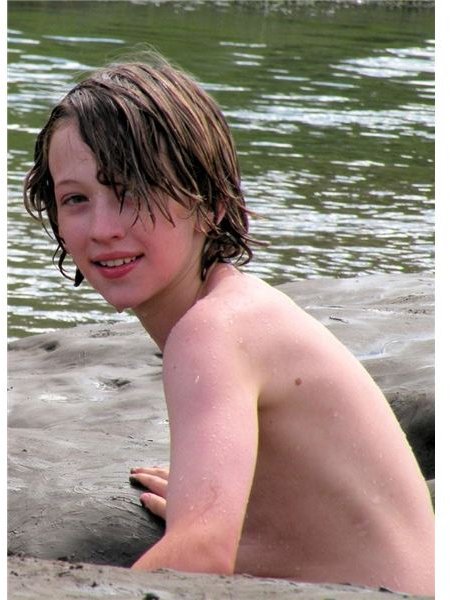
Step 1: Open both images, the one you’ll be “tattooing” and the tattoo itself (for easy reference, we’ll call the former “Izaac.jpeg” and the latter “Tiger.jpeg”).
Tip: To find images that make great tattoos, search the internet for free tattoo designs. If you’re blessed with an artistic flare, try drawing your own and then scanning it onto your computer.
Here are the images I’ll be using:
(Click on images to enlarge)

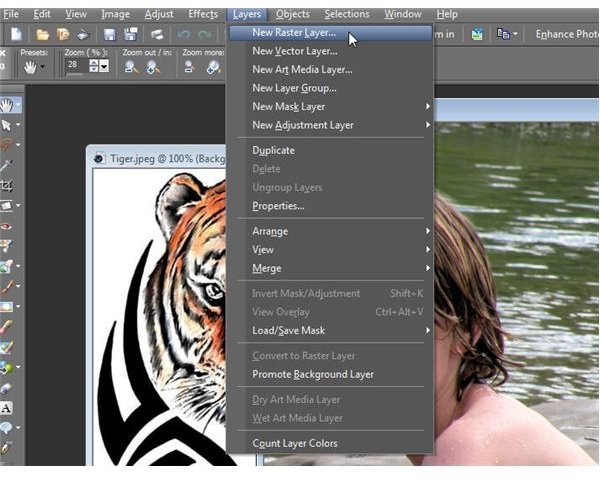
Step 2: Making sure Izaac.jpeg is your active image (when you click on an image, it will become your active image), create a new raster layer by choosing Layers>New Raster Layer…
(For more information on layers, please read Layer Types in Paint Shop Pro )
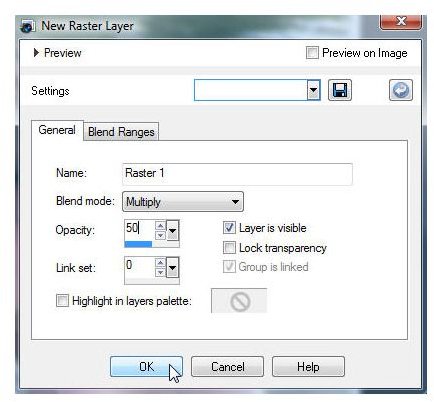
A window will open called New Raster Layer. Set the Blend Mode to Multiply and the Opacity to 50. Click OK when done.
Step 3: Make Tiger.jpeg your active image and press Ctrl + A to select all and then Ctrl + C to copy the image.
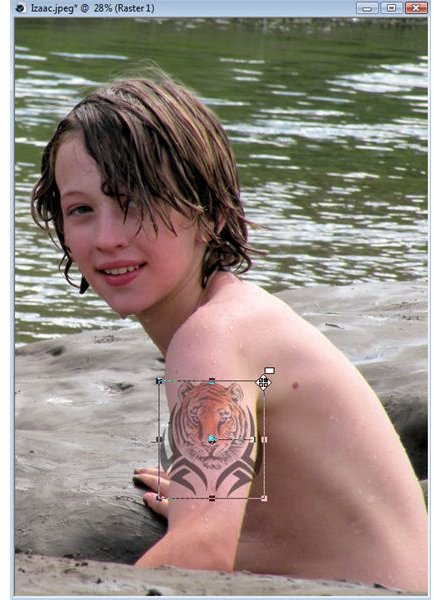
Step 4: Go back to Izaac.jpeg and press Ctrl + E on your keyboard to paste the copied tiger image as a new selection. Move the image to where you’d like it placed and click your mouse to “drop” it.
Step 5: Don’t panic if your tiger is showing a white background. Simply press Ctrl + D on your keyboard to unselect it.
Press D on your keyboard to activate the Raster Deform tool. You can now resize, reshape or rotate the tiger to your liking.
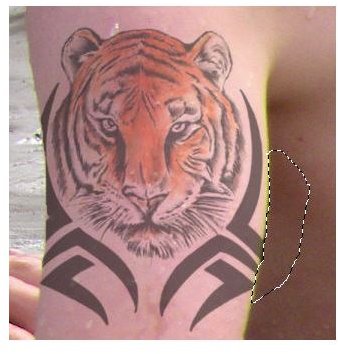
Step 6: As you can see from the screenshot above, part of the tiger design sticks out further than Izaac’s arm. To get rid of this, simply click on the Freehand Selection Tool (located in the toolbar on the left, it’s the one that looks like a lasso) and draw around the unwanted part. It may be easier to do if you zoom in first, but also keep in mind that your selection doesn’t need to be perfect, as the Izaac.jpeg will not be affected, only the Tiger.jpeg will be.
Once selected, press Delete on your keyboard. Repeat on the other side of the arm.
Step 7: Go to File>Save As…, rename the photo and choose the location you’d like the image to be saved to. When you click OK, you may be presented with the following screen…
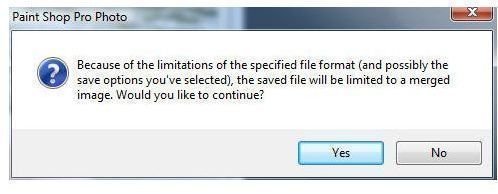
…click OK. Your image won’t be ruined, it’s simply “sticking” the background and raster layers together.
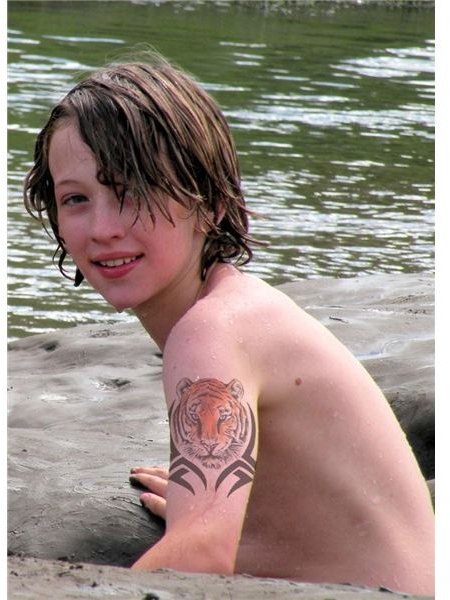
Before & After
Additional Tutorials
Did you find this tutorial helpful? Bright Hub’s Digital Photography channel has several Paint Shop Pro tutorials ideal for beginners and advanced users! You’ll find resources on everything from using layers to reviews of the best free plugins compatible with Paint Shop Pro by visiting our master list of Paint Shop Pro tutorials and resources .


