Want to have a little fun with pictures of your family and friends? Got a picture of your bare-chested friend who could use a little punch of testosterone in the form of chest hair? By following these simple steps, you can easily use Photoshop to change that smooth-chested pal into a manly man!
Creating a Chest Hair Brush
First and foremost, we need to create a Photoshop chest hair brush. And we want it to look kind of realistic, right? Believe it or not, this is actually an incredibly easy step. Go ahead and open Photoshop (and don’t worry, this method should work well for everyone using Photoshop from version 7.0 all the way through the current version).
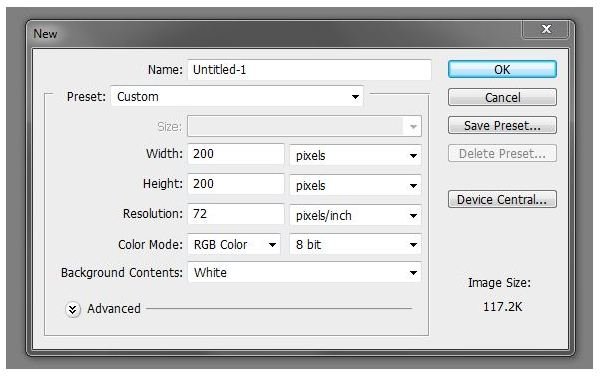
Create a new document, and make it somewhere around 200 pixels by 200 pixels. If your photo is really large, you’re going to want to make it bigger, but if your photo is smaller, we can always use Photoshop to make the brush smaller without loss of quality.
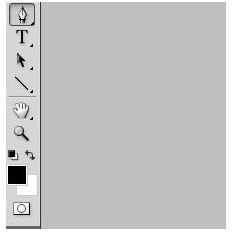
Grab your Pen Tool, which is a fairly nifty little tool if you haven’t already taken a look at it . The keyboard shortcut for the Pen Tool is P. After you have selected your Pen Tool, tap D on your keyboard, which sets your foreground colors to their defaults - black and white.
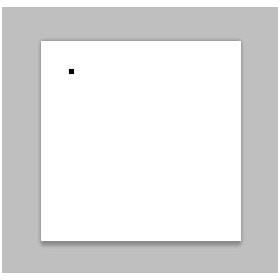
Now, start off by clicking one point on your canvas. You should see a small anchor point (a tiny gray box where you clicked).
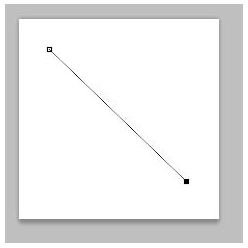
Click another point like I have done. The goal is to keep them fairly far apart and slightly diagonal from each other. You’ll see that these two points have been connected by a very thin gray line. This line is called a path.
Now, click somewhere near the center of your path. A third anchor point will appear, and it will be flanked by small circles on either side.
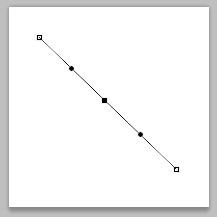
Holding down the Shift key on your keyboard, drag your center anchor point to create a curve. No need to get too extreme, just a nice, natural curve.
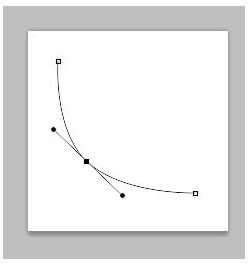
Feel free to grab the other anchor points and create a more or less curved curve, and remember that if you pull on the circle (toggles) surrounding the center anchor point, you can change how gradual your line curves, as well as the angle. Here’s an example of one I’ve done!
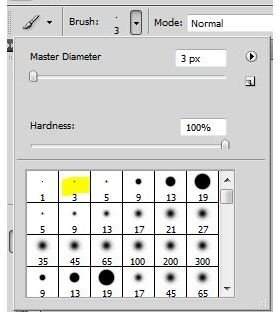
Now that we’ve got the shape of our chest hair defined, let’s go ahead and make it a real brush. Press B on your keyboard , and in the brush selection window, grab your default 3 pixel hard edged brush. Here’s where it is located on the standard brush menu in CS4.
Now tap F5 on your keyboard, which will open your brushes window. Here’s where the magic starts. Simply click on Shape Dynamics. Under Size Jitter, set your control to Fade, and enter 150 in the box directly after it. That’s it!

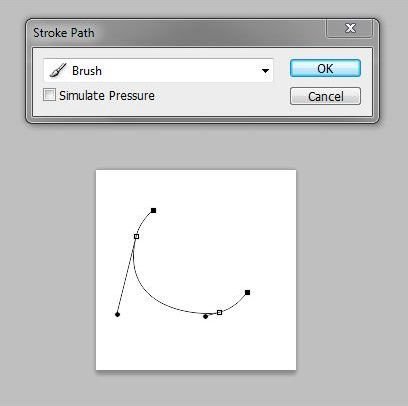
Now tap P on your keyboard to select your Pen Tool again. Right click on your canvas near your selected curve, and select Stroke Path.
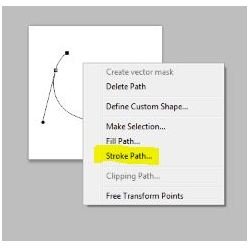
Make sure that “Simulate Pressure” is unchecked, and press OK.
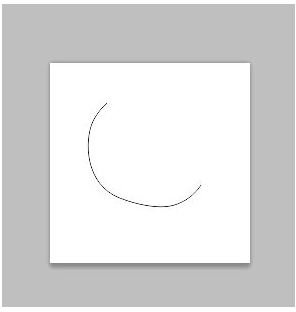
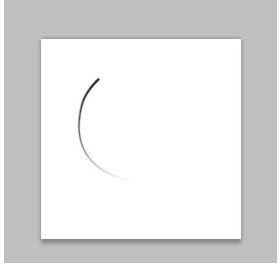
Now here’s your eerily realistic looking chest hair brush!
To save your brush, simply go to Edit > Define Brush Preset. Make sure you name your brush something like “Chest Hair” so you don’t forget what it is!
Creating a Hairy Effect
Now to create an almost too realistic effect with this brush, we’ve got to do a little more tampering with the brush. Go ahead and find the brush you just created in your brush selection menu. It’ll usually be the very last brush in your menu.
Now press F5 on your keyboard - yes, again! Go into Shape Dynamics and change the following settings:
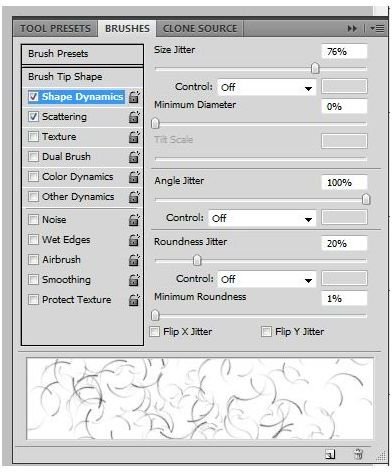
Size Jitter: 75%
Control: Off
Angle Jitter: 100%
Control: Off
Roundness Jitter: 20%
Control: Off
Minimum Roundness: 1%
Now go into Scattering and change these settings:
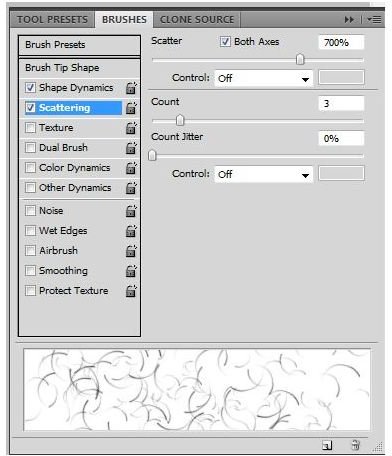
Scatter: 700%
Both Axes: Checked
Count: 3
Count Jitter 0%
Control: Off
Applying the Hair
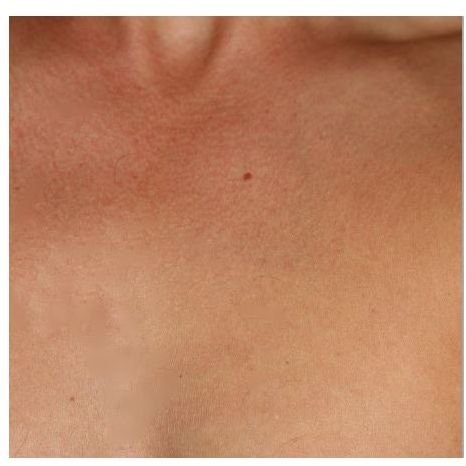
Now all you have to do is open up a picture you would like to add a bit of chest hair to! Here’s what I’m starting with. It’s kind of funny that I actually had to Photoshop out a few chest hairs just to put some on!
Simply choose a color for your brush that is close to the natural hair color of the person you are adding the hair to. I’m going to go with a dark brown, here!

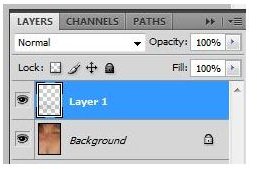
I prefer to make a new layer for the chest hair, just in case I want to change the layer blending mode - though with this effect just using the brush straight up doesn’t look bad either!
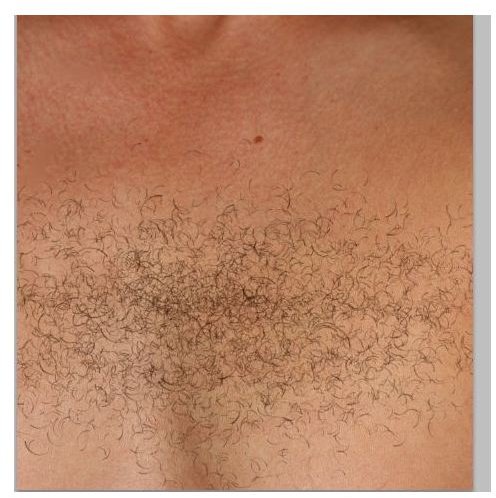
Now sweep the brush across the persons chest in whatever hair pattern you would like. Here’s what mine looks like! I hope you have fun with this silly effect!
References
-
All screen shots and information are provided by Amber Neely, who has over a decade of experience with Photoshop, and seven years professional experience in graphic design.
Bare chest: Day 288 by Bruce - which is licensed under a Attribution 2.0 Creative Commons License .


