Image editing software often presents a heaven or hell dilemma, depending on how familiar you are with it. Photoshop Elements 9 is a joy because of all the creative and easy tools you can use to enhance your photos. These Photoshop Elements tips will have you editing like a pro in no time.
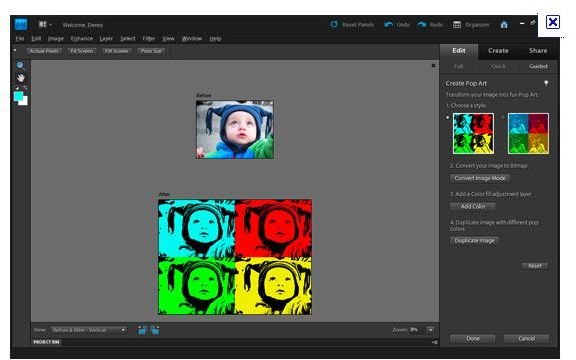
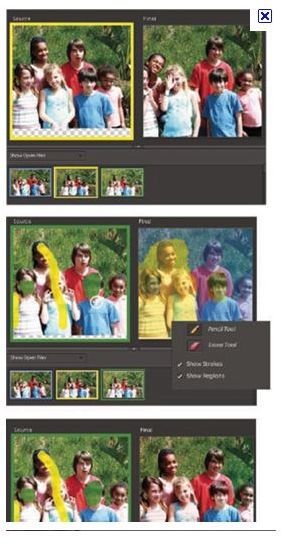
Create the “Andy Warhol” Effect.
Andy Warhol is synonymous with pop-art. Use guided edits on Photoshop Elements 9 to produce this silk-screen effect:
- Click Edit.
- Click Guided.
- Click on Pop-Art.
- Choose the style you want by clicking on one of the choices displayed.
- Now click Convert Image Mode.
- Click Add Color.
- Click Duplicate Image and Photoshop Elements generates four-color versions all in one composite image.
Go Out of Bounds With 3D
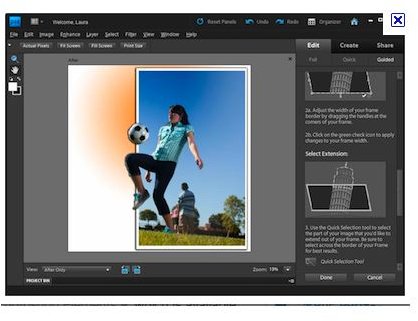
Create this cool 3D effect by taking a portion of your photo and putting it out of bounds.
- Open your photo.
- Click on Edit.
- Click Guided.
- Add your border.
- Hightlight the portion of your photo that looks like it’s coming at you.
- Add Shadow and Gradient.
- Click Done.
Create Black and White Photos From Color Photos
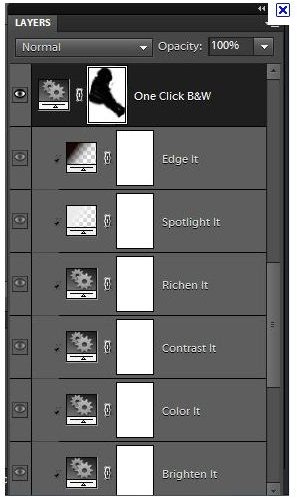
Easily create eye-catching black and white photos using the Enhancer tool.
- Open your image you want to convert to black and white.
- On the Enhancer menu, choose Convert to Black and White.
- You can choose a preset from the Select a Style list, or
- Use the Adjust Intensity sliders.
- Once you like what you see, click OK.
Remove Unwanted Clutter
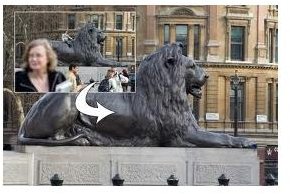
- Pull up your photo.
- Use your Healing Brush to brush away unwanted items or damage to older photos.
Use Photomerge to Fix Lighting Problems
-
Open two or more related images with different exposures and select them in the Project Bin.
Advertisement -
Use your Guided Edit mode and click Exposure under the Photomerge heading.
-
Use the tools to color the photo to your liking.
Advertisement -
After it’s the way you want, click Done.
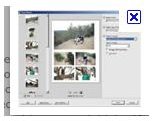
Create a Panorama

- Open the images you want to merge .
- Make any corrections or cropping on your photos before assembling the images.
- From the File menu choose New.
- Click Photomerge Panorama.
- Click Add Open Files button to use your images.
- If you decide to delete a file from the list, click Remove.
- Chose a Panorama Style from the Layout column.
- Once you have the images you want in the Source Files list, click OK for them to merge.
Create Your Own Studio Package
The Picture Package function creates a page with multiple copies of the same image, just like the ones you’d get after shelling out big bucks in a professional photographer’s studio.
- Open the file you want to select in the Project Bin.
- Click the Create tab in the Panel Bin.
- Click the Photo Prints button.
- From the Options menu, click Print Package.
- In the Select Layout drop down menu, select and layout and dimensions for your package.
- Click Fill Page with First Photo checkbox and include as many copies as will fit.
- Click Print.
Blend Your Photo With Your Text
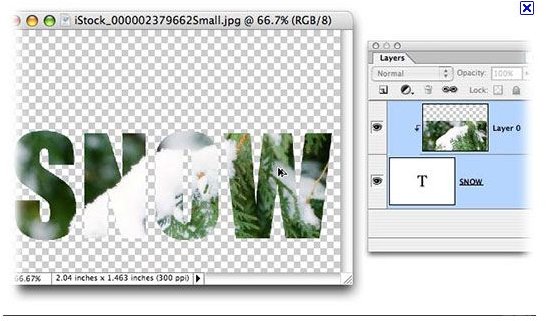
This awesome looking effect is simple to produce.
- Create your text and position the selection over the image you want to show through your text.
- Click Copy from the Edit menu.
- Copy the selection to the clipboard.
- From the File menu, choose New, then Image from the clipboard. Your text with image blend will show up in it’s own file.
Use the Color Curve Adjustment to Adjust a Photos Colors
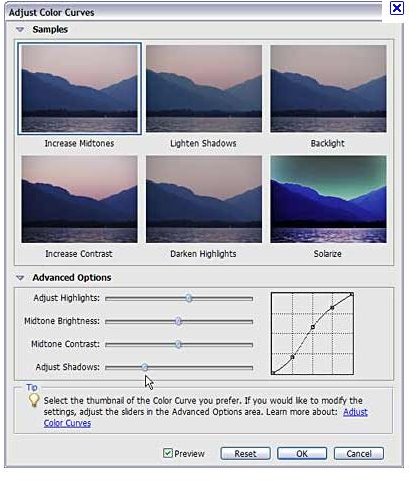
- From the Enhance menu, choose Adjust Color.
- Click Adjust Color Curves to open the Color Curve dialog.
- Clicking on the Styles on the left or,
- You can drag the sliders to manually tweak midtone, contrast, brightness or shadows. The points on the color curve represent each setting.
- Once you are done, click OK.
Partially Removing Color in Your Photo
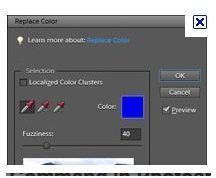
If you’ve ever watched reruns of the classic show from Keenan Ivory Wayans, In Living Color, one segment had a fabulous special effect. It was a comedy sketch based on classic film noir. The damsel in distress seeking help was photographed in black and white, while everyone else was filmed in color. You can duplicate this effect in your photos. It really makes the color image pop out:
-
Select the area of your image from which you want to remove the color.
Advertisement -
From the Enhance menu, click Adjust Color,
-
Click Remove Color.
Advertisement
Conclusion
You’ll be so thrilled with your enhanced photos you create using Photoshop Element tips, you just may want to show them off. Photoshop Elements 9 Plus, available for under $110 on Amazon , allows you to share your memories with your choice of animated templates. You can also add video and music to your photo show and have a public or private viewing of your gallery.
References
Source: author’s own experience.
Screenshots provided by author.


