Have you ever ended up with a take of an instrument that just sounds anaemic, dull and lifeless? The more you try to improve it the worse it sounds. In circumstances like these, panning, along with a couple of other simple can play a major part in helping you to bring that instrument to life.
Mixed Doubles
In our last article we looked at how panning can be used to thin out an otherwise over busy mix. This article addresses the opposite situation. Suppose that you have a recording that consists of perhaps just one vocal track and one acoustic guitar track. How can we fatten it up to make it sound fuller?.
The most common approach, especially by the relatively inexperienced, is to reach straight for your box of FX plug-ins and pile on dollops of compression and reverb. It may well be that you will end up using some effects in this situation, but they shouldn’t necessarily be the first thing you try. Your DAW software includes a number of interesting tools that you can use to control with precision exactly how your tracks behave in space, and that includes fattening them up. Why would you wish to yield that control over to some third party, off the shelf, sledgehammer plug-ins?
In this article, we’ll deal with the guitar track. We are going to double this track up and then apply different EQ and pan settings to each track.
You can use the technique outlined in our article Height as a Dimension of Sound to identify two key frequencies or frequency ranges for this instrument. One will likely be somewhere between 120 Hz and 300 Hz, the other somewhere between about 2,000 Hz and 5,000 Hz.
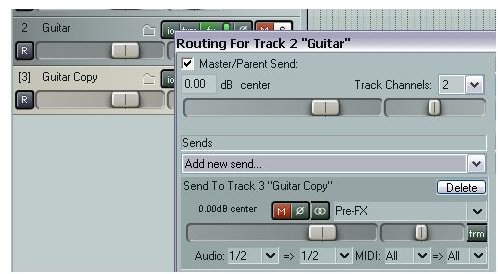
If you are using new generation software like REAPER , the easiest way to double up is probably simply to create a new track and then add a Pre FX send from the original track to the new one. The routing setup for this is shown in the first illustration.
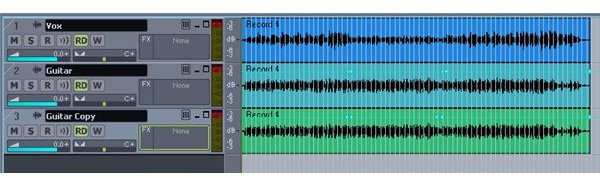
If you are using older generation software which doesn’t support this ‘kind of architecture, you will have to copy the track. For most DAW software this will mean copying the recorded media item as well. An example using Sonar is shown in the second illustration.
Hearing is Believing
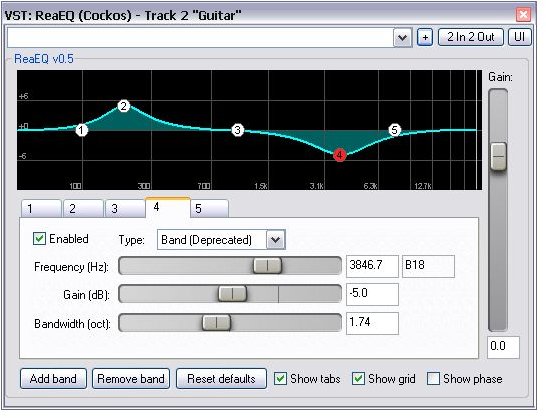
Next, pan one guitar track about 40% left, the other 40% right. Having identified your key frequencies, insert an EQ plug-in in each guitar track. On the first guitar track, increase the first frequency and decrease the second. Reverse this on the second guitar track, so that the EQ curve for this track will be the opposite of the first one. An easy way to do this is to just drag and drop the plug-in from the first track’s FX window to the FX button on the second track. This will copy the FX with its settings. You will then just have to adjust the two gain controls.
The EQ graph for your first guitar track will look something like that shown in the third illustration. For the second guitar track, the first of the two key frequencies will be lowered in volume and the second increased.
You can now play the tracks, making such adjustments as you think necessary to the pan, volume and EQ settings for both tracks. Your guitar should sound fuller and fatter than it did before. You should get visual confirmation of this by looking at the VU meters.
In our next article, we’ll look at a slightly more complex example which extends this technique.
Images
This post is part of the series: Develop Your Mixing Sense
A series of articles intended to help you develop your mixing sense. Includes tips and tricks on finding the right balance in your mix, fleshing out thin sounds and more.