Don’t get confused by having too many e-mail accounts on your Windows Phone - make sure you know what’s happening by adding Start screen tiles.
Too Many E-mail Accounts?
One of the biggest improvements in Windows Phone 7 over Windows Mobile is the ease with which e-mail accounts can be set up and accessed. Whether you have a Microsoft Exchange account , a Gmail account with IMAP access or an account with your ISP, these can be set up and accessed from your phone with ease.
In fact it is so easy to setup e-mail accounts in Windows Phone 7 that you might end up with a few too many of them cluttering things up. Alternatively you might require access to several accounts but have problems in finding them within the OS.
Adding an E-mail Account – Too Easy?
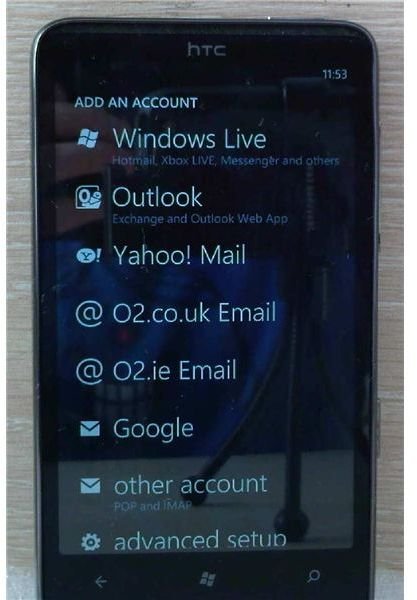
Featuring compatibility with a wealth of e-mail types and hosts, adding a new Windows Phone 7 e-mail account could be described as a bit “too easy”. All you need to do is go to Settings > Email & accounts > +Add an account and within a few moments of entering your e-mail address and password Windows Phone will have picked up your server details and configured your e-mail inbox!
As such, many users end up with three or more inboxes sitting on their phone’s Start screen or skulking around in alphabetical order in the Apps list.
While alphabetical order is perfect for indexing, it doesn’t make it any easier to find an e-mail account, so the best solution is to move your e-mail inboxes (or at least the ones you use regularly) to the Start screen.
If this hasn’t happened by default it is easy to do, and the tiles representing these accounts can be repositioned to meet your requirements.
Adding and Moving E-mail Tiles
When your e-mail account is configured in Windows Phone 7, it will be added to the Apps list – the screen you access by swiping left on your Start screen (or by tapping the arrow).
To add the icon as a tile to your Start screen, tap and hold and in the resulting context menu, select Pin to Start.
This will create a new tile for that e-mail account, and position it at the foot of your Windows Phone Start screen!
However, this isn’t ideal – when you tap the Start button on your phone, the first thing you see is the top of the Start screen. If you have a new e-mail that you want to read or you want to quickly send one, scrolling to the bottom of the screen might take a bit longer than is necessary.
The easy solution to this is to move the tile, which is easier than it sounds! First find the new e-mail tile on the Start screen, and again tap and hold. Rather than a context menu appearing, this time the tile will stay the same size while the rest of the Start screen appears to fall away. To move the tile, just tap and hold it, dragging the item to the position where you want it to sit on your Windows Phone Start screen.
When you’re happy with the position, tap the tile to fix it in place!
References
Screenshot by author
Source: author experience


