Need to get your iPhone photos onto a thumb drive? Don’t fret! I’ll walk you through how to transfer your pictures in no time.
iPhone Photo Capabilities
There is almost no limit to the things that an iPhone can do. The phone makes many things more convenient. With a 5.0 megapixel camera and 5x zoom, iPhone 4’s camera can take great digital photos, eliminating the need to carry around an extra device. Even iPhone’s earlier model, 3GS, has a 3.0 megapixel camera, which is still respectable. Taking great photos with iPhone would be useless if you couldn’t transfer the photos to a computer or thumb drive. We’re going to take a look at how you can get your iPhone pictures onto a thumb drive, making it easier to transfer the photos to another computer or get prints from your local photo developer.
Before Transferring iPhone Photos to a Thumb Drive
Currently, there is no way to transfer photos from iPhone directly to a thumb drive. They must be transferred to the computer, then to a thumb drive. Don’t worry, it’s only a few extra steps and we’ll go over them. Before transferring iPhone photos to a thumb drive you’ll need to sync to the computer . If you already have photos set to sync automatically, then you are almost ready to transfer your photos. If you do not have photos sync automatically, you’ll need to transfer your photos to your computer.
For a Windows PC, copy your pictures to a folder using the Photo Wizard
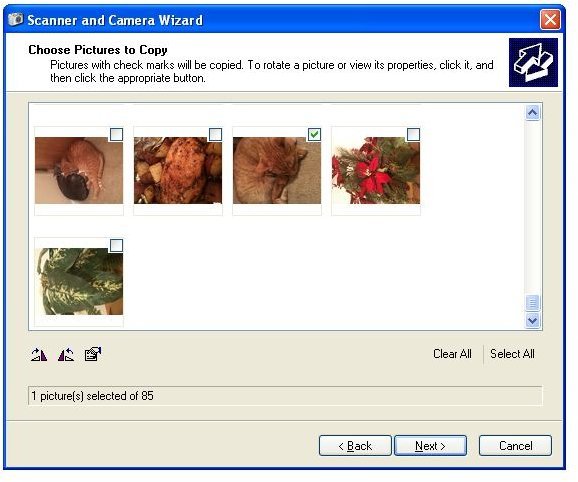
- Wait for the Apple iPhone Scanner & Camera Wizard to pop up, and press ok.
- Press next and select photos to copy to the computer.
- Press next, name the set of photos and select a folder destination.
- Press next, select “Nothing. I am finished working with these pictures.” and press next again.
- Click finish.
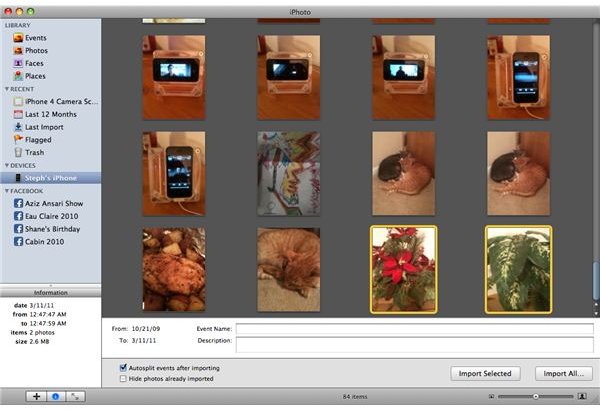
For Mac, import your pictures into iPhoto
-
 Advertisement
Open iPhoto.
-
Select your device along the left side of the screen.
Advertisement -
Select the photos to transfer to your computer and press “Import Selected” or select “Import All”.
How to Transfer iPhone Photos to a Thumb Drive
Once you’ve synced your iPhone and transferred your photos to the computer you’re almost done. Getting the pictures onto the computer is actually the hardest part. Transferring them to a thumb drive is simple. Have your computer and your thumb drive ready for the final steps.
For a Windows PC:
- Insert thumb drive to a USB port.
- Open to view files on the thumb drive.
- Open the folder on your computer that contains your photos.
- Drag and drop the photos you want transferred to the thumb drive folder OR right-click > Send to > Removable Disk.
For Mac
- Insert thumb drive to a USB port.
- Open iPhoto.
- Drag and drop photos you want transferred to the thumb drive icon. Double click the thumb drive icon if you wish to open to view files on the drive.
Sources and Image Credit
“iPhone User Guide.” Apple, www.apple.com
iPhone 4 image courtesy of Apple.
Screenshots provided by author.


