Many things have changed since the first Android stable SDK. One of these things is the way you install the SDK on your computer. Let’s see how to do it now!
Android Tools and SDK Manager
I’m not really sure if it was when Google released Android SDK 1.6 or 2.0 when the way of installing Android tools changed. What changes? What I’m talking about? Now, if we look into the Android developer’s page, in the SDK section , we have one link to download SDK Manager (Windows, Mac OS X or Linux version). In my case, I’m a Linux user, so let’s download the Linux version with this link:
Android SDK Manager, Linux version
We accept the terms of the Android SDK License Agreement and we start downloading it. What are we doing here? Are we downloading the Android SDK to start working with it? Why is so light? (Just 15 MB?)
These are the changes I mentioned before: we are not downloading the full and operative SDK to start working with Android as we did with older versions. (I remember downloading 100 MB for the 1.5 SDK.) We are downloading the SDK Manager and tools. This download provides us with the basic Android tools (ddms, sqlite3, the emulator…). We can see all this functionality if we extract the downloaded file and we go to the “tools” folder.
Now, can we create Android projects in Eclipse? No. As I mentioned before, this is just the SDK Manager and Android tools. What do we have to do to have full SDK functionality to start working in our Android projects? Let’s look again to the /tools folder inside the directory we have extracted before. There is a file, called “android”. Let’s execute it.
If you execute it, you will see a screen like this one.
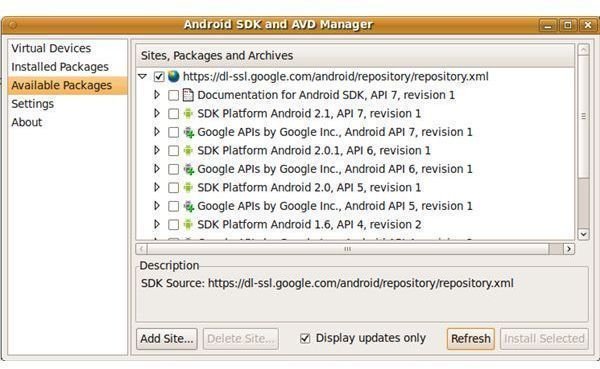
From here, we can download and update your SDK. There is a list with all Android SDKs, Google APIs, Documentation… we could need to do our development. Do you need to work in a Android SDK 2.0 environment? Just check it, and download it! Is there a new SDK and want to try it? Execute the SDK manager, look for the new SDK, and download it. It’s that easy!
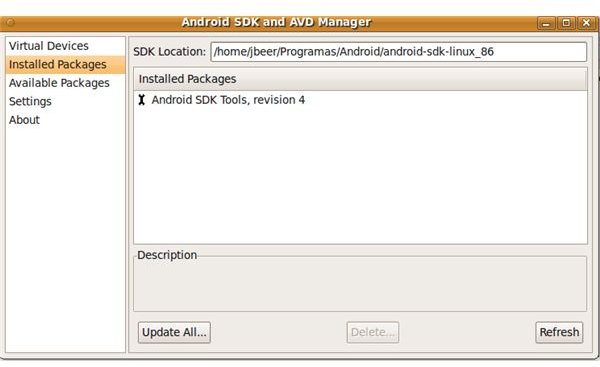
Here, more images from this application:
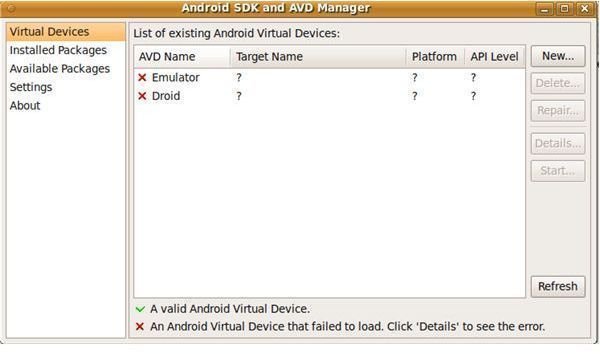
Check out that you can create your AVD (Android Virtual Devices) using this application too!
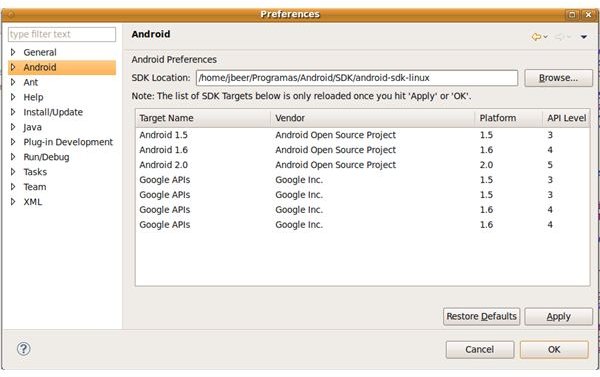
Now, in Eclipse, we are not limited to just one SDK, as we had before. Now we can work with all of them (not in the same project, of course!).
Ask, Comment, Interact
Ask any question you have about the article, and I will try to answer as fast as I can. Comment my code, my writing, maybe there is something that is missing or is not complete- just let me know! In other words, interact!
Follow up
If you want to know when new articles are released, subscribe to the Google Android RSS. (See “Subscribe to Google Android” in the right-hand column on this page.) Otherwise, you can follow my research, articles and work in my professional twitter: jbeerdev
This post is part of the series: More Android Elements!!
More information about Android and its programing environment.


