Adobe Flash is certainly a fun program to play around with, but in order to create some truly amazing characters, you’re going to need to figure out how to draw Flash Cartoons in an efficient manner. If you’re not a good artist, don’t fret: you can do this with a few shapes and some freehand.
Preparations
You can’t just go wild and start your masterpiece right away; not yet, at least. Instead, you’re going to need to make a few minor preparations and ensure you know how to use Adobe Flash correctly.
Set a fair amount of time aside so you can at least get started on your project. If you haven’t used Adobe Flash before, make a point of going over all the different options and tools available to you. You’ll be called upon throughout this tutorial to employ specific tools, so it’s best to get familiar with them before jumping right into the drawing instructions.
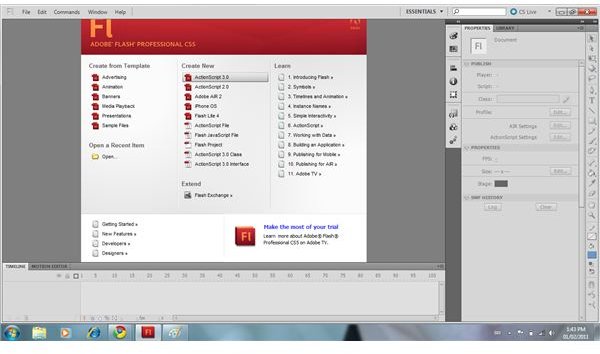
For those of you that do not already have Adobe Flash, you can grab a Free Trial Version for the purposes of this tutorial. It lasts sixty days too, so you should be able to have some fun with it before your trial period runs out. When you’re ready to get started, open Adobe Flash and select the “ActionScript 3.0” option from the welcome interface.
Click on any image in this tutorial for a larger view.
Step 1: The Head
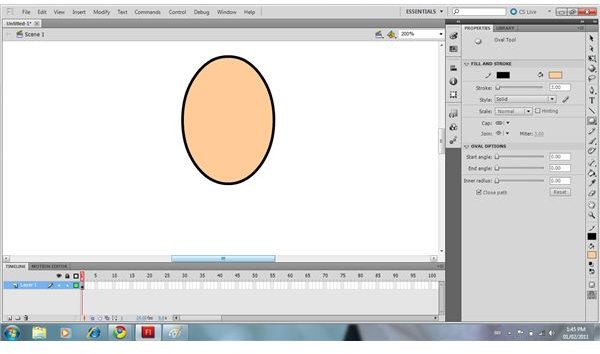
The first part of your cartoon character that you’ll be drawing is the head. To do this, find and select the “Oval Tool” from the Tools Panel. It’s usually located on the right-hand side of the program.
Once selected, look at the Properties Panel; it should be located right beside the Tools Panel. Change the “Stroke Color” to black and the “Fill Color” to the color you want your character’s skin to be. This color really depends on what type of character you’ll be making and your personal preference. Lastly, increase the “Stroke Thickness” to 3.00 points or similar.
Once all of these properties are set up, you can go ahead and draw an oval that will represent your character’s head. Remember to size it appropriately though! If you’re drawing a human, make sure your character’s head has more height than width.
Tip: You’re going to be drawing a variety of different components that are all essential to your character. As such, you must use layers to organize all parts of your cartoon for easy editing and managing. The Layers Panel is located at the bottom of the interface where you can create new layers, rename existing ones, and change the order of layers. In this case, you should rename default “Layer 1” to “Head” or similar.
Step 2: The Chin
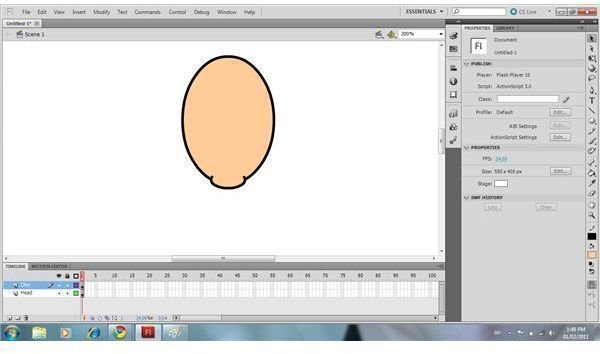
Although this step is optional, it will certainly give your character a little bit more detail if you include it. To draw this component, start off by creating a “New Layer” and renaming it “Chin.” Use the “Oval Tool” to create a small circle near the bottom of your character’s head. Make sure it overlaps though, otherwise it’ll just look slightly awkward.
Now select the “Eraser Tool” from the Tools Panel. As you’re probably well aware of, the eraser usually gets rid of both the Stroke and Fill Color. To change this, find the “Eraser Mode” option near the bottom of the Tools Panel and click on it. From the menu that appears, choose the “Erase Lines” option to restrict the eraser to removing lines.
Drag and drop your eraser along the chin’s line that overlaps the head. It’s okay to leave two small lines that extend into the head though as this will give the impression that your character’s chin is sticking out. Refer to the screenshot if you’re in need of assistance.
Step 3: The Ears
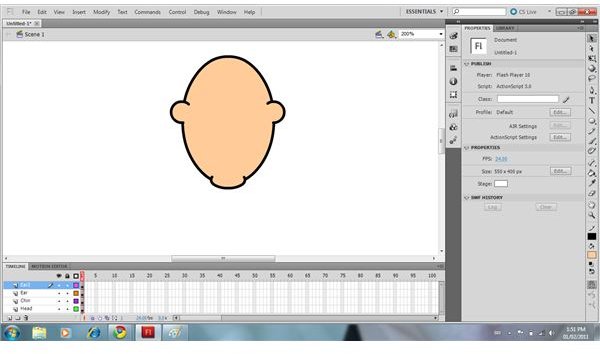
This step is similar to the above, but is done slightly differently. Create a “New Layer” and rename it “Ears.” Using the “Oval Tool,” draw a small circle away from the head. It’s far easier to figure out the ideal size of your ears this way and adjust its height with respect to where it’ll sit.
Use the “Selection Tool” and double-click the ear you just made. Drag it until overlaps the head and is in an appropriate placing. As with the chin, use the “Eraser Tool” to remove the line that overlaps the ear. Make sure you erase the entire bottom line that overlaps the head, but still have a small amount on top.
Copy this ear via the “CTRL” and “C” key or by selecting “Edit” and “Copy” from the menu. Then simply paste via “CTRL” and “V” or by selecting “Edit” and “Paste.” Select the pasted ear by double-clicking on it with the “Selection Tool” and click on the “Modify” option from the menu. Find the “Transform” option and select “Flip Horizontally.” This will ensure your copied and pasted ear faces the right direction. Drag it into its appropriate placing via the “Selection Tool” and proceed. For those of you who are confused about what you should have on your screen now, please refer to the screenshot.
Continue on to the next page for the rest of this tutorial on how to draw Flash cartoons.
Step 4: The Eyes

Have you ever heard that saying “eyes are the gateway to the soul?” Well it’s kind of the same with your cartoon character!
Make a “New Layer” and rename it “Eyes.” It’s time to take advantage of the “Oval Tool” yet again, but this time, reduce the “Stroke Thickness” to 2.00 points or similar and change the “Fill Color” to white. Find a spot on your head where you want your eye and simply draw a small oval to represent your character’s eye. Feel free to be creative here; make it as circular or oval, big or small as you’d like it to be.
Using the “Selection Tool,” double-click the eye you just drew and move it around using your arrow keys for precision. Just keep shifting it around until you have it in the desired spot you want it.
Now, unless you’re making a Cyclops, you’re going to need another eye! To do this, simply copy and paste the eye you just created via the previously identified methods. As soon as you have your other eye, you can go ahead and drag it beside the original eye using the “Selection Tool.”
By now you should have two white eyes on your character’s head. To create the pupils, make a “New Layer” and rename it “Pupils.” Select the “Oval Tool” and change the “Stroke Color” to “No Stroke,” represented by a plain white box with a red line running through it. You’ll also need to change the “Fill Color” to black.
Holding “Shift,” create a small circle that will serve as your cartoon character’s pupils. By holding the “Shift” key down, you’re forcing Adobe Flash to make a perfect circle; leaving no opportunity for you to accidentally make irregular pupils. Position it within one of the eyes and then copy and paste the pupil into the other eye using the tactics previously explained.
Step 5: The Nose
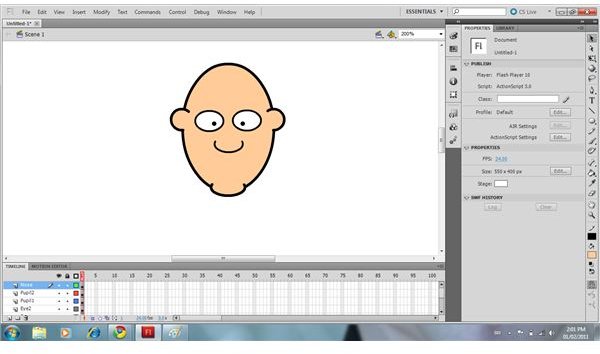
Alright! By now you should have the basic components of your character’s face created including his or her head, chin, ear, and eyes. Next up you’re going to need to create the nose.
Start off by making a “New Layer” and renaming “Nose.” Change the “Stroke Thickness” to 2.00 or similar and ensure the “Stroke Color” is black. Also, you’ll need to alter the “Fill Color” back to the original color of your character’s skin.
As with the chin and ears, use the “Oval Tool” to create a small oval directly beneath your character’s eyes. Use the “Eraser Tool” to remove the top line of the oval, just keep erasing until it’s up to your specifications. Alternatively, you can draw the nose freehand by using the “Pencil Tool,” although this can often be a little more tricky. Don’t worry if your nose isn’t perfect! You can always redo it via “Edit” and “Undo.”
Step 6: The Mouth

Create a “New Layer” and call it “Mouth.” Now, use the “Pencil Tool” to draw the mouth freehand. Take your time and go slowly. Make sure you don’t release pressure until you fully connect the mouth; that is, when your freehand finally meets where you started.
The way you shape your mouth is completely up to your personal preference, and bear in mind that the “Pencil Tool” is just a good way to get the basic structure down. If you don’t like the way it looks after you’re done drawing it freehand, you can use the “Selection Tool” to alter the way the lines and nodes appear. When satisfied, you can use the “Paint Bucket Tool” to fill the mouth with a dark color or similar.
Tip: If you experience any troubles when attempting to fill the mouth with a color, find the “Gap Size” option near the bottom of the Tools Panel in Flash . Click on this option and wait for the options to appear in a small menu, then select “Close Large Gaps” to correct the issue you’re experiencing.
Step 7: The Hair
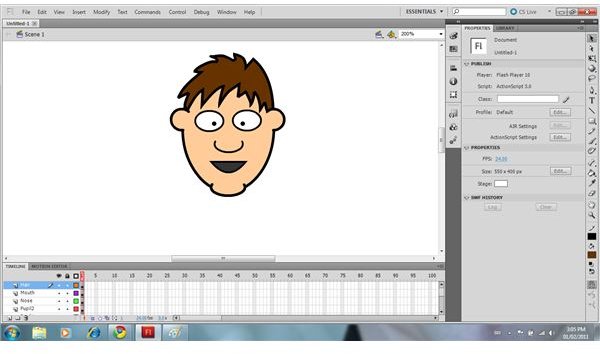
Make a “New Layer” and name it “Hair.” Because you previously adjusted the “Stroke Thickness,” you’ll want to increase it again to 3.00 points or similar; the same as your head.
Whether you like it or not, you get the chance to draw freehand once again. Select the “Pencil Tool” from the Tools Panel and begin drawing from the line of either ears you didn’t erase. You want to try to seemingly blend those two lines into your character’s hairline, as demonstrated by the screenshot.
Go absolutely wild with this component and really fool around with it! Dare yourself to see what type of a radical hair style you can come up with. When you’ve finished drawing your character’s hair and have it the way you like, go ahead and fill it with some type of color via the “Paint Bucket Tool.”
Step 8: The Eyebrows
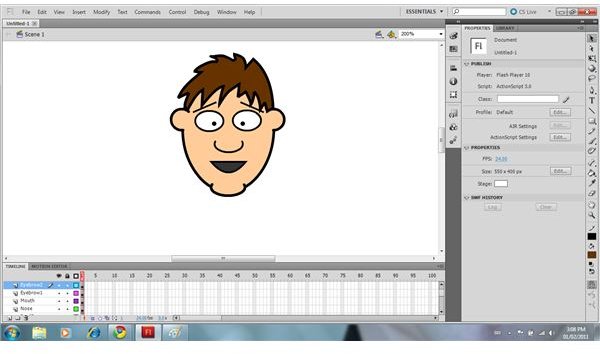
This is another optional step that you shouldn’t feel pressured to fulfill. As with most other optional components though, eyebrows just add more personality and an overall finished look.
Create a “New Layer” and call it “Eyebrows.” Now select the “Line Tool” and draw an eyebrow directly onto your character’s head above his or her eyes. You can make your eyebrows thin by drawing one, single line; or you can make them thicker by drawing a box using the line tool. Just ensure that a thicker eyebrow isn’t too big and that it’s filled with an appropriate color.
You can copy and paste the eyebrow using the methods you’ve already learned. Reposition the pasted eyebrow above the other eye and flip it horizontally so that it’s angle is the opposite of the original. If you’ve forgotten, you can do this by clicking “Modify,” then “Transform,” and then finally “Flip Horizontally.”
Step 9: The Neck
Yep, you’re done with your cartoon character’s face. Huzzah! Next up, you’re going to want to create his or her body, which has a variety of different components. The first of which is, of course, the neck. Create a “New Layer” and name it “Neck.”
Select the “Rectangle Tool” from the Tools Panel and make sure the “Stroke Thickness” is set at 3.0 points and that the “Fill Color” is the same hue as the head. Now click and drag the your mouse to make a small rectangle that will represent the neck. Make sure it’s positioned immediately under your character’s head and chin, and drag the layer labelled “Neck” to the bottom of all the other layers via the Layers Panel.
By doing this, your character’s neck will be beneath his or her head. The screenshot on the following page demonstrates what this should look like, with a few other parts that will be explained.
Step 10: The Chest
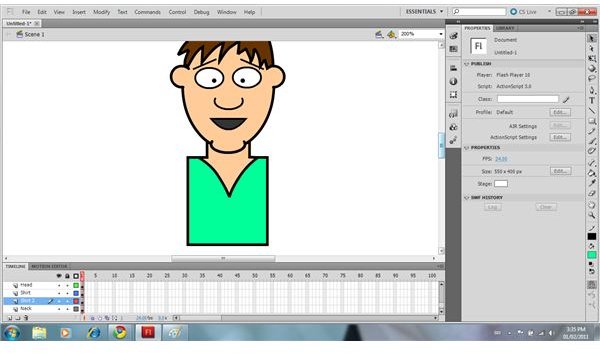
As usual, make a “New Layer” and name it “Chest.” In the Layers Panel, drag this newly created layer above the layer titled “Neck,” but below the “Head” layer.
Use the “Pencil Tool” to draw and connect a triangle that starts halfway down the neck. If you don’t like the way it looks after drawing it freehand, use the “Selection Tool” to fix curves or points.
When satisfied, fill the triangle in using the “Paint Bucket Tool.” You can either use the color of your character’s skin, as demonstrated in the screenshot, or the color of his or her undershirt. Go ahead and draw the character’s shirt either freehand using the “Pencil Tool” or by using the “Rectangle Tool.” If you use the “Rectangle Tool,” you’ll need to quickly make and rename a “New Layer” and ensure it’s below the “Chest” layer. As always, make use of the “Selection Tool” to correct any flaws or errors you find.
Step 11: The Legs
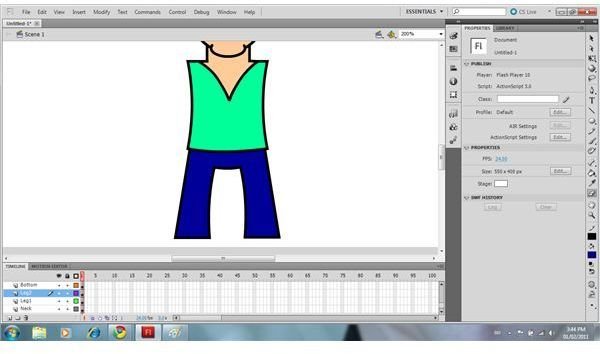
You’re nearly done setting up your character, so keep going! Now you need to focus on his or her legs. Make a “New Layer” and name it “Legs.” Use the “Rectangle Tool” from the Tools Panel to create one of your character’s legs directly under your his or her torso. Use the “Selection Tool” to tilt the leg you just created so that your character doesn’t look square.
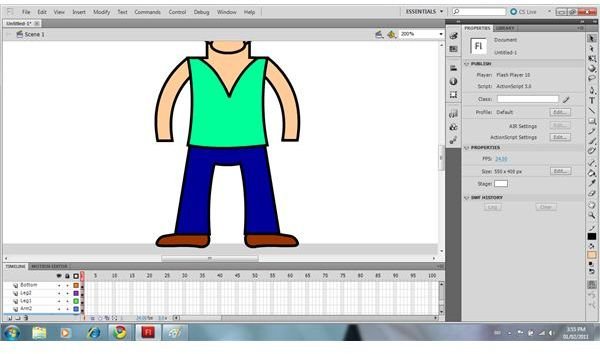
Next, nudge the leg into an appropriate location and fill it with a dark blue color to resemble jeans or a similar color depending on what type of character you’re making. Copy, paste, and flip the pasted leg horizontally to create your character’s second leg. Position it, and proceed with giving him or her some shoes.
Make a “New Layer” called “Shoe” and drag this layer below your “Legs” layer. Use the “Pencil Tool” to draw a shoe freehand; it doesn’t need to be spectacular. Fill it with an appropriate color and position it nicely. Using previously discussed strategies, copy and paste the shoe you just made onto a “New Layer” and flip it horizontally.
Step 12: The Arms
Create a “New Layer” and name it “Arms.” You might be sick of all these layers by now, but you’re nearly done your character. Drag the “Arms” layer to the op of all other layers.
Select the “Rectangle Tool” and draw a box that resembles an arm. Use the “Selection Tool” to customize the rectangle and change it’s shape to whatever you desire. An example is shown in the screenshot. Copy, paste, and flip it horizontally to make a second arm. Position both of them in their appropriate places and ensure both look like they’re coming out of your character’s shoulder.
Color it appropriately with the help of the “Paint Bucket Tool,” and erase the top line of the box using the “Eraser Tool” to make it appear as if the chest and arms are connected.
Step 13: The Hands
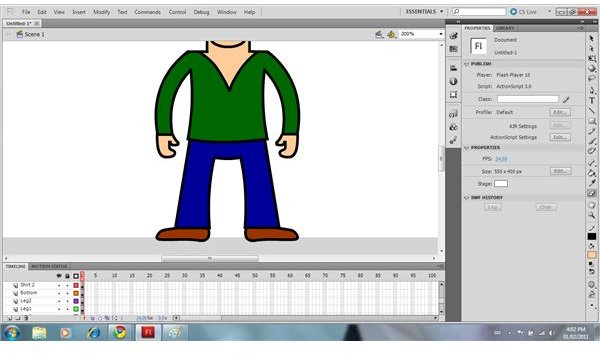
This is one of the hardest parts you’ll have to draw freehand. Make a “New Layer” and call it “Hands.” Using the “Pencil Tool,” draw the hand freehand directly under or extending from one of the arm you just created. This can be a little bit tricky, but as long as you have a few fingers or it looks like a glove of some type, it’ll look fine.
Make sure your “Hands” layer is below the “Arms” layer and that its placed immediately under one of the arms. You should know the drill by now: copy, paste, flip horizontally, and reposition to get your second hand using the methods previously explained.
Objective, Complete!
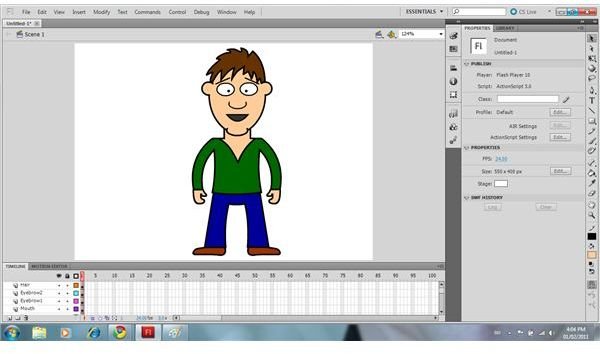
Phew! There you have it. You should now have a basic cartoon character in Flash all made, as shown in the screenshot. It’s just basic and simple, but it’s a good enough layout and design to get you started. From here, you can customize and add further detail throughout your cartoon. Some of the things you could add include:
- Buttons
- Zippers
- T-Shirt Design
- Glasses
- Freckles
- Watch
- Laces
Anything you can think of can probably be added to dramatically alter the appearance of your cartoon and make it look even better! Go wild with it and try to make it as detailed as possible. This is your first character too, so don’t be discouraged if it doesn’t look amazing. You can always go through these steps again now that you know how it’ll basically look at the end and have more ability to size things better. Have fun with it!


