Copying music from your iPod to iTunes doesn’t have to be a chore. Using this guide and free software to copy music from iPod to iTunes, you’ll be good to rock and roll.
Getting Started
You may have noticed Apple made it extremely easy to get content on your iPod using iTunes but getting your iPod content onto a different computer isn’t so easy. Apple did this to help stave off piracy by making it difficult for you to transfer music and files from an iPod to a different computer.
If you’re like me and you’ve got multiple computers you use your iPod with, you may have a desire to back up your iPod to these other computers. If you attempt to synchronize your iPod with a second computer using iTunes, the new computer will overwrite anything already on your iPod.
That’s where this guide comes in. We’ll use a free program called SharePod to backup and transfer music from our iPod to iTunes on a second computer. Keep in mind that it is illegal to share media with those who don’t own it. Be sure you are only using this backup process on devices that you own.
SharePod allows you to copy tracks from your iPod or iPhone. If you have an older iPod you may even be able to update album artwork, copy data to your iPod and update playlists. If you have an iPhone 4 or iPod Touch with iOS 4 , you will only be able to read data from the device.
Copy iPod to iTunes
- Start by downloading the Microsoft .NET Framework . This is a required component for SharePod to work.
- After installing the .NET Framework and rebooting your computer, download and install iTunes if you don’t already have it installed. SharePod needs some files from iTunes in order to work.
- Next, download and extract SharePod .
- Plug your iPod or iPhone into your computer’s USB port.
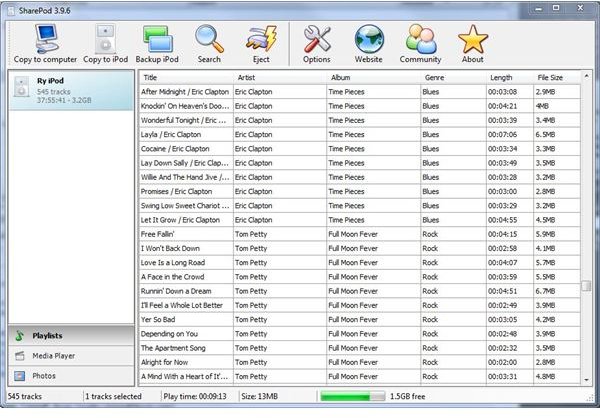
- SharePod doesn’t need to be installed – simply double click on the SharePod.exe to start the program. After a moment, SharePod should discover your iPod (Figure 1).
- You now have the option of doing a partial copy, or a full backup of your device. In this scenario, we’ll just copy a few selected tracks to my secondary PC. In the right window pane, select the tracks you wish to copy. Note that you can hold down the CTRL key to make multiple selections (Figure 2).
- Click the “Copy to computer” icon.
- You now can specify where you want to copy the files and whether or not you want SharePod to automatically import them into iTunes (Figure 3). You can also specify how you want the folder structure to look. I would generally recommend keeping the default of having top level folders by artist and subfolders with albums. Click OK when you’re ready to start the copy.
- After a few moments, SharePod will inform you the copy has finished (Figure 4). You can click the “More details” link to see all the details of the operation. Click the Cancel button when the copy has been completed.
- If you look in the directory where you specified the files to be copied to, you should now see them (Figure 5). Assuming you kept the box checked for SharePod to import the music into iTunes, you should now see the music there as well.
That’s all there is to copying your iPod to iTunes. If you have any issues with SharePod, you can check out MediaMonkey - another free media manager - which supports newer iPods and iPhones.
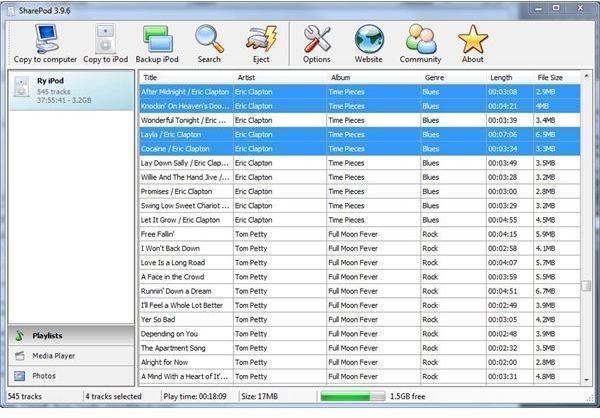
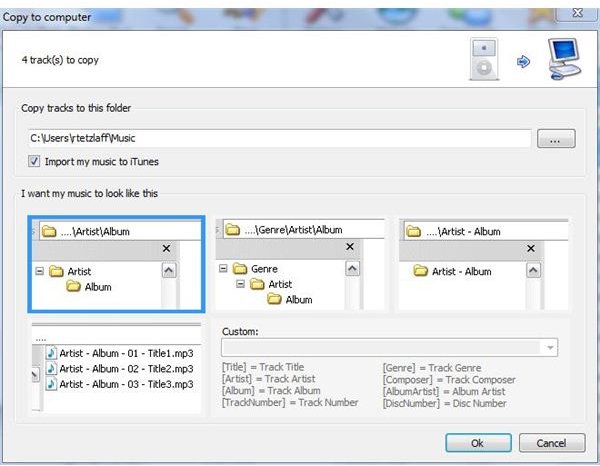
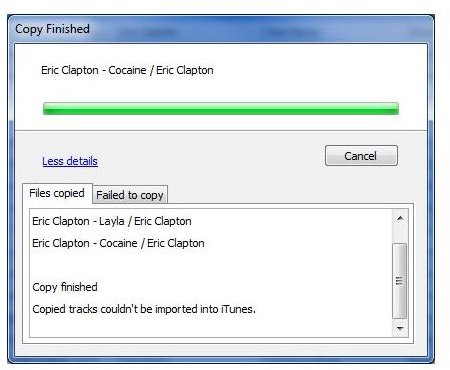
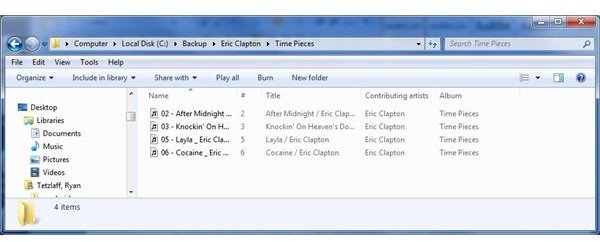
Image Credits: Screenshots taken by Ryan Tetzlaff


