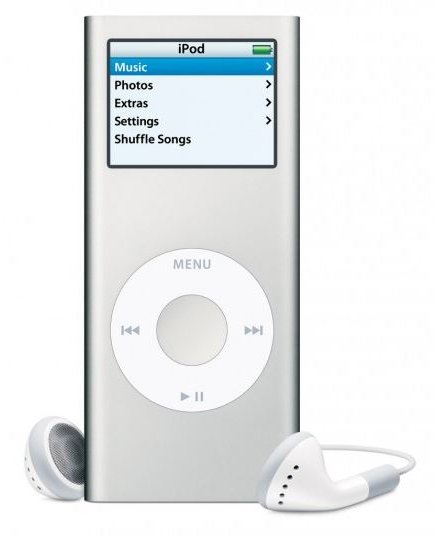
One of the good things about the Apple iPod Nano is that it’s easy to control the music you put on and take off it. You can create playlists, favorite songs, organize by favorite author, etc. The options you have are endless. It is easy to delete songs from an iPod Nano and only takes a few minutes.
How do You Delete Songs from an iPod Nano Manually?
You will see from the steps below that Apple makes it is easy to delete songs from an iPod Nano. They don’t make it as easy to go the other way around and move songs from your iPod to your computer though. Below are the steps on how to delete songs from an iPod Nano manually.
STEP ONE
Connect your iPod Nano to your computer via a USB cable. Plug one end of the cable into your iPod Nano and the other into a USB port on the back or front of your computer. Do not use a USB port on your keyboard.
STEP TWO
Open iTunes if it doesn’t open automatically. Find your iPod under Devices in the left panel. You will see an iPod icon and the name that you gave your iPod when you set it up for the first time. Click on the arrow next to the iPod icon.
STEP THREE
Click on Music and you will see the music on your iPod listed on the right side of the window. Find a song you want to delete and right click on it and select Delete. Click the Remove button to the confirmation. The song is now deleted. If you want to delete more than one song hold down the Ctrl key and click on each song you want to delete. When you are finished right click on any song you chose and select Delete. Click the Remove button on the confirmation window. All songs you selected will be deleted.
STEP FOUR
Eject your iPod before you disconnect it. Click on the arrow next to your iPod in the device list and it will automatically eject.
The songs will be deleted from your iPod the next time sync your iPod Nano with iTunes.
How do You Delete Songs from an iPod Nano Automatically?
During these steps, your iPod WILL NOT be connected to your computer.
STEP ONE
Open iTunes and click on Library on the left. Click Music and you will see all of your music listed on the left side. Find a song you want to delete and right click on it and select Delete. If you want to delete more than one song hold down the Ctrl key while you click on each song that you want to delete. When all songs have been chosen right click on any of the songs and select Delete from the drop down menu.
STEP TWO
If you want to delete an entire playlist find the playlist on the left side of the screen and right click on it. Select Delete from the drop down menu and click Delete on the confirmation window.
STEP THREE
Connect your iPod to your computer via the USB cable. iTunes will automatically sync your iPod with iTunes and the music will be removed from your iPod.
Backup iTunes
Open iTunes and click File then Library and select Backup Disc from the drop down menu. A dialog box will open. Select either Backup entire iTunes library or playlists, Backup only iTunes Store purchases or Only back up items added or changed since last backup.
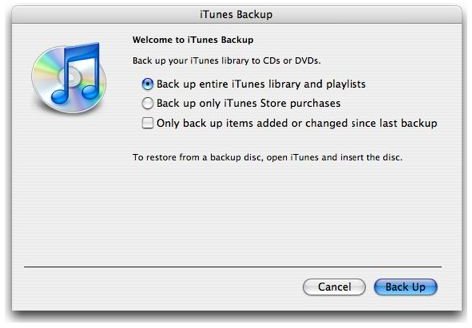
Insert a black CD or DVD into your computers CD/DVD drive. iTunes will start scanning and burning the disc.
If the disc is not big enough iTunes will stop and ask you to insert another disc.
NOTE: Audible items are not backed up. Audible keeps a library on their website of all purchases you have made.
You cannot play any music from these CDs as the iTunes library backs up as one file and not separate MP3s.
Conclusion
Hopefully you now have the songs organized on your iPod the way you want. As you can see it’s very easy to do. You should backup your iTunes library on a regular basis as it is harder to move songs from your iPod to your computer than it is to move them from your computer to you iPod. There are many other tips and tricks you can do with your iPod Nano.


