Here are some basic tips and tricks for how to use an iPod Nano.
iPod Nano Multitouch
The iPod Nano really made a name for itself originally as a boiled down version of the iPod that was cheaper, smaller, and more geared towards just easy audio playback. Its creation marked the beginning of the iPod diversification that headed to the world of the iPod Touch , iPhone and iPod Shuffle, but today the iPod Nano has a whole element of interactivity it never had before. The touch screen on the iPod Nano Multitouch and the new menu system added some questions on how to use an iPod Nano that were self-explanatory before. Here are ten tips on how to use an iPod Nano that will get even the most novice user started.
1. Plugging In
First off, you are going to need the appropriate connection tools to get started. You will need to use the accompanying USB cord to
plug in the iPod Nano Multitouch into an active USB port. There are often several USB ports that may be inactive, and you will have to use one that is actually on the computer and not on a peripheral device like a keyboard.
2. Software
The computer you use needs to be updated with compatible software for your iPod Nano to work. If you are on a Mac computer, you will need the Mac OS X v10.5.8 or a more recent version. If you are syncing to a PC, you will need either Windows XP, Windows Vista or Windows 7. You are also going to need to be using at least iTunes 10, but this will be an easy and free update if you do not have it already.
3. Basic Touch Screen Controls
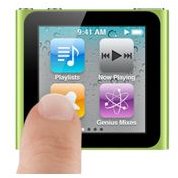
One of the most important parts of learning how to use an iPod Nano is learning the unique features of its Multitouch screen. If you just want to select an icon, such as Clock, then you can just tap it once. If you are on something like a photo, you can tap it twice and it will zoom in, and repeating the double-tap will make it zoom back out. If you hold down on an icon it will let you rearrange those icon on the screen, and if you hold on a place without one it will take you back to the home screen. In general, you will navigate through pages on the iPod Nano by “swiping” left and right, which means you press your finger onto the touch screen and slide it left or right.
4. iPod Nano Battery Life
The iPod Nano battery life can be a problem for some users, and it is important to approach the battery the right way directly from the start. After you start using your new iPod Nano , plug it in to your computer the same way you did the first sync, allowing it to charge for just over three hours so that it has full battery life. The rule of thumb is that it will be charged to full battery life in three hours, but in as little as an hour and a half, the battery will be charged as much as 80 percent.
5. iPod Nano Wallpaper
One thing that is new for the iPod Nano Multitouch is that you can change the wallpaper, which was a nice feature for the iPod Touch . If you want to change the iPod Nano wallpaper you start out at the Home screen and go into Settings. From here, select Wallpaper and then find the iPod Nano wallpaper that you would like to use. Just hit the Set button, and when you swipe out of it the new iPod Nano wallpaper will be set.
6. Brightness
In the same area as the iPod Nano wallpaper controls, you may want to increase or decrease brightness. You will find that when you are learning how to use an iPod Nano that a very high brightness will shorten the iPod Nano battery life, but if it is too dark it may be hard to see. Go into Settings and choose General. If you tap Brightness you will find that there is an adjustable bar that lets you increase or decrease it. If you want it to go back to standard you can always just choose Restore to Default.
7. Back to Default
Customizing is a standard part of learning how to use an iPod Nano, but if you do too much you may find that it is less user-friendly and you may be inclined to just start over by resetting your iPod Nano . To do this you want to return the settings to the default they were at when you first started using your iPod Nano Multitouch. To reset those settings, begin by going to Settings, choose the Reset Settings option that is right up front. You will be asked again if you are sure that you want to do this, and here just choose Reset.
8. Song Shuffle
When you are listening to music you may find that you do not have a specific album or playlist you want to listen to, but instead just want your library to play randomly. This can be done easily once you learn how to use an iPod Nano, and you do this by first going to Songs from the Home Screen. You will have a general list of available song track here, but at the top you can just choose Shuffle. If you want to shuffle through the songs, you can then shake the iPod Nano and it will do so. That is a feature that is common to other types of iPods as well.
9. Maximum Volume
Since iPod Nanos are often used as the main source of music for things like parties or events, when you are figuring out how to use an iPod Nano you need to also learn how to restrict the maximum volume that it can go. What this will do is set a limit for how loud it can be, so that when someone tries to alter it they will be unsuccessful. As with other changes, go into Settings at the Home Screen. Choose Music, then Volume Limit. From here you will adjust the volume bar to the place that you do not want it to go above and then hit the Lock Volume Limit button below.
10. Playlist
Playlists are important, and when you are discovering how to use an iPod Nano you will find that you can easily do this right on your
iPod rather than doing it from iTunes. Go directly to Playlists from Home and then hit the Add button from inside. First choose the category you want and then begin tapping items that you want in your playlist. Once you have selected all the tracks hit the Done button.
References
iPod Nano User Guide, https://manuals.info.apple.com/en _US/iPod_nano_6thgen_User_Guide.pdf
Image credits, Apple.com


