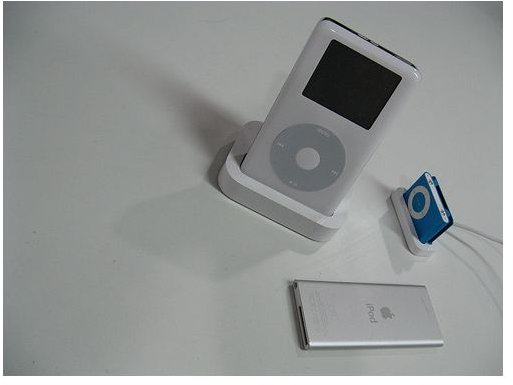
It’s inevitable that your iPod battery will die eventually. The device that once gave you endless hours of music on a single charge is now barely lasting two hours. If you’re asking “how do I change the battery in my iPod?” the answer will depend on which iPod you own; this article covers them all.
Disclaimer: Opening your iPod voids the warranty. By performing any task in this tutorial the user confirms that Bright Hub and the author are not responsible for any damages incurred.
Changing the battery in an iPod can be a simple task if you own the iPod Classic. However, if you have an iPod Touch you may need to have some soldering skills. In any case, it is very important that you have the correct tools on hand when you start the change process. Many do-it-yourself sites suggest using a small flathead screwdriver to open your iPod but this can damage the metal case and should only be done if a suitable nylon pry tool cannot be found (they are available at most electronics stores and online).
How Do I Change the Battery in My iPod Classic?
To change the battery in an iPod Classic first set it on a flat surface face up. Make sure the unit is powered off. Locate the ridge between the metal bottom cover and the plastic top cover and insert the nylon pry tool there. Because there are no clips to dislodge, you must wiggle the top panel away from the bottom case. Be careful as you lift away the top panel, depending on your model it may be attached to the back by a set of connection wires. Set the top down so you can see the interior of both the front and back covers. You will be able to see the battery and the wired connector that attaches it to the circuit board. Disconnect the battery clip and pop the battery out. The battery is not clipped in but rather adhered with a tacky glue. A bit of a wiggle and it will come out. If you have trouble, pry it out with the pry tool. Do not use a screwdriver for this because you will end up bending the metal case. Once the old battery is removed, replace it with the new one (the glue may still be tacky enough to keep it in place, if it isn’t you can use a dab of rubber cement to keep the new battery in). Connect the new battery to the wire connector and reassemble the iPod.
How Do I Change the Battery in My iPod Nano?
Replacing the battery in an iPod Nano requires a full disassembly of the unit. To do this, you will need a very small Philips head screwdriver and a shim tool. The shim tool is used to pry off the bezels from the top and bottom of the Nano unit.
Once the bezels are removed, you will see two Philips head screws that need to be removed (have a piece of tape handy to stick the screws to, they are very small and easy to lose). Slide the headphone jack out of the case carefully, it is still attached to the motherboard and will be able to be moved just outside of the case. Behind the headphone jack is another Philips head screw that has to be removed. Once these screws have been removed you can slide the motherboard assembly out of the case. Gently pry up the LCD screen (it is only attached with tape). You will now be able to see the ribbon cable connector for the screen. Pry up the connector to a 45 degree angle and slip the ribbon connector out so you can move the screen out of the way. You can now see the battery and its connector. Pop the battery ribbon connector out and remove the battery, again held in with a dab of glue. Replace the battery and connect the cable to the motherboard. Reassemble the unit.
Please continue on to the final page of this article to learn how to change the battery in an iPod Touch and iPod Shuffle.
How Do I Change the Battery in My iPod Touch?
The iPod Touch offers a greater challenge than that of the Classic or Nano. First you’ll need to know which generation of iPod Touch you have. For the first generation, you’ll need to release the back cover from the unit by running a shim along the edge of the unit to release all of the clips holding the backing on. You’ll now be able to see the battery. It is held in place with glue. Running the same shim along the edges of the battery will release it. The battery is still connected to the motherboard via three wires (red, white and black). Heat the connection points with a soldering iron and remove the wires. Note the positions as the new battery wires must be connected in the same positions. Insert the new battery and solder the new wires in place . Reassemble the unit.
If your iPod Touch is a second, third or fourth generation, you will have to go through a much more lengthy process as the battery is in the same place but the unit has to be disassembled top to bottom. Run the shim along the edges like you would with the first generation iPod Touch. Remove the top and set it off to the side. It will still be attached by a ribbon cable. Release this cable. At the top left corner of the unit you will see a small Philips head screw. Remove this. In the top right corner you’ll see a piece of foil bent over the screen, unfold this so that the screen can be removed. As you lift out the screen you’ll see it is still attached via a ribbon cable. You’ll now see a metal covering held in place by seven Philips head screws. Remove them. You can now unhook this cable and set the screen off to the side. Removing the metal backing will reveal the battery. There will be a piece of tape over the ribbon cable that connects the battery to the motherboard. Remove this tape and heat the connection with a soldering iron to release it from the motherboard. Remove the battery. Replace the battery and solder down the new connections. Reassemble the unit in the exact opposite order.
How Do I Change the Battery in My iPod Shuffle?
Changing the battery in the ultra-small iPod Shuffle requires a steady hand and a bit of patience. Set the iPod Shuffle down on a flat surface, face up. Using a shim or pry tool, separate the top panel from the bottom by running it along the crease in the side. This will unlatch all of the clips. Now, pop off the Hold button from the back of the unit and then pry the bezel off from the area around the headphone jack and USB port. Push the motherboard assembly out of the outer casing. There will be a piece of foil covering the battery, peel this back. Now that you can see the battery, it may be connected in one of two ways depending on what generation the iPod is :
1. If you have a first or second generation iPod Shuffle, the battery connection will be soldered in place. Release the solder by touching the connection with a soldering iron. Keep in mind the new battery will have to be attached to this spot exactly the same way as the old battery (make notes on the orientation if you have a poor short-term memory like I do).
2. If you have a later generation iPod Shuffle, the battery will be connected via a plastic connector clip. If this is the case, simply wiggle it out. The battery may or may not be held in place with a dab of glue (construction was not uniform). If it is attached with glue, pry it off with your shim tool. Put a dab of glue on the back of the new battery and fix it into place. Reattach the battery in the same manner it was removed and then reassemble the unit.
Now that we’ve answered your question, “how do I replace the battery in my iPod?” you can enjoy a fully-functioning music player and use the money you saved to buy more music from the iTunes Store.
References
Image courtesy of gaobo at Flickr
https://www.youtube.com/watch?v=qmMKSmkOPiw&feature=related
https://www.youtube.com/watch?v=AKhBaJ1HSuA&feature=related
https://www.youtube.com/watch?v=K8t-RHrRBcI&feature=relmfu


