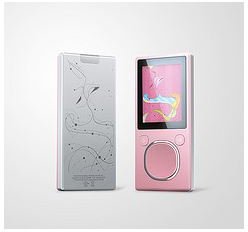
Like any electronic device, the Zune has its own set of frequent technical problems and failures. There are some tips to help avoid any costly Zune repairs.
Zune is Microsoft’s MP3 player and like any electronic device, the Zune comes with its own assortment of glitches and Zune repairs. Most issues with the device are easily remedied with a few quick steps. Should the device continue to fail, it is time to send your Zune back to Microsoft for repair.
Sync your Zune on Regular Basis
It is vital that you sync your Zune on a regular basis to avoid Zune repairs. Every time you purchase a new application or download music directly to your Zune, you should sync the device to your PC. Diligent syncing (backing up) of your Zune to your PC will assure that should you ever need to restore the device, you will not lose any data. You can learn about Zune setup instructions for the same.
Language Settings
Sometimes, at first setup, or through a random pushing of buttons, the language setting on the Zune will change. To reset the device to your preferred language, simply select ‘Settings’ (‘Parameters’ or ‘Configuration’) > ‘Language’ > choose your preferred language.
Black Screen/Won’t Start
The most obvious reason for the Zune to not respond when fully charged is that it could be locked. To unlock your Zune, move the ‘Hold’ switch back and forth 2 to 4 times, then press the ‘Play/Pause’ button for a second. If the device still does not respond, the battery could be drained. If the battery is drained, recharge your Zune – no Zune repairs necessary.
Determining Storage Space Remaining
To determine whether you have enough storage space on your Zune for a desired download, on your Zune, choose ‘Settings’ > ‘About’ > ‘Storage.’ This will give you all the information pertinent to your Zune’s remaining storage.
Syncing your Zune to Another Computer
If you want to pull a playlist from another Zune user’s computer, simply sign onto their computer as a ‘Guest.’ Be sure to tell the computer to always set your device to guest. As a guest, you can transfer data (songs, pictures, etc.) back and forth between your friend’s computer and your Zune. Your updates will not be remembered as a guest, you are just a visitor. Be certain that there is enough storage space on your Zune to hold the data you want to transfer. Items you add to your Zune as a guest remain until you manually delete.
Screen Display Reads “Contact Zune 5 Support”
Learn how to reset the Zune model. To restore a Zune, you must have an Internet connection on a Windows platform and it must have Zune software installed. Assuming that you have performed the recommended syncs to keep all of your Market Place purchases backed up on your computer, this is a painless operation. By restoring your Zune to factory settings, all content will be wiped – the startup and data partitions are actually removed and rebuilt with this restore and pseudo Zune repair.
Set the ‘Hold’ switch to ‘Unlocked,’ press and hold both the ‘Back’ button (<–) and the TOP of the Zune Pad. When the device begins to power up, release the buttons and immediately press and hold the following 3 buttons: Back (<–); CENTER of Zune Pad; Play/Pause Button. For the 30GB Zune you need to hold different buttons: Back (<–); LEFT side of Zune Pad; CENTER of Zune Pad. Hold all 3 buttons until the Zune restarts (indicated by “Please wait” in the screen). The screen will then say “Connect Zune to your PC.” Follow the instructions on computer screen.
Hopefully, these tips will avoid you really needing any Zune repairs.
Resources
Content Reference: Zune
Image Credit: By Rubens LP on Flickr


