A ceiling mount video projector provides a clean look that gives any media room that movie theater appearance. Mounting a projector on the ceiling presents challenges that can be addressed through proper preparation. This article explains the different methods for ceiling mount installation.
Choosing Projector Placement
Modern home theater projectors provide remarkably detailed presentations of movies, high definition television and sporting events. Owners of media rooms looking to duplicate the move theater experience often choose to hang their projector from the ceiling. When facing space limitations, ceiling mount video projectors provide a sleek look that does not interfere with furniture placement or the movement of the room’s occupants.
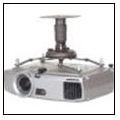
Ceiling Mounts
Ceiling mounts for projectors are available in generic varieties and are also manufacturer specific. Nearly every modern video projector
offers a ceiling mount option. It is important to check the complexity of the installation before purchasing the projector, especially if ceiling mounting is the only alternative. The projector must also have the capability of displaying an upside down image since it will be attached to the ceiling from the bottom.
The critical element in a ceiling mount video projector is positioning. Different projector models have unique throw ratios, which is the relationship between projector distance and the width of the screen. Throw ratios are usually 1.8 or 2.1 to1, which means 1.8 feet of throw distance for every foot of screen width. To mitigate errors in throw ratio calculations, projectors with zoom capabilities and lens shift are highly recommended.
Ceiling Mount Installation
A ceiling mount is most successful when appropriately planned. Wiring in particular is best served when a power receptacle is placed near the projector mount along with an HDMI extension. Wiring the system during the construction of the home affords the easiest installation flexibility and will provide the most professionally finished look.
The position of the ceiling mount should be such that the projector will be at screen height and at the center of the screen’s width when permanently attached. This may require an extension pole that will lower the position of the projector relative to the screen. Newer ceiling mounts have a telescoping pole that will accommodate installations where a variable drop is needed.
The ceiling mount should include appropriately sized mounting hardware and detailed instructions. Chains, clamps and load bearing bolts can be used for added stability. Brackets are available for mounting to a variety of ceiling construction types including sheetrock, plywood, upstairs floor and concrete. Sloped ceilings may require an adjustable adapter to provide the necessary angle that will make the projector square to the screen.
After drilling holes in the joists and screwing the bolts into the projector, the power and HDMI cables can be attached to the unit. Using the supplied parts and tools, the projector can be can be safely secured to the ceiling.
Focus and Adjustment
After plugging in the projector and turning it on, using the zoom and lens shift features will center the image to exactly match the size of the screen. Most projectors offer a positioning grid in their setup software. In the alternative, reference DVD’s can be purchased that will provide positioning templates as well as color reference.
Image: www.projectorzone.com


